I was standing in my kitchen, staring at a half‑baked batch of ordinary chocolate chip cookies that had somehow turned into a crumbly disaster, when a friend dared me to combine my two biggest sweet‑tooth obsessions: cheesecake and classic cookies. The result? A buttery, creamy, melt‑in‑your‑mouth cookie that feels like a bite‑sized slice of New York cheesecake wrapped in a chocolate‑chip‑laden hug. I’m not exaggerating when I say this is the cookie that makes you question every other dessert you’ve ever tried. I dare you to taste this and not go back for seconds; the moment the first crumb hits your tongue, you’ll understand why.
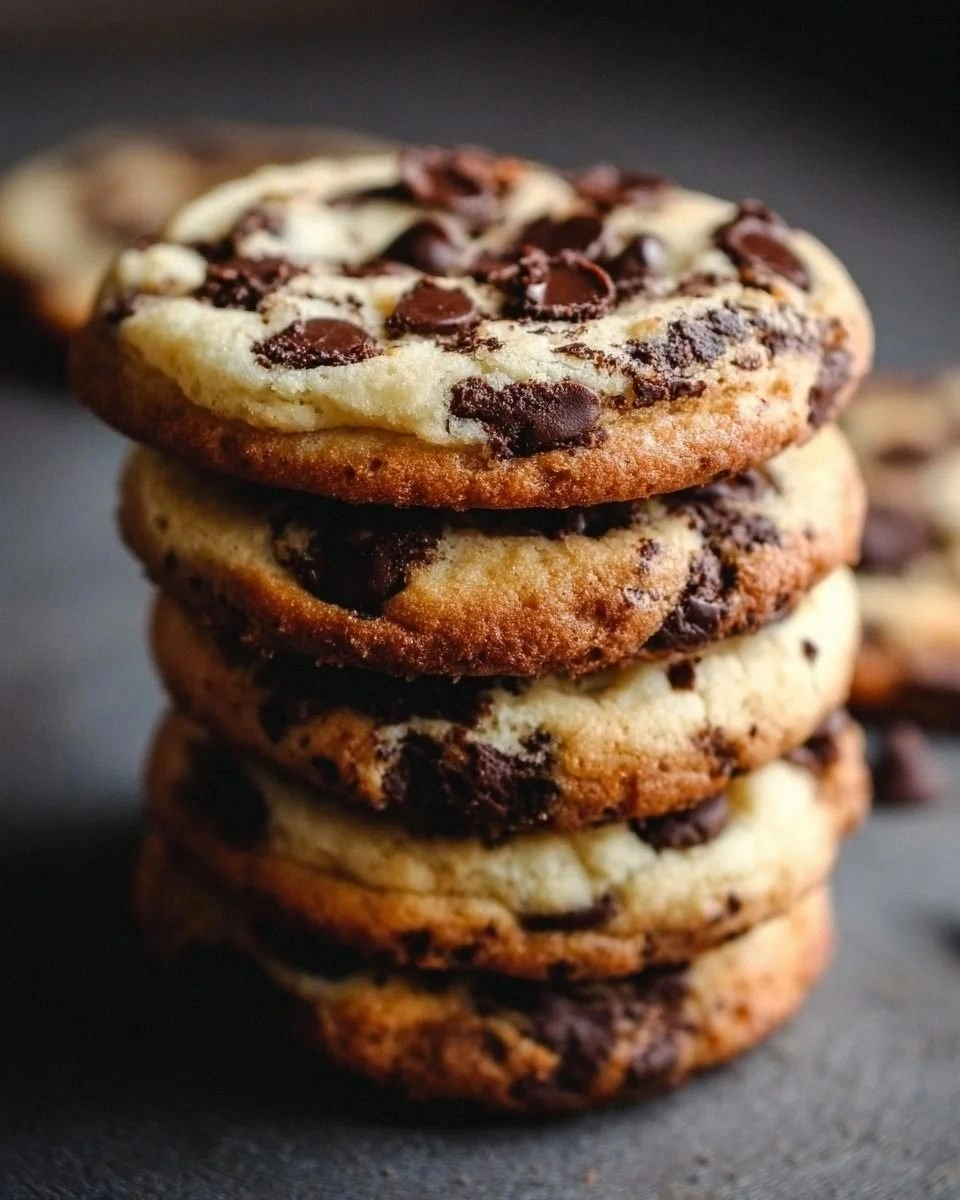
Picture yourself pulling a tray of golden‑brown beauties from the oven, the whole kitchen smelling like a bakery that just opened at sunrise. The aroma of toasted butter and caramelized sugar swirls with a faint hint of tangy cream cheese, while the chocolate chips glisten like tiny constellations against a buttery night sky. The edges are crisp enough to crack with a gentle tap, but the centers stay soft, almost custardy, as if a tiny cheesecake core is waiting to burst out. I’ll be honest — I ate half the batch before anyone else got to try it, and that’s exactly the kind of addictive quality we’re after.
Most recipes get this completely wrong. They either over‑mix, turning the dough into a tough brick, or they under‑bake, leaving you with a doughy mess that never quite reaches that perfect, chewy‑soft balance. Here’s what actually works: a cream‑cheese‑infused butter base that creates a tender crumb, a precise ratio of sugars that gives you that caramel‑kissed sweetness, and a gentle fold‑in of chocolate chips so they stay glossy and melty. The secret ingredient? A splash of vanilla that ties everything together, plus a dash of baking soda that lifts the cookies just enough to keep them airy without losing their dense, cheesecake‑like heart.
Okay, ready for the game‑changer? We’re going to whisk, fold, chill, and bake our way to cookie nirvana, using a technique that most home bakers overlook: chilling the dough for at least 30 minutes before baking. This step lets the butter and cream cheese firm up, preventing spreading and ensuring that each cookie retains a thick, pillow‑soft center. Let me walk you through every single step — by the end, you’ll wonder how you ever made it any other way.
What Makes This Version Stand Out
- Cheesecake‑Richness: The addition of cream cheese turns a regular cookie into a decadent, velvety treat that feels like a mini cheesecake in every bite.
- Texture Contrast: Crispy, caramelized edges give way to a soft, almost melt‑in‑your‑mouth center, creating a delightful crunch‑to‑cream experience.
- Flavor Balance: Equal parts granulated and brown sugar provide sweetness with a deep, buttery caramel note that doesn’t overwhelm.
- Chocolate Distribution: Generous chocolate chips are folded in at the end, ensuring each cookie has pockets of melty chocolate goodness.
- Simplicity: Despite the gourmet vibe, the ingredient list is straightforward and uses pantry staples you probably already have.
- Make‑Ahead Friendly: The dough can be portioned and frozen, giving you a ready‑to‑bake stash for any spontaneous cookie craving.
- Crowd‑Pleaser: Whether it’s a family gathering or a solo midnight snack, these cookies consistently get rave reviews and empty plates.
- Visual Appeal: The golden edges and glossy chocolate chips make them look as good as they taste, perfect for Instagram bragging rights.
Alright, let's break down exactly what goes into this masterpiece...
Inside the Ingredient List
The Flavor Base
Unsalted butter, softened to room temperature, is the backbone of any good cookie. It provides the rich, buttery flavor and helps create that golden‑brown crust we all love. If you substitute with margarine, you’ll lose the depth of flavor and the cookies may turn out greasy. For the best results, use a high‑quality European butter that has a higher butterfat content; it adds a subtle nutty note that pairs perfectly with the cream cheese.
Cream cheese, also softened, is the secret star that gives these cookies their cheesecake‑like interior. Its slight tang cuts through the sweetness, preventing the flavor from becoming cloying. Skipping it or replacing it with plain yogurt will change the texture dramatically, turning the cookies into a more traditional chewy style. Look for a full‑fat cream cheese, as the lower‑fat versions can make the dough too wet and affect the crumb.
The Sweet Duo
Granulated sugar contributes to the crisp edges and helps with spreading, while brown sugar adds moisture and a caramel‑like depth. The combination creates a complex sweetness that mimics the flavor profile of a baked cheesecake. If you prefer a less sweet cookie, you can reduce each sugar by a quarter cup, but expect a slightly less tender center.
Eggs act as the binding agent, providing structure and a little lift. Large eggs are ideal because they contain the right amount of liquid and protein. If you’re out of eggs, a flax‑egg (1 tablespoon ground flaxseed mixed with 3 tablespoons water) can work, but the texture will be a touch denser.
The Texture Crew
All‑purpose flour is the scaffold that holds everything together. Three cups may seem generous, but they balance the moisture from the butter, cream cheese, and eggs, ensuring the cookies don’t spread too thin. Sifting the flour with baking soda and salt guarantees an even distribution of leavening and prevents pockets of floury grit.
Baking soda is the quiet hero that creates a slight rise, giving the cookies a light, airy crumb without making them cake‑like. Too much soda will cause excessive spreading and a metallic aftertaste, so stick to the precise teaspoon.
Salt is the flavor enhancer that brings out the sweetness of the sugars and the richness of the butter. A pinch less and the cookies taste flat; a pinch more and you’ll notice a pleasant contrast that makes the chocolate chips pop.
The Final Flourish
Chocolate chips are the finishing touch, adding pockets of molten chocolate that ooze out as the cookies bake. Use semi‑sweet chips for a balanced sweetness; if you love intense chocolate, go for dark chips or even chopped chocolate bars. Skipping the chips entirely turns this into a plain cheesecake cookie, which is still delicious but loses that signature burst of chocolate.
Everything's prepped? Good. Let's get into the real action...
The Method — Step by Step
Start by creaming together the softened butter, cream cheese, granulated sugar, and brown sugar in a large mixing bowl. Use a handheld mixer on medium speed until the mixture is light, fluffy, and pale yellow—this should take about 3‑4 minutes. The scent of sugar caramelizing under the beaters is a good sign that you’re on the right track. Power transition: This is the moment of truth; the base is where all the flavor magic begins.
Add the eggs one at a time, beating well after each addition, then pour in the vanilla extract. The dough should look glossy and slightly thickened. If it looks too thin, give it a minute; the butter and cream cheese will absorb the liquid.
Kitchen Hack: Scrape the sides of the bowl with a rubber spatula after each addition to ensure everything is fully incorporated.In a separate bowl, whisk together the flour, baking soda, and salt. Whisking not only combines the dry ingredients but also aerates the flour, preventing a dense cookie. Sift the mixture into the wet ingredients gradually, mixing on low speed just until you see no streaks of flour. Over‑mixing at this stage can develop gluten and make the cookies tough.
Fold in the chocolate chips by hand using a sturdy wooden spoon or a spatula. The chips should be evenly distributed, but avoid crushing them. If you want pockets of extra chocolate, reserve a handful and press them gently into the dough after portioning.
Cover the bowl with plastic wrap and chill the dough for at least 30 minutes, or up to 2 hours if you have the patience. This step is crucial: it firms the butter and cream cheese, preventing excessive spreading and ensuring those thick, cheesecake‑like centers.
Watch Out: Skipping the chill will result in flat, crispy cookies that lack the coveted soft middle.Preheat your oven to 350°F (175°C) and line two baking sheets with parchment paper. Using parchment prevents sticking and gives you an even bake. If you prefer a slightly crispier edge, you can lightly butter the parchment, but this isn’t necessary for this recipe.
Scoop the chilled dough onto the prepared sheets using a cookie scoop (about 2‑ tablespoon per cookie). Space them 2 inches apart; they will spread just a little. For uniform cookies, dip the scoop in a bit of flour between scoops.
Bake for 12‑14 minutes, or until the edges are golden brown and the tops have set but still look slightly soft. The center will continue to set as it cools, giving you that perfect cheesecake texture. Power transition: This next part? Pure magic. When you open the oven and see that caramel‑brown edge, you’ll know you’ve nailed it.
Remove the cookies from the oven and let them rest on the baking sheet for 5 minutes. This short rest allows the cookies to firm up without becoming hard. Then transfer them to a wire rack to cool completely; the cooling process locks in the soft interior.
Enjoy immediately, or store them as directed below. I’ll be honest — the first bite is always the best, but the second and third are just as addictive. Picture yourself sharing these with friends; you’ll hear the “wow” moments before the last crumb disappears.
That's it — you did it. But hold on, I've got a few more tricks that'll take this to another level...
Insider Tricks for Flawless Results
The Temperature Rule Nobody Follows
Always bring your butter and cream cheese to exactly room temperature—no hotter, no colder. If they’re too soft, the dough will become greasy and spread too much; if they’re too cold, you’ll end up with a lumpy batter that never fully incorporates. I once tried using melted butter to speed things up, and the cookies turned out flat and crispy, like crackers. The rule of thumb: the mixture should feel like a soft, pliable dough that holds its shape when you scoop it.
Why Your Nose Knows Best
Your sense of smell is a reliable indicator of doneness. When the edges start to smell nutty and slightly toasty, that’s the signal that the interior is still soft but the exterior has formed a perfect crust. If you rely solely on time, you might pull them out too early or let them over‑bake. Trust that caramel‑brown scent; it’s the olfactory green light.
The 5‑Minute Rest That Changes Everything
After baking, let the cookies sit on the sheet for five minutes before moving them. This brief pause lets the steam redistribute, finishing the cooking process from the inside out. Skipping this step results in a cookie that cracks on the bottom and loses some of that luscious cheesecake melt. I once served cookies straight from the tray and the texture was off—lesson learned.
Cold‑Roll the Dough for Uniform Thickness
If you’re after perfectly uniform cookies, roll the chilled dough between two sheets of parchment to a thickness of about ½ inch, then cut with a cookie cutter. This technique ensures each cookie bakes evenly and looks professional. It’s a bit more work, but the visual payoff is worth it for a special occasion.
Don’t Over‑Mix the Flour
When you add the dry ingredients, mix only until just combined. Over‑mixing develops gluten, which can make the cookies tough and diminish that melt‑in‑your‑mouth feel. I’ve seen bakers beat the flour in for minutes, only to end up with a dense, cake‑like cookie. Stop the mixer as soon as you no longer see streaks of flour.
Creative Twists and Variations
This recipe is a playground. Here are some of my favorite ways to switch things up:
White Chocolate Raspberry Swirl
Swap half of the semi‑sweet chips for white chocolate chips and fold in a tablespoon of freeze‑dried raspberry powder. The tart raspberry cuts through the richness, while the white chocolate adds a buttery sweetness that pairs beautifully with the cheesecake base.
Espresso‑Infused Double‑Chocolate
Add a teaspoon of instant espresso powder to the dry mix and use dark chocolate chunks instead of chips. The coffee deepens the chocolate flavor, creating a sophisticated, almost mocha‑like bite that’s perfect for adult gatherings.
Nutty Caramel Crunch
Stir in ½ cup of toasted chopped pecans and drizzle a thin line of caramel sauce on each cookie just before baking. The nuts give a satisfying crunch, and the caramel adds a glossy, buttery finish that makes the cookies look bakery‑ready.
Matcha Green Tea Delight
Replace one cup of flour with matcha powder (adjust the remaining flour to keep the total at three cups) and add white chocolate chips. The earthy green tea flavor balances the sweet cream cheese, and the visual green specks make for an Instagram‑worthy treat.
Spiced Pumpkin Cheesecake
Incorporate ½ cup canned pumpkin puree and a teaspoon of pumpkin pie spice, then use a mix of dark and milk chocolate chips. This seasonal twist is perfect for autumn, delivering a warm, comforting flavor that still retains the signature texture.
Salted Caramel Pretzel
Fold in crushed pretzel pieces and swirl in a caramel sauce before baking. The salty pretzel adds a surprising crunch, while the caramel creates pockets of gooey sweetness that melt in your mouth.
Storing and Bringing It Back to Life
Fridge Storage
Place the cooled cookies in an airtight container with a slice of bread on top. The bread releases moisture that keeps the cookies soft for up to five days. If you notice the cookies drying out, replace the bread slice with a fresh one.
Freezer Friendly
Arrange cookies in a single layer on a parchment‑lined tray and freeze for two hours, then transfer to a zip‑top freezer bag. They’ll stay fresh for up to three months. When you’re ready to eat, let them thaw at room temperature for 10 minutes, then pop them in a 300°F oven for three minutes to revive the crisp edges.
Best Reheating Method
To bring a refrigerated cookie back to its peak, preheat your oven to 325°F, place the cookie on a baking sheet, and add a tiny splash of water (about a teaspoon) to the sheet. The steam will re‑moisturize the interior while the oven restores the golden crust. In just five minutes you’ll have a cookie that tastes as fresh as the day it was baked.