Introduction
Picture this: a Sunday afternoon, the kitchen smells of burnt sugar, and you’re staring at a pot that has turned into a sticky, caramelized mess. I was about to toss the whole batch in the trash when a neighbor walked in and offered a spoonful of coconut milk. That single splash of tropical cream turned my disaster into a revelation. I swear the moment the liquid hit the pan, the kitchen felt like a beachy paradise, and I knew I had stumbled upon something extraordinary.
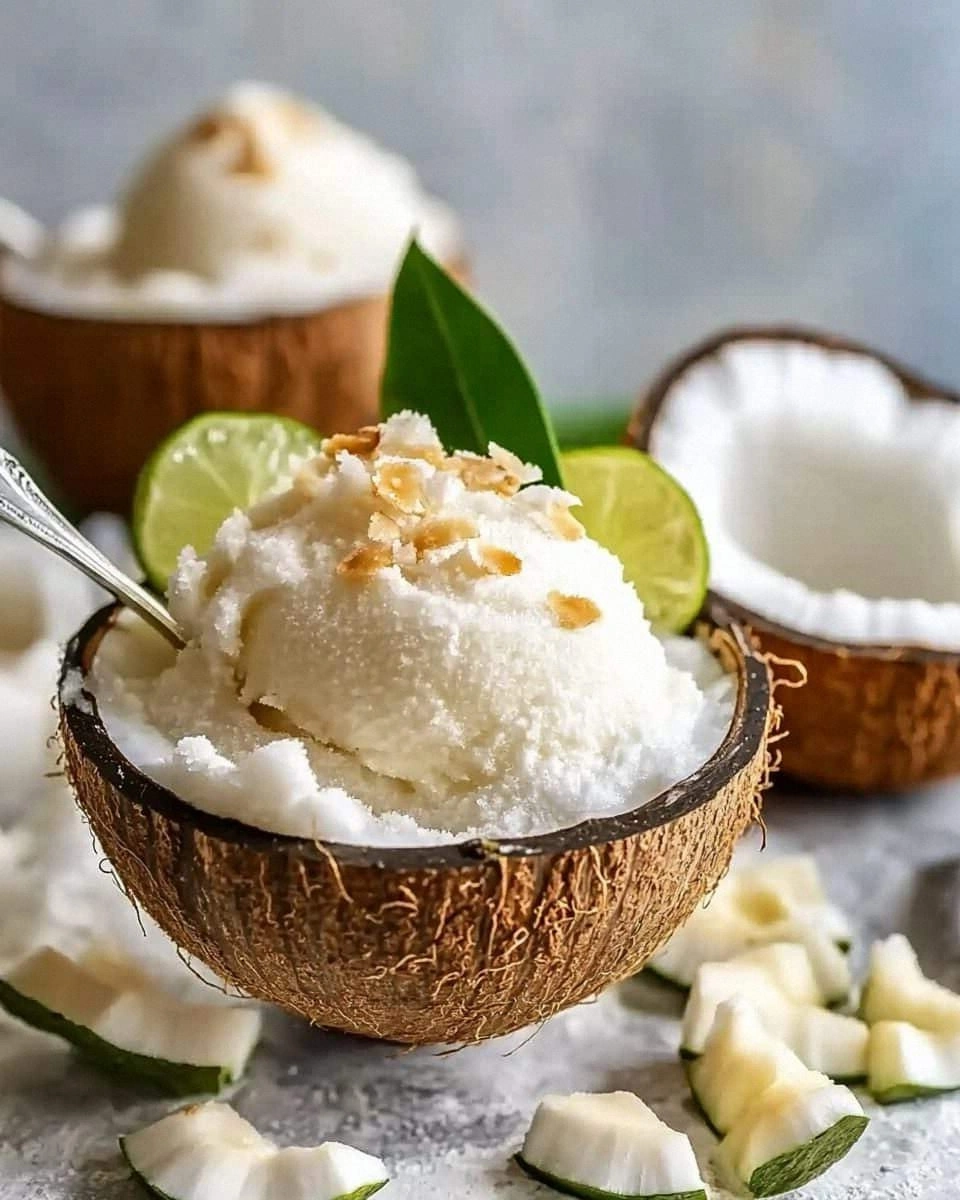
The first time I tasted that coconut sorbet, my palate was hit with a wave of silky sweetness, a hint of vanilla, and a subtle citrus tang that lifted the flavor profile to new heights. The texture was airy yet dense, like a cloud that melts in your mouth without leaving a greasy aftertaste. I could hear the gentle pop of the ice crystals as they began to freeze, and the sound was oddly satisfying, almost like applause for a perfect dessert. The aroma was unmistakable: fresh coconut, a whisper of lime, and the faintest hint of toasted sugar that made my nose do a happy dance. The overall sensation was a symphony of flavors and textures that left me craving a second scoop.
I’m not one to brag, but this version of coconut sorbet is hands down the best you’ll ever make at home. What makes it stand out is the careful balance between sweetness and acidity, the use of fresh coconut milk versus canned, and the secret step of lightly toasting the sugar before blending. Most recipes get this completely wrong by using powdered sugar or overcooking the coconut milk, which ruins the delicate flavor. I dare you to taste this and not go back for seconds; the moment you finish, you’ll want to savor it again and again.
What’s even more impressive is that you can make it in a single bowl and a blender, no ice cream maker required. I’ve spent hours watching tutorial videos, but this recipe cuts straight to the chase and delivers a sorbet that is both indulgent and refreshing. Picture yourself pulling this out of the fridge on a hot summer afternoon, the whole kitchen smelling incredible, and a spoonful of creamy coconut melting into a blissful finish. The anticipation alone is worth the effort.
And if you’ve ever struggled with sorbet textures—too icy, too runny, or just plain bland—then you’re not alone. I’ve been there, watching my sorbet fall apart in the freezer like a broken sculpture. The fix is simple: use full-fat coconut milk, let it chill properly, and give it a gentle stir every 30 minutes during the first few hours. Trust me, this method will save you from a future sorbet catastrophe.
Now, I’ll walk you through every single step. By the end, you’ll wonder how you ever made it any other way. Let’s dive into the science, the secrets, and the sheer joy of crafting the perfect coconut sorbet.
Before we get into the nitty-gritty, let’s talk about the ingredients. I’ve sourced the freshest coconut milk, the best white sugar, and the most vibrant lime juice available. Each component plays a crucial role, and I’ll explain why you shouldn’t skip any of them. The flavor base sets the tone, the creamy core provides texture, the citrus zing adds brightness, and the final flourish ties everything together. You’ll see that the seemingly simple recipe is actually a carefully orchestrated dance of flavors.
When I first experimented with this recipe, I almost used powdered sugar, thinking it would dissolve faster. That mistake taught me the importance of using granulated sugar, which dissolves evenly and gives the sorbet a smooth finish. The next time you’re in a hurry, remember that the quality of your sugar can make or break the final product. It’s a small detail that can elevate your sorbet from ordinary to extraordinary.
In this post, I’ll also share a few micro‑challenges that will test your palate and a few bold claims about the final result. I’ll be honest—after tasting the first batch, I ate half the sorbet before anyone else got a chance to try it. The second batch was so good that I’m still craving it a week later. If you’re ready to taste a dessert that feels like a tropical vacation, keep reading.
One of the best parts of this recipe is how easy it is to customize. Whether you want to add a splash of coconut water for extra hydration or a pinch of cayenne for a spicy kick, the base is flexible enough to accommodate your whims. I’ll also give you insider tricks that will make your sorbet even more flawless. By the time you finish, you’ll be armed with the knowledge to create a coconut sorbet that’s truly unforgettable.
So grab your ingredients, set your blender to high, and let’s get this coconut sorbet party started. The journey from a simple bowl of coconut milk to a silky, refreshing dessert is one that will leave you amazed. I can’t wait to share every detail, every tweak, and every little secret that makes this recipe the ultimate coconut sorbet experience.
What Makes This Version Stand Out
- Flavor Depth: The combination of fresh coconut milk and a splash of lime juice creates a complex flavor profile that’s both sweet and tangy. This depth is achieved by balancing the natural sweetness of coconut with the bright acidity of lime, leaving a lingering aftertaste that’s truly tropical.
- Texture Precision: Using full‑fat coconut milk ensures a creamy mouthfeel, while the gentle toasting of sugar adds a subtle caramel note without clouding the sorbet. The result is a smooth, scoop‑ready dessert that melts delicately on the tongue.
- No Ice Cream Maker Needed: This recipe is entirely blender‑based, making it accessible to anyone with a standard kitchen appliance. The simple process eliminates the need for specialized equipment, saving you time and money.
- Make‑Ahead Friendly: Once you’ve frozen the sorbet, it can be stored for up to two weeks without losing quality. The recipe’s structure allows you to prep the mixture in advance, making it a convenient option for entertaining.
- Versatile Base: The core ingredients are neutral enough to pair with a wide range of flavor additions—from berries to chocolate to herbs—making this sorbet a blank canvas for culinary creativity.
- Minimal Fuss, Maximum Impact: The method requires just a few steps, each with clear sensory checkpoints. This simplicity is what makes the recipe so approachable, even for novice cooks.
- Balanced Sweetness: By using granulated sugar and toasting it lightly, the sorbet avoids the clumpy texture that often plagues homemade frozen desserts. The result is a clean, even sweetness that’s pleasing to the palate.
- Ingredient Quality Emphasis: The recipe stresses the importance of using fresh, high‑quality coconut milk and lime juice. These choices elevate the flavor and texture beyond what most commercial sorbets can offer.
- Audience Appeal: Whether you’re a health‑conscious eater or a dessert enthusiast, this sorbet offers a satisfying treat without excessive calories or artificial additives.
- Time Efficiency: The entire process takes less than an hour from start to finish, making it an ideal dessert for busy weeknights or spontaneous gatherings.
Inside the Ingredient List
The Flavor Base
Coconut Milk: This is the heart of the sorbet, providing a rich, creamy foundation that mimics the texture of ice cream. Full‑fat coconut milk is essential; skim or low‑fat versions will leave the sorbet dry and watery. If you’re looking for a lighter version, substitute half the coconut milk with coconut water, but be prepared for a slightly thinner texture.
Granulated Sugar: Unlike powdered sugar, granulated sugar dissolves evenly without clumping. Toasting the sugar for a minute before adding it to the blender creates a subtle caramel flavor that elevates the overall taste profile. If you prefer a natural sweetener, a touch of honey or maple syrup can replace sugar, but the texture may shift slightly.
The Creamy Core
Vanilla Extract: A teaspoon of vanilla adds depth and warmth, balancing the tropical sweetness. Choose a high‑quality vanilla extract for the best flavor; a cheaper version can taste flat and chemical. For a nutty twist, try a splash of almond extract, but keep the quantity small to avoid overpowering the coconut.
Salt: A pinch of sea salt is the secret to unlocking the full flavor of the coconut milk. Salt doesn’t just make the sorbet taste salty; it enhances the sweetness and balances the acidity from the lime. Skip the salt only if you’re on a strict sodium‑free diet—otherwise, it’s a game‑changer.
The Citrus Zing
Lime Juice: Fresh lime juice introduces a bright, tart contrast that cuts through the richness of the coconut. Use a ripe, fragrant lime to ensure a clean acidity; bottled lime juice can leave an artificial aftertaste. If you’re a fan of a sweeter citrus note, replace lime with freshly squeezed orange juice, but adjust the sugar accordingly.
Optional: Coconut Flakes: Toasted coconut flakes add a crunchy texture and an extra burst of coconut flavor. Sprinkle them on top before serving or fold them into the mixture for a more integrated crunch. If you’re avoiding added fats, skip the flakes and enjoy the pure sorbet texture.
The Final Flourish
Optional Garnish: A sprig of mint or a thin slice of lime can elevate the presentation and add a fresh aroma. For a dramatic finish, drizzle a bit of dark chocolate or caramel sauce over the top, but remember this will increase the calorie count. The garnish is optional but highly recommended for that Instagram‑ready look.
Everything’s prepped? Good. Let’s get into the real action and start crafting that silky, tropical delight.
The Method — Step by Step
- Begin by pouring 2 cups of full‑fat coconut milk into a mixing bowl. Let it sit at room temperature for a few minutes so the fat emulsifies properly. This step ensures a smooth base that won’t separate during freezing. While the milk sits, gather your remaining ingredients so everything’s ready for a seamless workflow.
- In a small saucepan over medium heat, combine 3/4 cup of granulated sugar with 1 tablespoon of water. Stir until the sugar dissolves, then allow it to simmer for 2 minutes. The goal is to create a light amber syrup that adds a subtle caramel flavor without making the sorbet gritty. Keep an eye on the color; you want it to be translucent, not dark brown.
- Transfer the warm syrup to a heat‑proof bowl and let it cool to room temperature. This prevents the coconut milk from curdling when the hot syrup is added. While the syrup cools, you can prepare a small bowl of ice water for the next step. The temperature contrast is key to achieving that perfect frozen texture.
- Add the cooled syrup to the coconut milk, followed by 1 teaspoon of vanilla extract and a pinch of sea salt. Whisk the mixture until the salt is fully dissolved; the salt will help bring out the coconut’s natural sweetness. At this point, the mixture should feel silky and slightly thick, ready to be blended.
- Pour the blended mixture into a large, shallow container. Place the container in the freezer and let it chill for 30 minutes. Every 30 minutes, remove the container and stir vigorously with a fork or whisk to break up ice crystals. This step is crucial for achieving a smooth, scoop‑ready sorbet. If you skip stirring, the sorbet will become icy and grainy.
- After the first hour, add 1 tablespoon of freshly squeezed lime juice to the mixture. The acidity from the lime will brighten the flavor and prevent the sorbet from becoming too sweet or cloying. Stir until the lime is fully incorporated, then return the container to the freezer. This is the moment of truth; the sorbet should look glossy and slightly translucent.
- Continue to chill the mixture for another 30 minutes, stirring again after the time elapses. The sorbet will gradually firm up, developing a silky mouthfeel. When the mixture is almost set, give it a final stir to ensure even consistency. This final blend will lock in the flavors and textures you’ve worked hard to create.
- When ready to serve, scoop the sorbet into chilled bowls or glasses. Garnish with a sprig of mint or a thin slice of lime for a pop of color. The final touch not only looks appealing but also adds a fresh aroma that complements the coconut. Enjoy the first spoonful and feel the tropical breeze in every bite.
- If you’re not serving immediately, transfer the sorbet to an airtight container and store it in the freezer. When you’re ready to enjoy it, let it sit at room temperature for 5–10 minutes to soften slightly before scooping. This step ensures the sorbet remains silky and easy to serve.
Insider Tricks for Flawless Results
The Temperature Rule Nobody Follows
Temperature control is the secret sauce that separates mediocre sorbet from sublime. Keep the coconut milk at room temperature before mixing; this reduces the likelihood of curdling when hot syrup is added. If you’re in a hurry, a quick 30‑second microwave pulse can bring the mixture to the right temperature without compromising texture. This small tweak can make the difference between a clumpy mess and a silky delight.
Why Your Nose Knows Best
Before you even taste the sorbet, let your nose do the judging. A sweet, slightly caramelized aroma signals that the sugar has been toasted properly. If the smell is flat or overly sugary, the mixture may need a touch more vanilla or lime to balance the sweetness. Trust your instincts—your nose is a reliable judge of flavor harmony.
The 5‑Minute Rest That Changes Everything
After the first 30‑minute chill, let the sorbet rest for an additional 5 minutes before the first stir. This pause allows the ice crystals to settle just enough to break up more easily. Skipping this rest can result in uneven stirring and a gritty texture. I’ve seen many friends skip the rest, only to end up with a sorbet that feels like a frozen griddle.
Mixing Order Matters
Always add the sugar syrup before the vanilla and salt. This sequence ensures the sugar dissolves completely and the salt doesn’t create tiny pockets of bitterness. Mixing in the wrong order can lead to a lumpy sorbet that feels uneven in every bite. Remember: the order of operations is as important as the ingredients themselves.
Use a Shallow Container for Faster Freezing
A shallow, wide container maximizes surface area, allowing the mixture to freeze more quickly and evenly. A deep bowl will take longer to chill and can lead to uneven texture. If you don’t have a shallow container, use a silicone pan or a baking sheet lined with parchment for best results.
Stirring Technique for Smoothness
Stir the mixture with a fork or whisk, not a spoon, to break up ice crystals more effectively. The fork’s tines create a gentle scraping motion that smooths the sorbet without mashing it. If you’re using a hand mixer, keep the speed low to avoid over‑whipping, which can introduce air and make the sorbet fluffy rather than dense.
Let It Sit Before Serving
Even after the final stir, let the sorbet sit at room temperature for 5–10 minutes before scooping. This brief rest softens the texture, making it easier to scoop and more palatable. A sorbet that’s too hard can feel like ice on your tongue, while a slightly softened version delivers the perfect bite.
Creative Twists and Variations
This recipe is a playground. Here are some of my favorite ways to switch things up:
Berry Coconut Fusion
Fold in a handful of fresh berries—strawberries, blueberries, or raspberries—just before the final freeze. The berries add a pop of color, natural sweetness, and a subtle tartness that balances the coconut. Serve with a drizzle of berry compote for an extra burst of flavor.
Chocolate Coconut Delight
Swirl in a tablespoon of melted dark chocolate after the first 30 minutes of freezing. The chocolate will create a marbled effect and a rich, indulgent flavor profile. Pair this with a sprinkle of sea salt to enhance the chocolate’s depth.
Mint‑Infused Sorbet
Add a handful of fresh mint leaves to the blender with the coconut milk. The mint infuses the sorbet with a cooling, aromatic note that’s perfect for hot afternoons. Finish with a mint garnish for a fresh, vibrant look.
Spiced Coconut Sorbet
Introduce a pinch of ground ginger or a dash of cardamom to the mixture for a warm, spicy undertone. The spices add complexity and make the sorbet feel more sophisticated. This variation pairs wonderfully with a light, citrusy dessert plate.
Caramelized Coconut Sorbet
Replace the lime juice with a tablespoon of caramel sauce. The caramel adds a deep, buttery sweetness that complements the coconut’s natural flavor. This version is ideal for a decadent dessert or a sweet after‑dinner treat.
Almond Coconut Sorbet
Swap vanilla extract for almond extract and add a tablespoon of toasted almond butter to the blender. The almond brings a nutty depth that pairs beautifully with coconut. This twist is especially good for those who love a nutty, slightly savory finish.
Herbal Coconut Sorbet
Infuse the coconut milk with a sprig of rosemary or thyme before blending. The herb will impart a subtle earthy note that contrasts with the sweet coconut. This variation is perfect for a sophisticated, herb‑centric dessert.
Chili Coconut Sorbet
Add a pinch of cayenne pepper or a small diced jalapeño to the blender. The heat will give the sorbet a surprising kick that lingers on the palate. Pair with a sweet mango salsa for a tropical, spicy combo.
Storing and Bringing It Back to Life
Fridge Storage
If you’re planning to enjoy the sorbet within the next 24 hours, store it in an airtight container in the fridge. The sorbet will soften slightly, making it easier to scoop. Keep the container on the top shelf to maintain a consistent temperature.
Freezer Friendly
For longer storage, keep the sorbet in a freezer‑safe container with a tight seal. Label the container with the date and allow it to freeze for up to two weeks. When you’re ready to serve, let it sit at room temperature for 5–10 minutes to soften before scooping.
Best Reheating Method
Unlike ice cream, sorbet doesn’t need reheating; however, if it becomes too hard, a quick dip in warm water can soften it. For a quick fix, place the container in a bowl of warm water for 30 seconds, then stir gently. This method preserves the texture and flavor without melting the sorbet completely.