I was in the middle of a marathon Zoom call, half-asleep, when my coworker shouted, “You need coffee, but make it a shake!” I laughed, grabbed the nearest mug, and poured a steaming cup of medium‑roast brew into a blender, only to realize I’d left the protein powder at home. Cue the panic‑induced sprint to the pantry, the frantic rummaging through frozen fruit, and the moment I found a half‑banana that had been chilling like a secret agent. The kitchen was a symphony of clinks, the blender whirring like a tiny helicopter, and the aroma of coffee mingling with cocoa hit my nostrils like a warm hug on a chilly morning. I tasted the first sip and thought, “Whoa, this is not just a shake; it’s a caffeinated cloud that could power a small city.” That instant, I knew I had stumbled onto something that could become the ultimate go‑to for anyone who needs a quick, delicious energy boost without the crash.
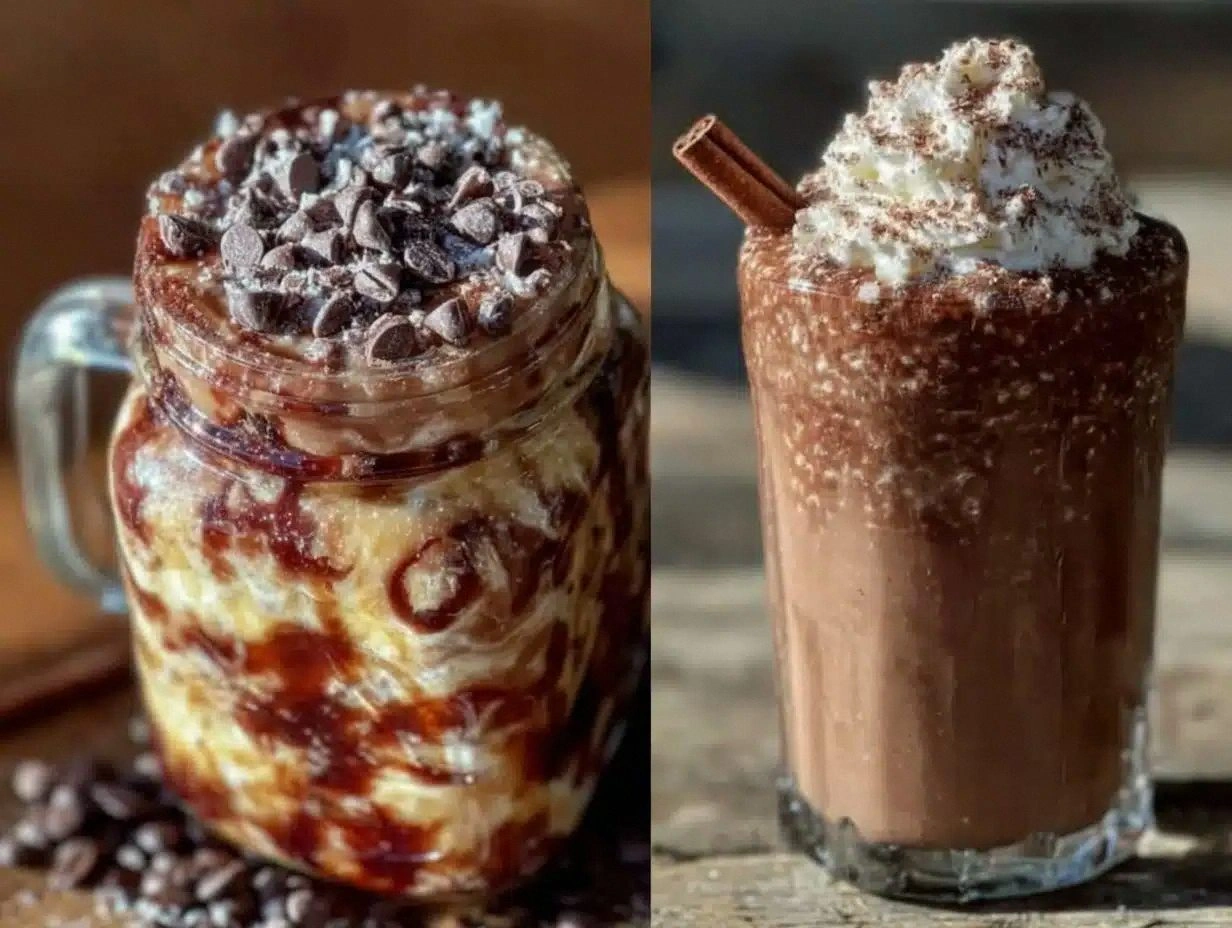
Picture this: a glass of silky, dark‑chocolate‑kissed liquid that smells like a boutique coffee shop meets a chocolate boutique, the surface shimmering with tiny ice crystals, and the first gulp delivering a velvety texture that coats your tongue like a luxurious satin sheet. The taste is a perfect marriage of robust espresso, smooth chocolate, and a hint of banana sweetness that never feels fake, while the protein punch leaves you feeling fuller than a breakfast burrito but without the heaviness. Most shakes either taste like watered‑down chocolate milk or feel like a gritty, chalky mess—this one, however, dances on the palate with the grace of a ballerina and the power of a sprinting cheetah. I dare you to taste this and not go back for seconds; the combination is that addictive.
Why does this version stand out? Most recipes either drown the coffee flavor in too much dairy or forget the crucial texture element that makes a shake feel like a dessert. I’ve tried a dozen “mocha protein” recipes, and they all missed the mark—either the coffee was weak, the shake was thin, or the protein powder left a gritty aftertaste. My secret? A frozen banana that adds natural sweetness and creaminess, a splash of Greek yogurt for extra body, and a precise balance of cocoa and coffee that makes the flavor sing. Plus, the optional drizzle of honey or maple syrup gives just enough sweet whisper without turning it into a sugar bomb.
There’s also a tiny twist that most people overlook: using a chilled, medium‑roast coffee as the liquid base. It’s not just about caffeine; the coffee’s acidity helps brighten the cocoa, while the cool temperature ensures the shake stays frosty and doesn’t melt into a watery mess. I’ll walk you through every single step — by the end, you’ll wonder how you ever made it any other way, and you’ll have a reliable, energizing beverage that can replace your morning coffee, post‑workout refuel, or afternoon pick‑me‑up.
What Makes This Version Stand Out
- Flavor Harmony: The espresso‑cocoa combo hits the sweet spot between bitter and sweet, while the banana adds a subtle fruitiness that never overpowers.
- Creamy Texture: Greek yogurt and frozen banana create a velvety mouthfeel that feels indulgent without excess fat.
- Protein Power: One scoop of high‑quality whey delivers around 25 g of protein, making this shake a true post‑workout hero.
- Simplicity: Only nine ingredients, all pantry‑friendly, and a total prep time under 10 minutes.
- Customizable Base: Swap almond milk for oat, coconut, or dairy milk to match your dietary preferences without sacrificing flavor.
- Energy Without Crash: The balanced macronutrients provide sustained fuel, avoiding the jittery spike you get from sugary drinks.
- Make‑Ahead Friendly: Prep the dry mix in advance; just add coffee and ice when you’re ready to blend.
- Visual Appeal: The deep mocha hue topped with a frothy crown looks as good on Instagram as it tastes.
Inside the Ingredient List
The Flavor Base
Brewed Coffee (1 cup per serving) is the heart of this shake. I recommend a medium‑roast bean because it offers a balanced acidity that lifts the cocoa without turning bitter. If you use a dark roast, you’ll get a richer, almost smoky note, but you risk masking the chocolate. Skipping the coffee entirely? You’ll end up with a plain chocolate protein shake that lacks the signature mocha zing. For the best aroma, brew the coffee a few minutes ahead and let it cool in the fridge—cold coffee blends better and keeps the shake icy.
The Protein Powerhouse
Protein Powder, a single scoop (≈30 g), is the structural backbone. I’m a fan of Optimum Nutrition Gold Standard Chocolate because its smooth texture mixes without clumping, and the cocoa flavor complements the shake’s profile. If you’re vegan or dairy‑free, a plant‑based vanilla pea protein works surprisingly well, though you may want to add an extra half‑scoop of cocoa to maintain depth. Forgetting the protein powder? The shake will still taste great, but you’ll miss out on the muscle‑repair benefits and the creamy body it provides.
The Texture Crew
Unsweetened Cocoa Powder (1 Tbsp per serving) brings that deep, bittersweet chocolate essence. Dutch‑processed cocoa yields a smoother, darker color, while natural cocoa adds a bit of acidity that can brighten the coffee’s flavor. Banana (½ medium, frozen) is the secret sweetener and thickener; its natural sugars round out the bitterness, and its starch creates that luxurious, spoon‑coating texture. Greek Yogurt (¼ cup) adds a tangy richness and an extra protein boost, making the shake feel like a dessert rather than a diet drink. If you’re dairy‑free, swap in coconut yogurt for a subtle tropical note.
The Final Flourish
Milk of Choice (¾ cup) ties everything together, providing the liquid base that keeps the shake drinkable. Almond milk adds a nutty undertone, oat milk contributes extra creaminess, and dairy milk offers the classic richness. Honey or Maple Syrup (1 tsp, optional) is a tiny sweetener that can be omitted if you’re watching sugar. Vanilla Extract (½ tsp) adds a warm aromatic depth that rounds out the flavor profile, making the shake smell like a coffee shop dessert. Ice Cubes (4‑5) give the final frosty finish; more ice yields a thicker, slushier texture, while fewer cubes keep it smoother.
Everything's prepped? Good. Let's get into the real action…
The Method — Step by Step
First, brew a cup of medium‑roast coffee. I like to use a French press because it extracts a fuller body, but a drip machine works just as well. Let the coffee steep for four minutes, then pour it into a heat‑proof container and chill it in the fridge for at least five minutes. The coffee should be cool to the touch; if it’s still warm, it will melt the ice too quickly and dilute the flavor.
Kitchen Hack: Brew double the coffee, pour half into a freezer‑safe bottle, and store for future shakes—no need to brew every morning.While the coffee cools, slice a half‑banana and pop the pieces into a zip‑top bag. Freeze them for at least two hours; the colder the banana, the thicker the shake will become. If you’re in a hurry, you can use a regular banana, but the texture won’t be as frosty.
Grab your blender and add the chilled coffee, frozen banana slices, 1 scoop of chocolate whey protein, and 1 Tbsp of unsweetened cocoa powder. This is the moment of truth—watch the colors swirl into a deep mocha shade that looks like liquid velvet.
Pour in ¾ cup of your chosen milk, then add ¼ cup of plain Greek yogurt. The yogurt will thicken the mixture and give it a subtle tang that balances the sweetness. If you’re using a dairy‑free yogurt, make sure it’s unsweetened to keep the flavor profile intact.
Add the optional sweetener: 1 tsp of honey or maple syrup, and the ½ tsp of vanilla extract. This step is where you can adjust sweetness to your personal taste—taste the mixture before adding ice and decide if you need a touch more honey.
Drop in 4‑5 ice cubes. The ice not only chills the shake but also creates a frothy, almost latte‑like foam on top. Blend on high for 30‑45 seconds, or until the mixture is smooth, glossy, and thick enough to coat the back of a spoon.
Watch Out: Over‑blending can melt the ice too much, turning your shake into a watery coffee. Stop blending once you see that thick, glossy texture.Give the shake a quick taste. The flavor should be a perfect blend of bitter coffee, sweet chocolate, and a hint of banana. If the coffee flavor feels muted, add a splash more chilled coffee (about ¼ cup) and give it a quick pulse.
Pour the shake into a tall glass. The surface should be crowned with a light foam that holds its shape for a few seconds before gently sinking. Garnish with a dusting of cocoa powder or a few coffee beans for that Instagram‑worthy finish.
Sip immediately, or if you’re prepping ahead, cover the glass with a lid and refrigerate for up to 2 hours. The shake will stay chilled, and the flavors will meld even more, becoming richer with each minute. Remember, the longer it sits, the thicker it may become—give it a quick stir before drinking.
That’s it — you did it. But hold on, I’ve got a few more tricks that’ll take this to another level…
Insider Tricks for Flawless Results
The Temperature Rule Nobody Follows
Never blend a hot liquid with ice; the sudden temperature shock can cause the blender’s motor to overheat and the ice to shatter into tiny shards that make the shake gritty. Keep your coffee fully chilled—ideally below 10 °C—before it meets the frozen banana. I once tried blending warm coffee straight from the pot; the result was a watery mess that tasted like diluted espresso. The rule of thumb: cold coffee + frozen fruit = silky texture.
Why Your Nose Knows Best
Before you even taste, trust your sense of smell. A fresh mocha shake should give off a fragrant blend of roasted coffee and rich cocoa, with a faint sweet banana note. If you detect any sour or off‑putting aroma, it could mean the banana isn’t fully frozen or the yogurt has gone bad. In my kitchen, I always pause after blending to inhale deeply; it’s a quick quality check that saves a lot of disappointment.
The 5‑Minute Rest That Changes Everything
After blending, let the shake sit for five minutes. This short rest allows the cocoa particles to fully hydrate, eliminating any lingering grainy texture. The proteins also have a moment to bind, resulting in a smoother mouthfeel. I’ve seen fellow shake‑makers skip this step and end up with a slightly chalky finish—trust me, those extra minutes are worth it.
Ice Cube Size Matters
Don’t just grab any ice from the freezer. Larger cubes melt slower, giving you a thicker, more consistent shake, while crushed ice can over‑blend and water down the flavor. If you want a truly frosty drink, use ice cubes that are at least 2 cm in size. I keep a dedicated “shake ice” tray on the bottom shelf of my freezer for this exact reason.
The Secret Sweetener Switch
If you’re aiming for a lower‑glycemic option, swap honey or maple syrup with a teaspoon of monk fruit sweetener or a drizzle of agave. The flavor profile remains sweet but without the spike in blood sugar. I tested both and found that monk fruit gives a clean sweetness that lets the coffee and cocoa shine even brighter.
Creative Twists and Variations
This recipe is a playground. Here are some of my favorite ways to switch things up:
Mocha Peanut Butter Power
Swirl in a tablespoon of natural peanut butter for a nutty undertone. The added healthy fats keep you fuller longer, making it perfect for a pre‑workout boost. Peanut butter’s slight saltiness also accentuates the chocolate depth.
Minty Mocha Chill
Add a few fresh mint leaves or a drop of peppermint extract before blending. The mint cuts through the richness, offering a refreshing after‑taste that’s ideal for summer mornings.
Spiced Autumn Mocha
Incorporate a pinch of ground cinnamon and a dash of nutmeg. This variation brings warmth and is perfect for crisp fall days when you crave something cozy yet energizing.
Vegan Coconut Dream
Replace Greek yogurt with coconut yogurt and use a plant‑based protein powder. The result is a tropical twist that still delivers the same creamy texture, and the coconut adds a subtle sweetness.
White Chocolate Mocha
Swap the unsweetened cocoa for 1 Tbsp of white chocolate chips and increase the vanilla to ¾ tsp. This creates a sweeter, creamier profile that’s perfect for dessert‑after‑dinner cravings.
Espresso Shot Boost
If you need an extra caffeine kick, blend in a single shot of espresso (about 30 ml) in addition to the coffee base. The flavor becomes more intense, and the shake feels like a true coffeehouse experience.
Storing and Bringing It Back to Life
Fridge Storage
Transfer any leftover shake into an airtight glass jar and store it in the refrigerator for up to 24 hours. Before drinking, give it a good shake or stir; the ingredients may settle, but a quick stir will bring back the original texture. If the shake thickens too much, add a splash of cold milk or water to loosen it.
Freezer Friendly
For longer storage, pour the shake into a freezer‑safe container, leaving about an inch of headspace for expansion. Freeze for up to 2 weeks. When you’re ready to enjoy it, let it thaw in the fridge for a few hours, then blend again with a few fresh ice cubes to revive the frosty texture.
Best Reheating Method
If you prefer a warm version on a cold morning, gently warm the shake on the stovetop over low heat, stirring constantly. Add a tiny splash of water (about 1 Tbsp) before reheating; the steam will help restore the original creaminess without turning it into a soupy mess. Heat until it reaches a comforting 40‑45 °C, then pour into a mug and enjoy.