Introduction
Picture this: I’m in the middle of a late‑night pizza binge, the fridge is a barren wasteland, and my craving for something crunchy yet indulgent is gnawing at me like a persistent mosquito. I flip through a stack of recipe books, stare at the same bland list of potato chips or mozzarella sticks, and then, in a fit of culinary rebellion, I decide to turn the humble onion into a crispy, cheesy masterpiece. The kitchen lights flicker, the onions begin to sizzle, and the air fills with a scent that’s half caramelized sugar, half roasted garlic—a perfume that makes even my cat pause mid‑walk to sniff.
I dare you to taste this and not go back for seconds. That moment when the first ring hits your tongue, the outer shell cracking like thin ice, and the inside melting into a gooey, parmesan‑laden dream is pure alchemy. The crunch is not just a texture; it’s a promise of flavor that lingers long after the last bite. If you’ve ever struggled with creating a snack that feels both fancy and comforting, you’re not alone—and I’ve got the fix.
What sets this version apart is the deliberate layering of flavors and the meticulous attention to the onion’s natural sweetness. I’ve found that using two large yellow onions, not sweet ones, gives a deeper, richer base that balances the sharpness of parmesan. The secret sauce? A splash of olive oil that coats each ring, a dusting of paprika for that smoky undertone, and a generous swirl of garlic powder that whispers savory notes without overpowering. The result is a snack that feels like a party in your mouth, where every bite is a celebration.
And here’s the kicker: I’m going to share a trick that will make your onions crisp up faster than a microwave burrito, plus a hack that keeps them from becoming soggy when you’re ready to serve. By the end of this post, you’ll wonder how you ever made onion rings the old-fashioned way. Stay with me, because this next part? Pure magic.
What Makes This Version Stand Out
- Flavor Depth: The combination of paprika, garlic powder, and parmesan creates a savory profile that outshines plain fried onions. The subtle heat from paprika dances with the creamy cheese, leaving a lingering aftertaste that keeps you reaching for more.
- Texture Mastery: The rings are engineered to be crisp on the outside and tender on the inside. The thin, uniform slices ensure even cooking, so each bite delivers that satisfying crunch before the gooey center melts.
- Ingredient Simplicity: Only seven pantry staples are needed, making this a go‑to recipe for busy nights or when you’re short on time. No fancy sauces or obscure spices—just quality ingredients and a dash of creativity.
- Versatility: This snack scales from a single plate for a movie night to a full buffet for a party. The recipe can be adapted for vegan or gluten‑free versions by swapping the parmesan for nutritional yeast or using a non‑dairy oil.
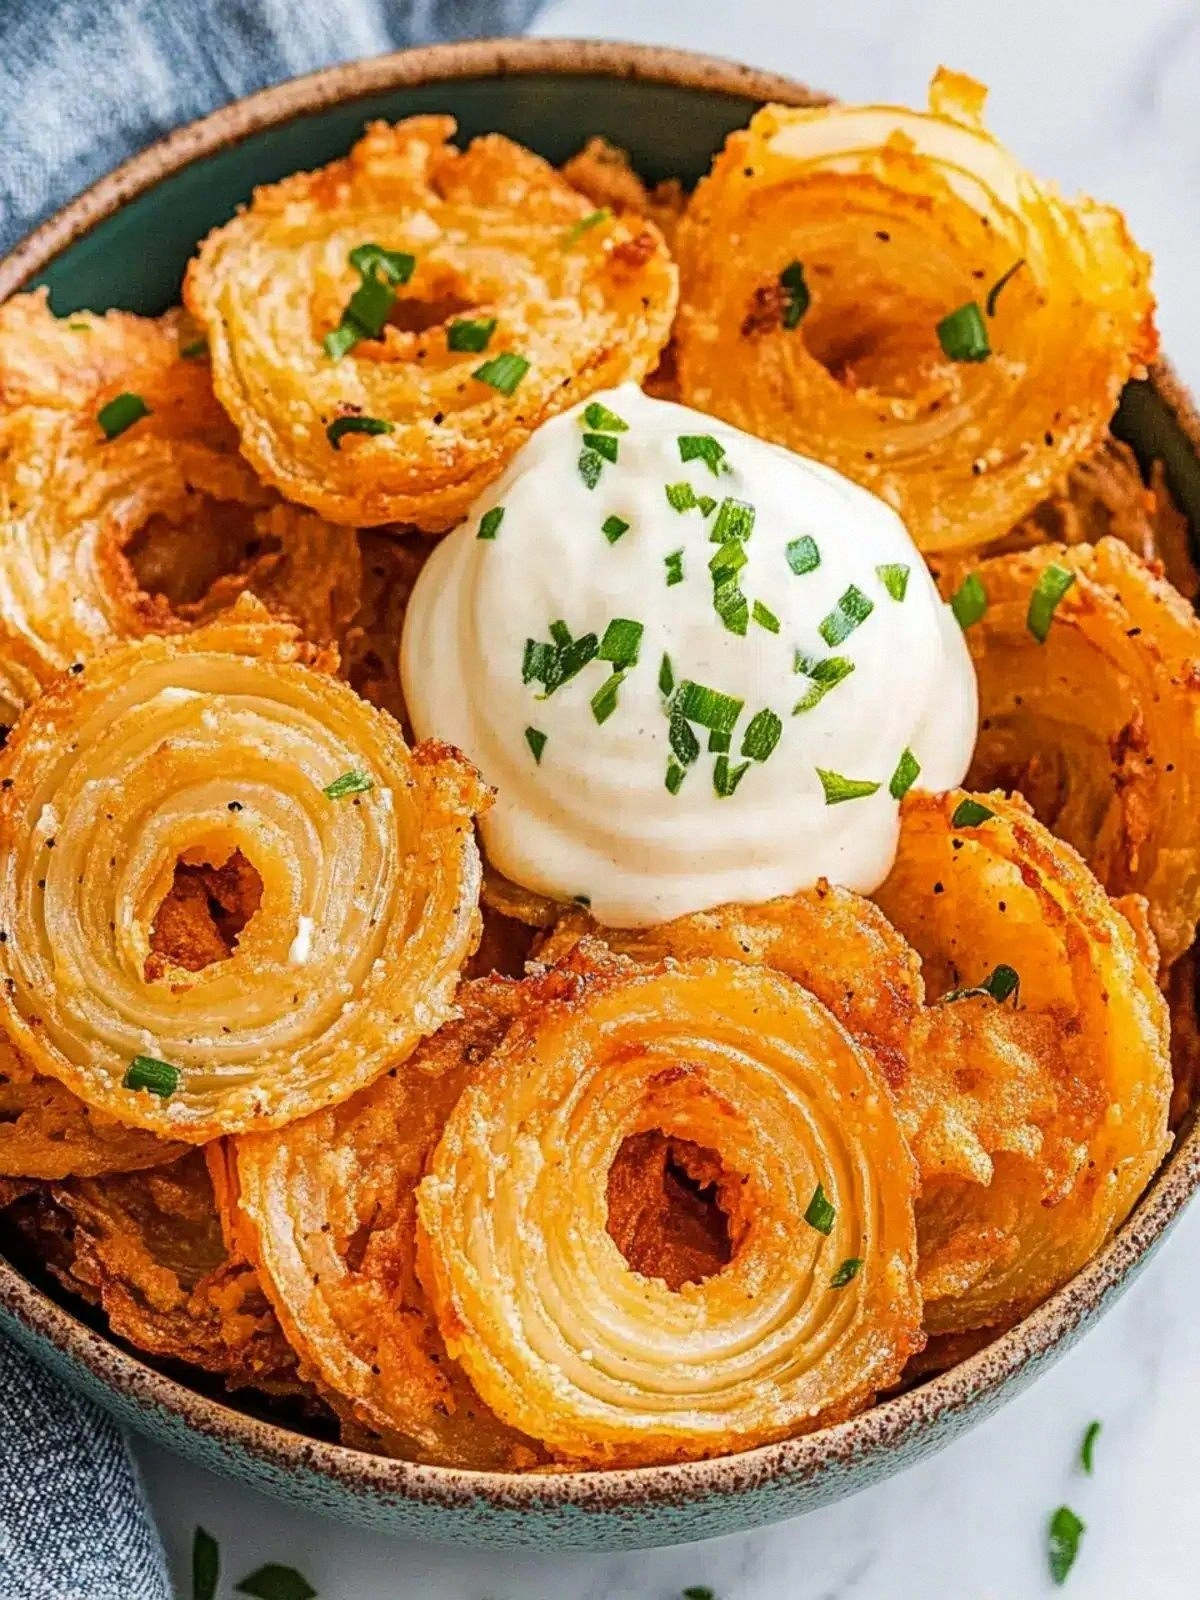
- Crowd‑Pleaser: Friends always ask, “Where did you get these?” because they’re not just delicious—they’re Instagram‑worthy, with golden rings that look as good as they taste.
- Time Efficiency: From prep to finish, the entire process takes less than an hour. Even if you’re juggling a work deadline, you can whip up these rings in no time.
Alright, let's break down exactly what goes into this masterpiece…
Inside the Ingredient List
The Flavor Base
The onions are the foundation of this snack. Yellow onions bring a sweet, mellow flavor that becomes caramelized during cooking, creating a subtle backdrop for the parmesan’s sharpness. If you skip the onions, the dish loses its core identity and becomes just a cheesy coating on something else.
The Texture Crew
Olive oil is the secret to achieving a golden, non‑greasy finish. It creates a thin film that prevents the rings from sticking together and promotes even browning. Without it, the rings can become dry or unevenly cooked.
The Unexpected Star
Paprika is more than a color enhancer; it adds a smoky, slightly sweet undertone that complements the onions’ natural sweetness. If you’re looking for a different flavor profile, smoked paprika can deepen the smokiness, while a touch of cayenne will add heat.
The Final Flourish
Parmesan cheese is the crowning glory, providing umami richness and a gooey, melt‑in‑your‑mouth texture. A high‑quality, freshly grated parmesan will yield a more robust flavor compared to pre‑grated varieties. If you’re vegan, nutritional yeast or a dairy‑free parmesan alternative works beautifully.
Everything’s prepped? Good. Let’s get into the real action…
The Method — Step by Step
- Prep the onions: Slice the onions into 1/8-inch rings, then cut each ring into quarters. The thinness ensures they cook quickly and evenly. While you’re slicing, wash your hands and the cutting board—cleanliness is key to preventing any off‑flavors. I swear, a clean board makes the onions taste fresher.
- Season the rings: In a large bowl, combine the olive oil, garlic powder, paprika, black pepper, and salt. Toss the onion rings in this mixture until each piece is lightly coated. The oil creates a barrier that keeps the onions from drying out while the spices infuse flavor. Make sure every ring gets a coat; a patchy seasoning will ruin the uniformity.
- Preheat the oven: Set your oven to 425°F (220°C) and place a wire rack on a baking sheet. The high heat is essential for a crisp exterior. The rack allows air to circulate around each ring, preventing them from steaming. Let the oven warm for at least 10 minutes before you start baking.
- Bake the rings: Arrange the seasoned rings in a single layer on the wire rack, leaving a little space between each piece. Bake for 12 minutes, then flip them gently. The first 12 minutes develop a golden crust; flipping ensures both sides crisp up evenly. Keep an eye on them; ovens vary, and you don’t want a char.
- Add the parmesan: After flipping, sprinkle grated parmesan cheese evenly over the rings. The cheese will melt and form a crispy, golden coating. This step is the “wow” factor—watch the cheese sizzle and create a glossy finish. The parmesan also helps bind the rings together slightly, preventing them from falling apart.
- Finish baking: Return the rings to the oven for an additional 6–8 minutes, or until the cheese is bubbly and lightly browned. The final minutes are crucial for achieving that melt‑in‑your‑mouth texture. If you like a crunchier finish, leave them a minute longer, but watch closely to avoid burning.
- Let them rest: Once out of the oven, transfer the rings to a wire rack to cool for 5 minutes. This rest period allows the cheese to set, creating a firm crust that’s easy to pick up. It also lets the residual heat finish the cooking process without overcooking the interior. I always keep a plate nearby for those who want to dig in immediately.
- Serve and enjoy: Arrange the rings on a platter and serve immediately while they’re still warm and crisp. Pair them with a side of ranch, marinara, or a tangy yogurt dip to balance the richness. If you’re hosting, set up a dipping station and watch the plates disappear. The aroma alone will make your guests line up for seconds.
That’s it — you did it. But hold on, I've got a few more tricks that'll take this to another level…
Insider Tricks for Flawless Results
The Temperature Rule Nobody Follows
Many people bake at 400°F, but 425°F is the sweet spot for a golden crust. The higher temperature encourages a rapid Maillard reaction, which deepens flavor and crispness. I’ve baked at 425°F for years, and the results are consistently superior. If your oven runs hot, lower the temperature by 25°F to avoid burning.
Why Your Nose Knows Best
As soon as the onions hit the oven, you’ll smell a caramelized scent that’s almost intoxicating. Trust that aroma as a cue for the right timing. If the smell is faint, the oven isn’t hot enough; if it’s too strong, the rings are close to burning. Your nose is the most reliable gauge for doneness.
The 5-Minute Rest That Changes Everything
After baking, let the rings sit for exactly five minutes. This brief rest allows the cheese to set into a firm, flaky crust that’s easier to bite into. Skipping this step can leave the cheese too gooey, causing the rings to fall apart. I always set a timer to avoid over‑resting.
Use a Wire Rack for Even Airflow
Placing the rings on a wire rack ensures that hot air circulates around each piece, promoting uniform crisping. Without a rack, the bottom of the rings will steam and become soggy. If you don’t have a rack, a perforated pan works as a close substitute.
Keep a Dipping Station Ready
Serve the rings with a side of ranch, marinara, or a tangy yogurt dip. The dip balances the richness and adds a refreshing contrast. If you’re hosting, set up a small platter of dips for guests to choose from. The dip also helps keep the rings from drying out on the plate.
Batch Cooking Saves Time
If you’re preparing for a crowd, bake the rings in batches. The oven’s heat will stay consistent, and you’ll get a larger batch of perfectly crisp rings. Keep the finished rings warm on a low oven (200°F) or in a covered dish. I always keep a second batch ready for those last-minute cravings.
Creative Twists and Variations
This recipe is a playground. Here are some of my favorite ways to switch things up:
Smoky Chipotle Rings
Swap paprika for chipotle powder and add a pinch of cumin. The smoky heat pairs beautifully with the onions, giving a southwestern twist. Serve with a cilantro‑lime yogurt dip for a fresh contrast. This version is perfect for a summer barbecue.
Herb‑Infused Parmesan Rings
Stir in chopped fresh rosemary or thyme into the seasoning mix. The herbs elevate the flavor profile and add an aromatic layer. The result is a sophisticated snack that feels like a fine dining appetizer. Great for a dinner party where you want something special.
Vegan Parmesan Rings
Replace parmesan with nutritional yeast or a dairy‑free parmesan alternative. The flavor remains rich, and the texture is just as satisfying. Use a plant‑based oil like avocado or canola for the coating. This variation is ideal for vegan gatherings.
Spicy Sriracha Rings
Add a drizzle of sriracha to the seasoning mix before baking. The heat will linger, making each bite a spicy surprise. Pair with a cool cucumber yogurt dip to balance the heat. This version is perfect for those who like a little kick.
Sweet & Salty Caramel Rings
Lightly brush the rings with a mixture of honey and a pinch of sea salt before baking. The honey caramelizes, creating a sweet crust that contrasts with the savory parmesan. The sea salt accentuates the sweetness, resulting in a complex flavor. This version is ideal for dessert‑style snacks.
Cheesy Garlic Parmesan Rings
Add a tablespoon of minced garlic to the seasoning mix for an extra punch. The garlic infuses the rings with a robust flavor that complements the parmesan. The result is a savory, aromatic snack that satisfies the garlic craving. Serve with a garlic aioli for an indulgent dip.
Breakfast‑Style Rings
Add a dash of cinnamon to the seasoning mix for a sweet twist. The cinnamon pairs nicely with the onions, creating a breakfast‑style snack. Serve with maple syrup or a dollop of Greek yogurt for a sweet‑savory combo. This version is a fun way to start the day.
Storing and Bringing It Back to Life
Fridge Storage
Store leftover rings in an airtight container in the refrigerator for up to 3 days. The crispness will diminish slightly, but they’ll still be tasty. To keep them from drying out, add a paper towel to absorb excess moisture. When ready to eat, you can reheat them briefly for a crisp finish.
Freezer Friendly
Place the rings on a parchment paper tray and freeze them for up to 2 months. Once frozen, transfer the rings to a freezer bag for long‑term storage. When you’re ready to eat, pop them directly into a hot oven for 5 minutes to revive the crunch. This method preserves the flavor and texture remarkably well.
Best Reheating Method
Reheat in a 375°F (190°C) oven for 5–7 minutes, or until the cheese is bubbly again. Add a tiny splash of water to the baking sheet before placing the rings on the rack; the steam helps restore moisture without making them soggy. Avoid microwaving, as it will result in a rubbery texture. The oven method keeps the rings crispy and delicious.