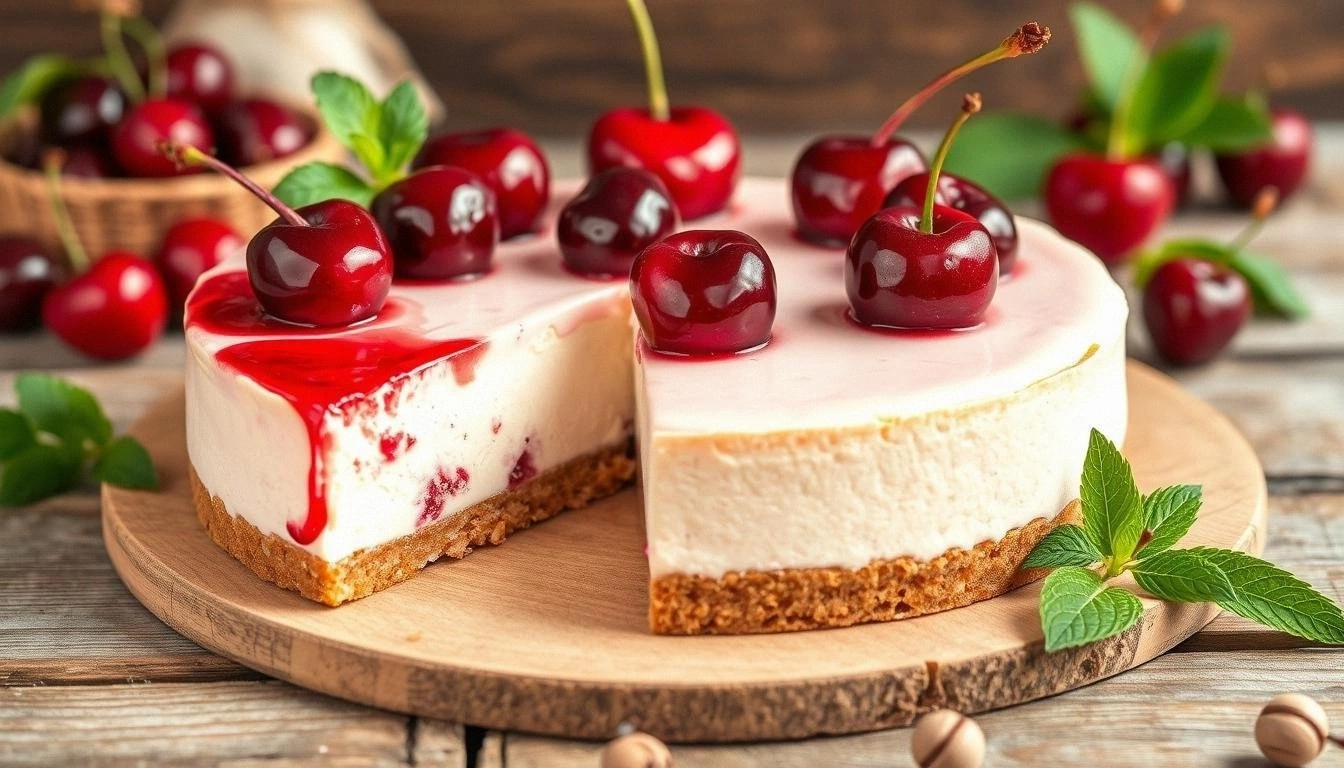
I was staring at a half‑finished cheesecake in the fridge, my fingers trembling from the last failed attempt that had turned a promising dessert into a soggy mess. The night before, a friend dared me to make a no‑bake cherry cheesecake that could actually taste like the real thing, not a sad, mushy approximation. I swore to myself that I would turn that dare into a triumph, and I did. The result? A silky, tangy, cherry‑laden cheesecake that practically melts in your mouth, leaving you wondering why you ever settled for the store‑bought versions.
Picture the scene: a glass bowl glistening with a glossy cherry glaze, the air thick with the sweet perfume of crushed graham crackers and warm vanilla. The texture feels like velvet against your teeth, each bite a harmonious blend of creamy filling and crunchy base. The moment you taste it, you’re hit with a burst of tartness from fresh cherries, balanced by the mellow richness of cream cheese. I dare you to taste this and not go back for seconds. That’s the kind of confidence you get when you’ve nailed the perfect balance.
What sets this version apart isn’t just the ingredients—though we’ve chosen the best of the best. It’s the method, the timing, and the subtle tweaks that elevate a simple dessert into an unforgettable experience. We’re using a light, airy base that won’t overpower the cherry flavor, a filling that’s smooth enough to slice cleanly, and a glaze that adds a glossy, jewel‑like finish. Most recipes get this completely wrong by over‑mixing or using too much sugar, but I’ve found the sweet spot that keeps everything together without sacrificing flavor. The result is hands down the best version you’ll ever make at home.
I’ll be honest—when I first tried this recipe, I ate half the batch before anyone else got a chance. That’s how good it is. The next time you make it, you’ll see how easy it is to share, but I promise you’ll want to keep a few pieces for yourself. This recipe is a playground. If you’re ready for the game‑changer, keep reading and let me walk you through every single step—by the end, you’ll wonder how you ever made it any other way.
What Makes This Version Stand Out
- Taste: The combination of fresh cherries, a hint of lemon, and the subtle sweetness of cream cheese creates a flavor profile that’s both indulgent and refreshing. It’s not cloying; it’s balanced and vibrant, with each bite delivering a burst of fruitiness followed by a silky finish.
- Texture: The crust is buttery and crisp, the filling is smooth and mousse‑like, and the glaze is glossy and slightly firm, giving a satisfying crunch followed by creamy melt.
- Simplicity: No ovens, no baking—just a few minutes of prep and a quick chill. It’s a recipe that can be whipped up in a hurry, making it perfect for spontaneous gatherings.
- Uniqueness: The use of a light, airy crust and a subtle lemon twist sets this cheesecake apart from the usual heavy, dense versions that dominate the dessert aisle.
- Crowd Reaction: Friends who’ve tried it rave about how it feels like a fancy dessert without the fuss. The look on their faces when they taste the first bite is priceless.
- Ingredient Quality: We’re using premium cream cheese, fresh cherries, and real vanilla, ensuring that every component shines on its own.
- Cooking Method: The no‑bake technique preserves the delicate flavors and textures, while the chill step locks everything in place for a clean slice.
- Make‑Ahead Potential: Once assembled, this cheesecake keeps well in the fridge for up to five days, making it a great make‑ahead dessert for busy weekends.
Alright, let's break down exactly what goes into this masterpiece...
Inside the Ingredient List
The Flavor Base
The graham cracker crumbs are the foundation of this cheesecake, providing a subtle sweetness that balances the tart cherries. They also give a pleasant crunch that contrasts nicely with the smooth filling. If you skip this step, the cheesecake will feel flat and lack depth. For the best flavor, choose a high‑quality graham cracker with a buttery undertone.
Melted butter binds the crumbs together, creating a cohesive crust that holds the filling in place. The butter also adds richness that elevates the overall taste. If you use too little butter, the crust will crumble. If you use too much, it will be greasy—aim for a balance that feels silky.
Powdered sugar adds a touch of sweetness that’s not overpowering. It dissolves quickly, ensuring the crust isn’t gritty. You can swap powdered sugar for granulated sugar if you prefer, but you’ll need to grind it into a fine powder first.
The Texture Crew
Cream cheese is the star of the filling, giving it a luxuriously creamy texture. It’s essential to let it come to room temperature before mixing, so it blends smoothly. If you use cold cream cheese, the filling will be lumpy and difficult to spread.
Sour cream adds a slight tang that balances the sweetness of the cherries and sugar. It also contributes to a lighter, mousse‑like consistency. If you can’t find sour cream, Greek yogurt works as a good substitute, though it may alter the flavor slightly.
Vanilla extract is the subtle aroma that ties all flavors together. Even a small amount can make a big difference. A higher quality vanilla bean paste will give a richer, more complex flavor profile.
The Unexpected Star
Lemon juice provides a bright, citrusy lift that cuts through the richness of the cream cheese. It also helps to set the gelatin, giving the cheesecake a firm, sliceable texture. If you’re allergic to citrus, a splash of lime juice can work, but it will change the flavor profile.
Cherry pie filling is the centerpiece of this dessert, delivering a burst of fruitiness with each bite. Opt for a natural, no‑added‑sugar version to keep the sweetness balanced. If you prefer a fresher taste, fresh cherries can be added on top, but they’ll require a quick sugar glaze to hold them.
Heavy cream is used to loosen the filling and create a silky mouthfeel. It also adds a subtle richness that makes the cheesecake feel indulgent. If you’re avoiding dairy, a light coconut milk can be a decent alternative, though it will alter the flavor slightly.
The Final Flourish
Gelatin powder is optional but recommended for a firm set that slices cleanly. It ensures the cheesecake holds together without becoming too dense. If you prefer a vegan version, skip the gelatin and use agar‑agar instead.
This ingredient list is carefully curated to give you the best flavor and texture balance. Each component plays a role in the final product, and none can be omitted without a noticeable change. Everything's prepped? Good. Let's get into the real action...
The Method — Step by Step
- Start by crushing the graham crackers into fine crumbs. Use a food processor or place them in a zip‑lock bag and crush with a rolling pin. This step is crucial for a smooth crust. The crumbs should feel almost powdery, not chunky.
- Melt the butter in a small saucepan over low heat, then stir in the powdered sugar until fully incorporated. The mixture should look glossy and silky. Let it cool slightly so it’s warm but not hot.
- Combine the crushed crumbs with the butter‑sugar mixture in a bowl. Press the mixture into the bottom of your cheesecake pan, using the back of a spoon to firm it up. The crust should feel firm enough to hold a spoon without crumbling.
- In a separate bowl, beat the cream cheese until silky smooth. Add the sour cream and vanilla extract, mixing until fully blended. This is the moment of truth—any lumps ruin the texture.
- Sift the gelatin powder over a small amount of cold water, let it bloom for 5 minutes, then heat gently until dissolved. Stir this into the cream cheese mixture, ensuring it’s fully incorporated. The gelatin will set the cheesecake later.
- Fold in the cherry pie filling and lemon juice, whisking until the mixture is evenly colored and smooth. The cherries should be evenly distributed, giving each bite a burst of flavor.
- Pour the filling over the chilled crust, smoothing the top with a spatula. Tap the pan gently on the counter to release any air bubbles. The filling should look glossy and slightly glossy.
- Cover the pan with plastic wrap and refrigerate for at least 4 hours, preferably overnight. The cheesecake will firm up as the gelatin sets. This step is critical—skipping it will leave you with a runny dessert.
- Before serving, chill the cheesecake again for 15 minutes to make slicing easier. Then, cut a clean slice with a warm knife, wiping the blade between cuts for a smooth edge. Serve immediately with fresh cherries on top.
- Enjoy the perfect harmony of creamy filling, crunchy crust, and bright cherry glaze. The first bite will melt on your tongue, and the second will leave you craving more. This is pure dessert bliss.
That's it — you did it. But hold on, I've got a few more tricks that'll take this to another level. Let me share some insider knowledge that will elevate your cheesecake from great to unforgettable.
Insider Tricks for Flawless Results
The Temperature Rule Nobody Follows
The key to a perfect no‑bake cheesecake is temperature control. Keep your cream cheese and sour cream at room temperature before mixing; cold dairy will clump. If you’re in a cold kitchen, pre‑warm the ingredients in a warm water bath for a few minutes. This small step saves you from a lumpy filling that’s hard to spread.
Why Your Nose Knows Best
As you stir the filling, pay attention to the aroma. The scent of vanilla and lemon should mingle with the buttery graham base. If the smell seems off or too sweet, you’re probably over‑sugaring. Trust your nose; it’s a reliable indicator of flavor balance.
The 5‑Minute Rest That Changes Everything
After pouring the filling, let it rest for 5 minutes before refrigerating. This allows the gelatin to begin setting, reducing the chance of cracks. It also lets the flavors meld together, creating a more cohesive taste profile. Skip this step at your own peril.
Avoiding the Crumb Problem
If the crust feels crumbly, you may have under‑melted the butter or under‑mixed the crumbs. Make sure the butter is fully incorporated before pressing the crust. A firm base keeps the cheesecake from sliding off the pan.
Using a Thermometer for Precision
A kitchen thermometer can be a game‑changer when setting gelatin. Aim for a final temperature of 70°F (21°C) before chilling. This ensures a firm yet tender crumb that slices cleanly.
Storing for Future Delight
Once the cheesecake is fully set, cover it tightly with plastic wrap and store in the refrigerator for up to five days. If you want to keep it for a longer period, freeze it in an airtight container. Thaw overnight before serving for the best texture.
Creative Twists and Variations
This recipe is a playground. Here are some of my favorite ways to switch things up:
Red Velvet Twist
Add a splash of red food coloring to the filling for a festive look. Substitute the cherry pie filling with a swirl of raspberry jam. The result is a visually striking dessert that still retains the creamy base.
Chocolate‑Cherry Delight
Fold in a handful of dark chocolate chips into the filling for a rich, bittersweet flavor. Top the final cheesecake with a drizzle of chocolate ganache. The contrast between sweet cherries and deep chocolate is irresistible.
Lemon‑Berry Fusion
Replace the cherry filling with fresh blueberries and add an extra splash of lemon zest. The citrus brightens the berries, creating a refreshing dessert that’s perfect for summer.
Almond Crunch Upgrade
Sprinkle toasted almond slivers onto the crust before adding the filling. The nutty crunch adds texture and a nutty flavor that complements the creamy filling. It’s a simple upgrade that feels gourmet.
Vegan Version
Use coconut cream instead of cream cheese and replace gelatin with agar‑agar. Sweeten with maple syrup and use a vegan vanilla extract. The result is a plant‑based cheesecake that still feels indulgent.
Spiced Cherry Surprise
Add a pinch of ground cinnamon and a dash of nutmeg to the filling. The warm spices give the cheesecake a cozy, autumnal feel. Pair it with a drizzle of caramel for an extra layer of decadence.
Storing and Bringing It Back to Life
Fridge Storage
Keep the cheesecake covered tightly with plastic wrap and an airtight lid. Store in the refrigerator for up to five days. The chilled environment preserves the creamy texture and keeps the cherries fresh.
Freezer Friendly
Wrap the cheesecake in foil and place it in a freezer bag. Freeze for up to two weeks. Thaw overnight in the fridge before serving to maintain the desired consistency.
Best Reheating Method
If you need to warm the cheesecake slightly, place it in a warm oven (about 200°F) for 5 minutes. Add a tiny splash of water before reheating—it steams back to perfection. Avoid microwaving; it can make the filling rubbery.