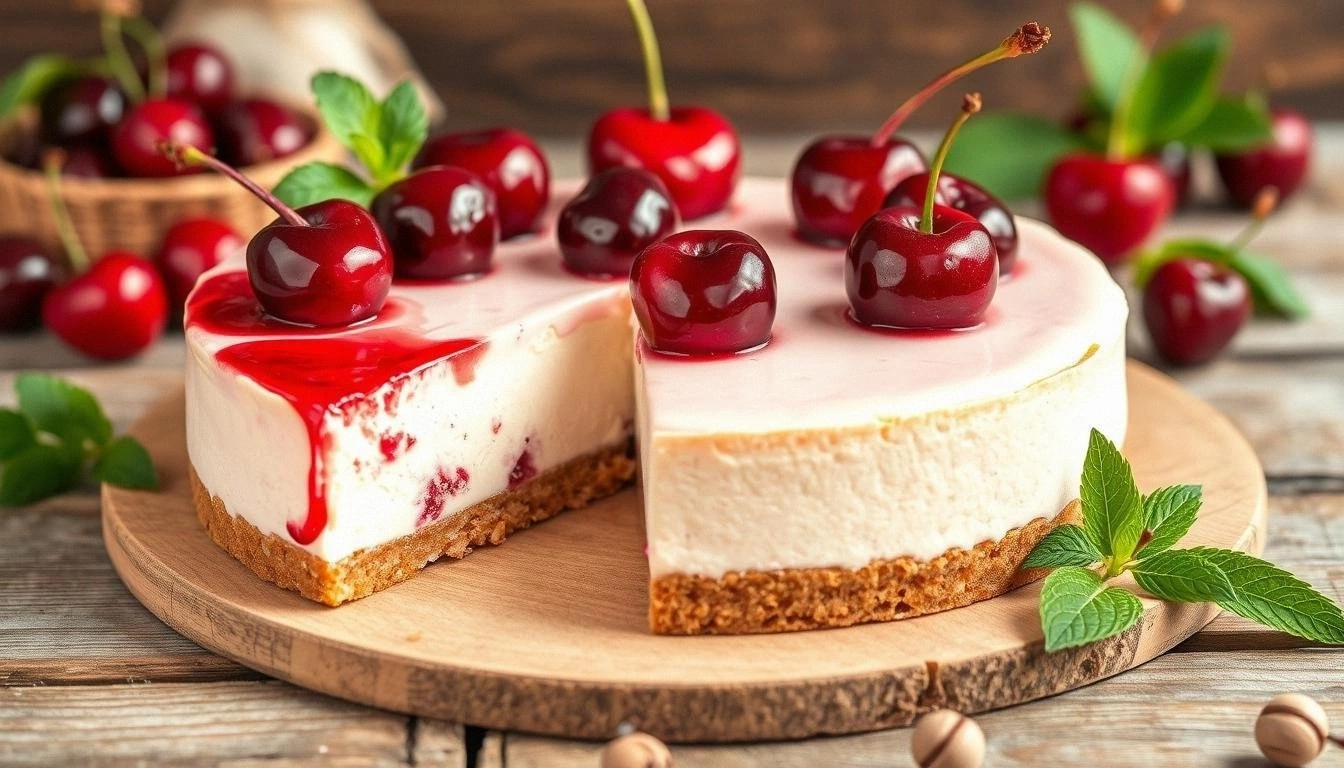
I still remember the night my kitchen turned into a culinary disaster zone. I was trying to impress a friend with a fancy dessert, but the sugar went rogue, the pan caught fire, and the oven door was stuck. I stared at the charred remains, heart racing, and thought, “This is the moment I need a rescue recipe.” That moment birthed my obsession with baked pears, and I’m about to hand you the definitive version that will have you slapping your hands in delight.
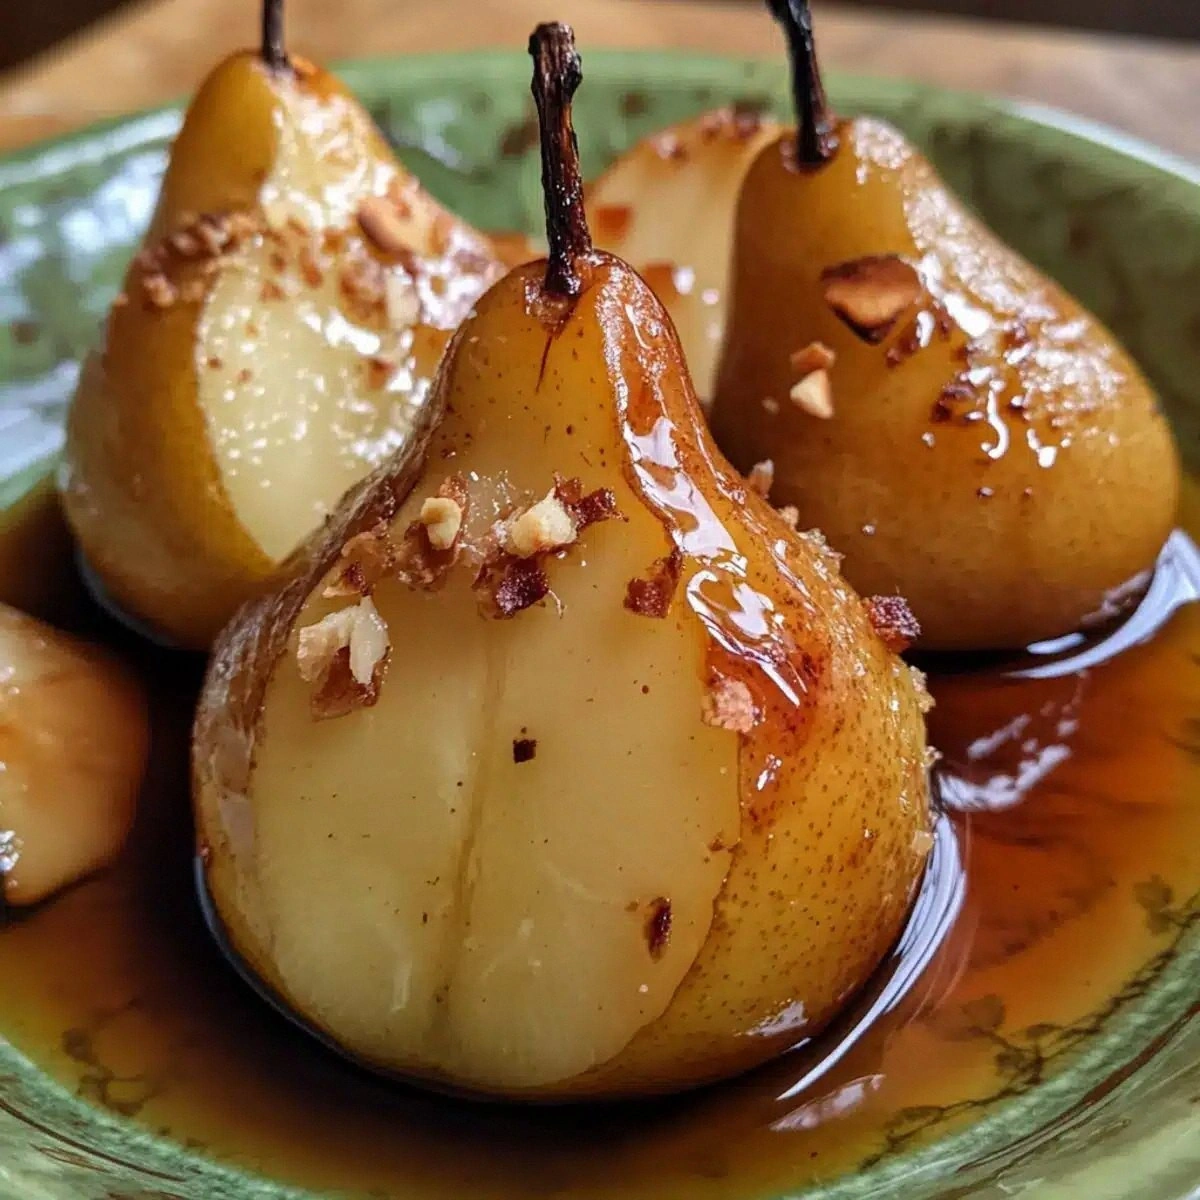
Picture this: the aroma of sweet maple syrup mingling with the faint, earthy scent of ripe pears, a gentle crackle as the butter melts into a glossy glaze, and the faint hiss of steam as the fruit softens. The sound of a timer ticking, the sight of golden edges forming, and the promise of a velvety interior that melts like a dream. Every sense is engaged, turning a simple dessert into a sensory celebration that feels like a hug from the inside out.
What sets this recipe apart is the precision of flavor balance and the sheer simplicity of the technique. I’ve stripped away unnecessary steps, kept the ingredient list lean, and introduced a single, unexpected twist that elevates the whole dish. This version is hands down the best you’ll ever make at home because it captures the natural sweetness of pears while adding a caramelized, buttery finish that’s impossible to resist.
I dare you to taste this and not go back for seconds. The maple glaze coats the pears like velvet, the cinnamon adds a subtle warmth, and the buttery crust creates a satisfying snap that lingers on your tongue. And the best part? You’ll be amazed at how quickly you can turn a handful of ingredients into a showstopper that looks as good as it tastes.
What Makes This Version Stand Out
- Flavor: The maple syrup and lemon juice create a bright, balanced glaze that enhances the pears’ natural sweetness without overpowering it.
- Texture: The butter caramelizes into a crisp shell, while the inside remains tender and juicy, providing a delightful contrast.
- Ingredient Quality: Using high‑quality, ripe pears and real maple syrup makes the difference between a good dessert and a great one.
- Simplicity: No elaborate sauces or fancy equipment required—just a baking dish, a timer, and a little love.
- Make‑Ahead: You can assemble the pears a day ahead, refrigerate, and bake when you’re ready—perfect for busy evenings.
- Versatility: Serve with Greek yogurt, vanilla ice cream, or a sprinkle of nuts for a customizable finish.
Alright, let’s break down exactly what goes into this masterpiece.
Inside the Ingredient List
The Flavor Base
Maple syrup is the heart of this recipe. It’s not just a sweetener; it’s a flavor carrier that infuses the pears with a deep, caramel-like richness. If you use a light or golden syrup, the taste will be noticeably milder, so stick with a dark or amber variety for the most authentic experience. A pinch of sea salt can also lift the sweetness, but it’s optional.
Lemon juice provides a bright counterpoint to the maple’s sweetness, cutting through the richness and adding a subtle tartness that keeps the glaze from feeling cloying. Without it, the pears would taste heavy and syrupy. If you’re allergic to citrus, a splash of apple cider vinegar will work as a suitable substitute.
The Texture Crew
Butter is the secret weapon that creates the golden crust. As it melts, it forms a glossy coating that crisps up during baking, giving the pears a satisfying crunch on the outside while the inside stays silky. A tablespoon of butter is enough to coat the surface of each pear; too much and you’ll end up with a greasy finish.
Ground cinnamon adds a subtle warmth and depth to the glaze, complementing the maple’s caramel notes. If you’re not a fan of cinnamon, you can substitute it with nutmeg or allspice for a different aromatic profile. A pinch of freshly ground black pepper can also add a surprising layer of complexity.
The Unexpected Star
Walnuts or pecans provide a crunchy texture and nutty flavor that contrasts beautifully with the soft pears. The nuts also add a protein boost, making this dessert more satisfying. If you’re allergic to nuts, chopped dried apricots or raisins can replace them while still delivering a chewy texture.
Choosing the right nuts matters. For a subtle flavor, walnuts are ideal; for a sweeter, buttery taste, pecans shine. Toast them lightly before adding to the glaze to enhance their aroma and bring out their natural oils.
The Final Flourish
Greek yogurt or vanilla ice cream is the finishing touch that turns this dish into a decadent dessert. The yogurt adds creaminess without the heaviness of full‑fat dairy, while the ice cream provides a classic, indulgent finish. If you prefer a vegan option, coconut cream or a dairy‑free yogurt works beautifully.
When you spoon the yogurt or ice cream over the warm pears, the heat causes a gentle melt that creates a luscious, molten center. This is the moment you’ll want to savor the contrast between the cold, creamy topping and the warm, caramelized fruit.
Everything’s prepped? Good. Let’s get into the real action.
The Method — Step by Step
- Preheat your oven to 375°F (190°C). Line a baking dish with parchment paper so the pears won’t stick. This step ensures even baking and a clean cleanup.
- While the oven heats, slice the pears in half and remove the core with a melon baller or a small spoon. This creates a cavity that will hold the glaze and ensures the fruit cooks evenly.
- In a small saucepan, combine the maple syrup, lemon juice, and cinnamon. Heat over medium heat until the mixture is smooth and fragrant, about 2–3 minutes. Watch for bubbles; the glaze should be glossy but not boiling.
- Add the butter to the glaze and stir until it’s fully melted and incorporated. The butter will give the glaze a rich sheen and help it caramelize on the pears.
- Place the pear halves in the prepared baking dish, cut side up. Spoon the warm glaze over each piece, ensuring every surface is coated. The glaze will seep into the cavity, creating a caramelized pocket.
- Sprinkle the chopped nuts over the glazed pears. They’ll toast slightly in the oven, adding crunch and nutty aroma. If you’re using a nut alternative, adjust the quantity accordingly.
- Bake for 20–25 minutes, or until the pears are tender and the glaze has thickened. The edges should start pulling away from the parchment, indicating caramelization.
- Remove the dish from the oven and let the pears rest for 5 minutes. This resting period allows the glaze to set and the flavors to meld.
- Serve each pear with a generous spoonful of Greek yogurt or a scoop of vanilla ice cream. The contrast of warm fruit and cool cream is pure bliss.
That’s it— you did it. But hold on, I’ve got a few more tricks that will take this to another level.
Insider Tricks for Flawless Results
The Temperature Rule Nobody Follows
Many people bake pears at 350°F, but this recipe calls for 375°F. The higher temperature caramelizes the glaze faster, creating a crisp outer shell while keeping the interior juicy. If you’re using a convection oven, reduce the temperature by 25°F to avoid over‑browning.
Why Your Nose Knows Best
As the pears bake, you’ll notice a sweet, caramel aroma rising. This scent is the key indicator that the glaze is thickening properly. If the smell feels too syrupy, lower the oven temperature slightly. Trust your nose—it’s your best judge of doneness.
The 5-Minute Rest That Changes Everything
After baking, let the pears rest for exactly five minutes. This brief pause allows the glaze to set, preventing it from running off when you add the yogurt or ice cream. It also lets the fruit’s juices redistribute, making each bite more flavorful.
A Pinch of Salt
Adding a tiny pinch of sea salt to the glaze brings out the maple’s sweetness and balances the richness. It’s a subtle touch that can make the difference between good and unforgettable.
The Quick Toast
If you’re short on time, toast the nuts in a dry skillet over medium heat for 2 minutes before adding them to the pears. This step boosts their flavor and ensures they stay crunchy.
Creative Twists and Variations
This recipe is a playground. Here are some of my favorite ways to switch things up:
Maple‑Spiced Pears
Add a dash of smoked paprika to the glaze for a subtle smokiness that pairs beautifully with the maple. This variation works well for a fall-themed dessert.
Citrus Burst
Replace the lemon juice with orange zest and a splash of orange juice. The bright citrus notes create a refreshing contrast to the warm pears.
Nut-Free Delight
Omit the nuts entirely or replace them with chopped dried cranberries. The cranberries add a tart bite that complements the sweet glaze.
Vegan Version
Swap the butter for coconut oil and use a dairy‑free yogurt or a scoop of coconut ice cream. The result is a creamy, indulgent dessert that’s plant‑based.
Savory Twist
For a savory take, sprinkle a pinch of rosemary and a dash of balsamic vinegar into the glaze. Serve alongside grilled chicken or pork for a balanced meal.
Storing and Bringing It Back to Life
Fridge Storage
Store the baked pears in an airtight container in the refrigerator for up to 3 days. The glaze may thicken slightly, but it will soften again when reheated gently.
Freezer Friendly
Wrap each pear individually in plastic wrap and place them in a freezer bag. They’ll keep for up to 2 months. Thaw in the refrigerator overnight before reheating.
Best Reheating Method
Reheat the pears in a 350°F oven for 5–7 minutes, or until warm. Add a tiny splash of water before reheating to steam them back to perfection, preventing the glaze from drying out.