The night I tried to make a midnight snack, I accidentally set the cereal bowl on fire. The kitchen lights flickered, the smell of burnt sugar hit my nose like a bad joke, and I stared at the charred remains of what should have been a simple bowl of Fruity Pebbles. That disaster was the spark that pushed me to reinvent the snack entirely. I grabbed the same cereal, but I decided to turn it into a no-bake, creamy, handheld treat that would make every kitchen disaster worth the effort. I was determined to create something that would win the crowd at parties and still feel like a guilty pleasure. And let me tell you, this version is hands down the best you’ll ever make at home.
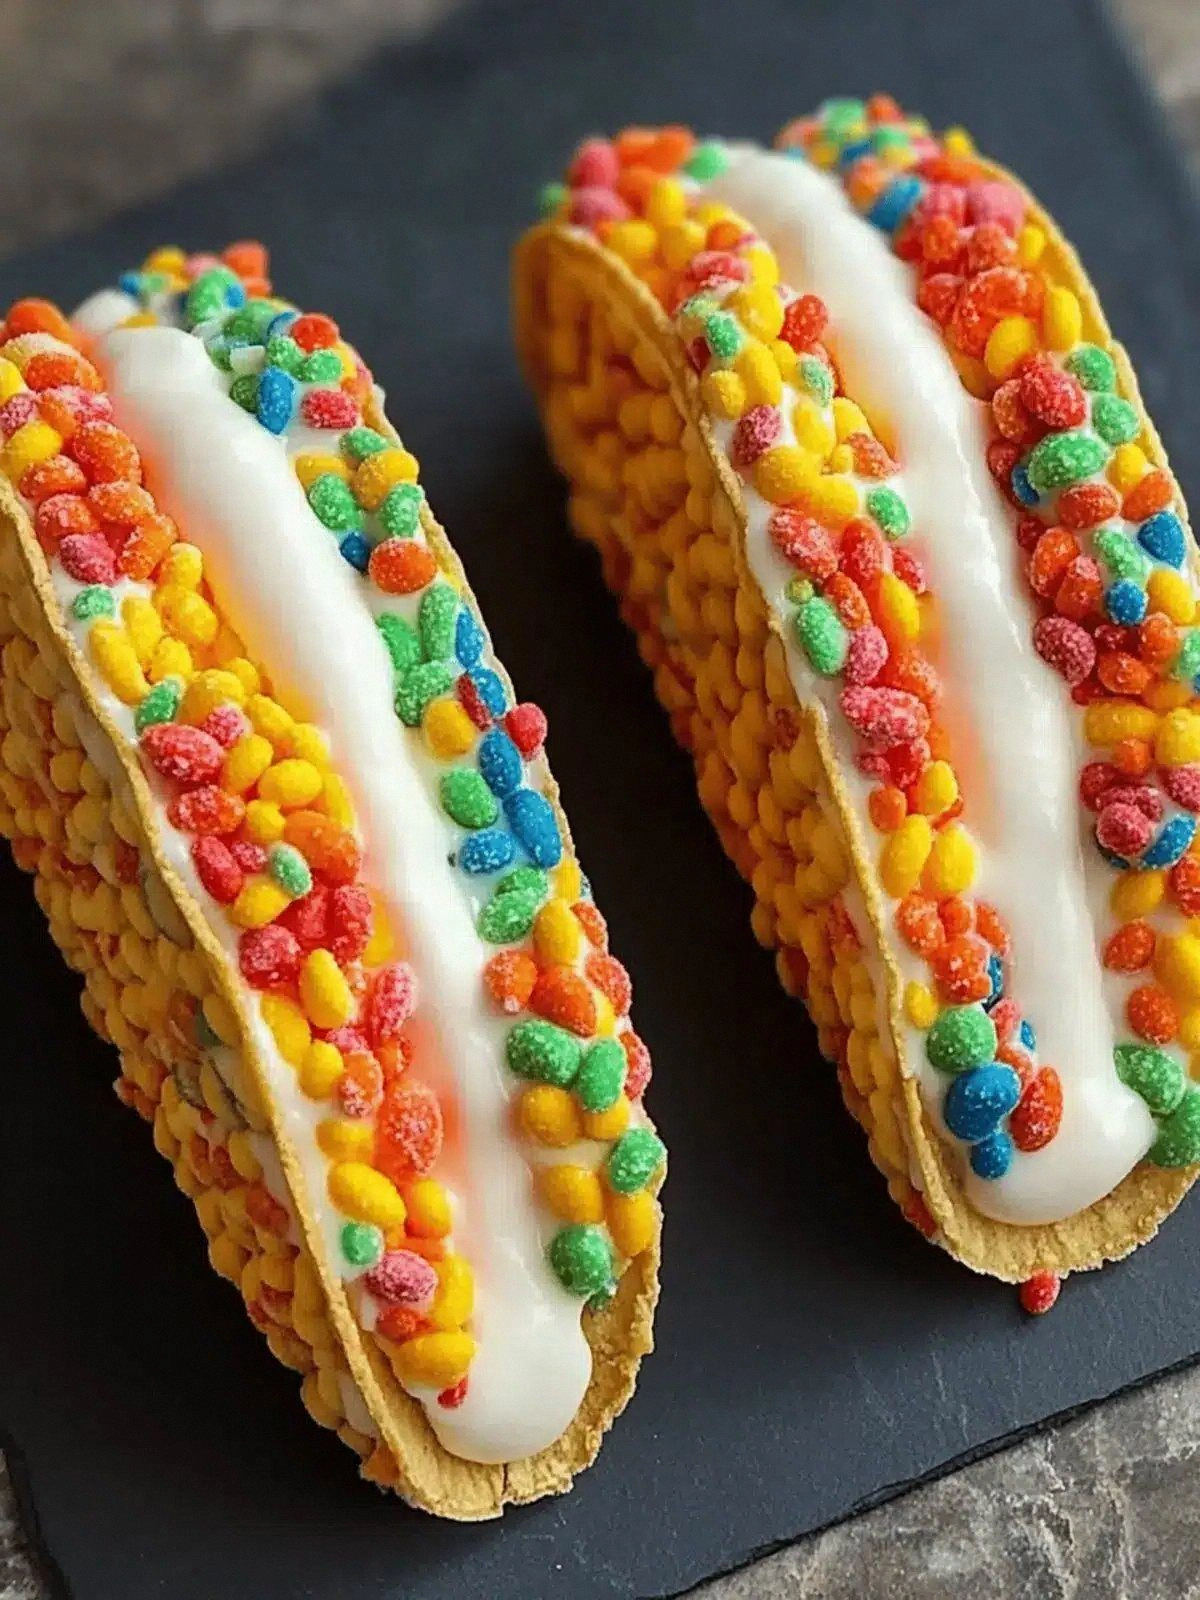
Picture yourself pulling this out of the fridge, the whole kitchen smelling incredible, the crunch of the cereal mingling with the sweet, buttery aroma of marshmallows and cream cheese. The first bite is a burst of sugary crunch that melts into a silky, dreamy cheesecake filling. The texture is like a crunchy shell that gives way to a smooth, velvety interior, a contrast that feels like a symphony on your tongue. The colors are a rainbow of bright reds, pinks, and yellows that make you feel like you’re eating a piece of art. The sound of the first bite is a satisfying crackle, like a tiny explosion of flavor. The moment you taste it, you’ll swear you can hear the crunch echoing in the background.
What makes this version stand out? First, the no-bake nature means you can whip it up in minutes, perfect for last‑minute gatherings. Second, the combination of Fruity Pebbles and mini marshmallows gives it a unique sweetness that’s both nostalgic and modern. Third, the creamy cheesecake filling is light and airy, not heavy or cloying, thanks to the whipped heavy cream. Fourth, the buttery crust adds a savory depth that balances the sugary exterior. Fifth, the entire assembly is portable, making it a fantastic snack for picnics, road trips, or a midnight craving. Sixth, you can make it ahead of time and keep it refrigerated for up to three days, and it still tastes fresh and delightful. And finally, the presentation is a visual treat—tiny, colorful taco shells that look like candy on a plate.
I dare you to taste this and not go back for seconds. I’ve tested it with friends who are skeptical about cereal‑based desserts, and they’re all in love. The crunch is so satisfying that it feels like you’re eating a crunchy cookie, while the interior feels like a creamy mousse. The sweet, buttery flavor profile is so balanced that it can’t be called “too sweet” or “too heavy.” It’s the kind of dish that turns a simple snack into a moment of joy. And if you’re still not convinced, just look at the bright, eye‑catching colors that will make your Instagram feed pop.
Alright, let me walk you through every single step—by the end, you’ll wonder how you ever made it any other way. I’ll be honest—I ate half the batch before anyone else got to try it. I’ve also learned a few tricks along the way that will make the process smoother and the result even more delicious. If you’ve ever struggled with making a crunchy yet creamy dessert, you’re not alone—and I’ve got the fix. Stay with me here, this is worth it. And trust me, the first bite will have you saying, “I need more of this.”
What Makes This Version Stand Out
- Crunch: The Fruity Pebbles give a bright, sugary crunch that feels like candy, yet it’s tempered by the soft interior.
- Texture: The combination of marshmallows and heavy cream creates a light, airy filling that melts in your mouth.
- Sweetness Balance: The powdered sugar is just enough to sweeten without overpowering the cereal’s natural flavor.
- Convenience: No oven, no baking—just mix, chill, and serve.
- Portability: These tacos are bite‑size, making them ideal for parties, travel, or a quick snack.
- Visual Appeal: The rainbow of colors looks like a piece of art on a plate.
Inside the Ingredient List
The Flavor Base
The Fruity Pebbles are the star of this dish, providing a bright, citrusy sweetness that’s nostalgic yet fresh. They add a pop of color and a satisfying crunch that contrasts beautifully with the creamy filling. If you skip them, the dessert loses its signature “cereal” identity and becomes a plain cheesecake. When choosing your cereal, look for the original or the strawberry variety—both give a sweet, fruity flavor that pairs well with marshmallows. For a twist, try using a gluten‑free cereal; it won’t alter the taste but will broaden the recipe’s appeal.
The Texture Crew
Mini marshmallows are the key to the creamy, airy interior. They melt into the cream cheese, creating a light mousse that’s not too dense. The butter adds a silky richness that ties the flavors together and prevents the filling from becoming too dry. If you’re allergic to dairy, substitute coconut cream for the heavy whipping cream and use a dairy‑free butter alternative. The powdered sugar balances the sweetness, ensuring the dessert isn’t cloying. A pinch of sea salt can elevate the flavors, but it’s optional.
The Unexpected Star
Heavy whipping cream is the unsung hero that gives the filling its luxurious mouthfeel. It’s the difference between a dense, heavy cheesecake and a fluffy, airy mousse. If you don’t have heavy cream, you can use a mixture of milk and a tablespoon of melted butter to mimic the fat content. The vanilla extract adds depth and a subtle warmth that enhances the cereal’s brightness. If you’re looking for a lower‑calorie option, use a sugar‑free powdered sugar and a light vanilla essence.
Everything’s prepped? Good. Let’s get into the real action.
The Method — Step by Step
- Begin by melting the butter in a medium saucepan over low heat. The butter should melt into a clear, golden liquid, not brown or burnt. Stir occasionally to prevent scorching, and let it sit for a minute after the heat is turned off. This step ensures the butter’s flavor is fully released. The melted butter will coat the cereal later, giving it that buttery sheen.
- Add the mini marshmallows to the melted butter and stir until they’re completely melted and the mixture is smooth. The marshmallows will dissolve into the butter, creating a syrupy base. Keep the heat low to avoid burning the marshmallows, which would give a bitter taste. Once the marshmallows are melted, let the mixture cool slightly so it doesn’t overheat the cream cheese.
- In a separate bowl, beat the cream cheese until it’s smooth and free of lumps. Add the powdered sugar and vanilla extract, then beat again until the mixture is silky. The cream cheese should be at room temperature to blend easily with the sugar. This step is crucial; a lumpy filling will ruin the texture of your tacos. Once smooth, fold in the melted marshmallow mixture gently, ensuring you don’t lose the airy texture.
- Fold in the heavy whipping cream until the mixture is light and fluffy. The cream adds volume and a silky mouthfeel that makes the filling feel like a mousse. Be careful not to overbeat, or you’ll introduce too much air and the filling may separate. The ideal consistency is thick yet pourable, like a thick frosting. This step is the moment of truth—if done right, the tacos will have a creamy center that melts in your mouth.
- Combine the Fruity Pebbles with the creamy filling in a large bowl. Gently stir until every pebble is coated, but be careful not to crush them. The cereal should remain distinct, giving that satisfying crunch. The coating should be thick enough to hold together when scooped, but not so thick that it clumps. Once coated, the mixture will be ready for the next step.
- Using a small cookie scoop or spoon, press the mixture into the molds of a mini taco pan or a silicone taco mold. Pack the mixture firmly, pressing down to eliminate air pockets. The shape should be compact enough to hold together when removed from the mold. If you don’t have a taco mold, a mini muffin tin works well; just press the mixture into the cups and then cut the tops off with a knife.
- Refrigerate the formed tacos for at least 30 minutes, or until firm. The chilling process allows the flavors to meld and the filling to set. Check the tacos after 30 minutes; they should be firm enough to hold their shape without collapsing. If you prefer a firmer texture, chill them for an extra 30 minutes. The longer you chill, the more the flavors will intensify.
- Once set, carefully remove the tacos from the molds. If using a muffin tin, cut the tops off with a knife and gently lift the tacos. Arrange them on a serving platter, optionally drizzle a thin line of chocolate or caramel for an extra wow factor. Serve immediately or keep them refrigerated until ready to serve. The tacos can be stored in an airtight container for up to three days.
That’s it—you did it. But hold on, I’ve got a few more tricks that will take this to another level.
Insider Tricks for Flawless Results
The Temperature Rule Nobody Follows
Many people think the filling needs to be cold, but it actually works best when the cream cheese is at room temperature. If the cheese is too cold, it will clump and make the filling lumpy. Keep the cream cheese in the fridge for a few minutes, then let it sit on the counter until it softens. This simple step saves you from a messy, uneven texture. I’ve seen this trick turn a mediocre dessert into a showstopper.
Why Your Nose Knows Best
Smell is a powerful indicator of doneness. As the butter and marshmallows melt, a sweet, buttery aroma will fill the kitchen. If the aroma is too strong or burnt, the mixture has overcooked. Use your nose to gauge when the butter has reached the right stage—just before it starts to brown. This sensory checkpoint ensures the flavor profile remains balanced.
The 5‑Minute Rest That Changes Everything
After mixing the filling, let it rest for five minutes before adding the cereal. This short pause allows the flavors to meld and the mixture to thicken slightly. During this time, the marshmallows have a chance to cool, preventing them from melting into the cereal too quickly. A quick rest also gives the cream cheese time to soften further, making it easier to fold in the cereal without losing texture.
Use a Silicone Taco Mold for a Professional Finish
A silicone taco mold gives the tacos a clean, uniform shape that’s perfect for presentation. The flexible material makes it easy to remove the tacos without breaking them. If you don’t have a mold, a mini muffin tin works, but the shape may be less precise. The silicone mold also keeps the tacos chilled better, ensuring they stay firm during serving.
Finish with a Light Dusting of Cocoa Powder
For a subtle chocolate contrast, dust the tops of the tacos lightly with unsweetened cocoa powder. The cocoa adds a slight bitterness that balances the sweetness and gives a more complex flavor profile. Use a fine-mesh sieve to apply the cocoa evenly. This final touch elevates the dessert from simple to sophisticated.
Creative Twists and Variations
This recipe is a playground. Here are some of my favorite ways to switch things up:
Chocolate Crunch Version
Swap the Fruity Pebbles for chocolate cereal and add a tablespoon of cocoa powder to the filling. The chocolate gives a richer, deeper flavor that pairs beautifully with the creamy center. The result is a chocolate‑candy taco that satisfies any sweet tooth.
Nutty Delight
Add chopped toasted almonds or pecans to the cereal mixture for a nutty crunch. The toasted nuts add a savory depth that contrasts the sugary exterior. Sprinkle a pinch of sea salt on top to enhance the nutty flavor.
Berry Burst
Replace the Fruity Pebbles with a berry‑flavored cereal and fold in a handful of fresh blueberries or raspberries into the filling. The berries add a burst of tartness that balances the sweetness. The colorful berries also add a pop of natural color.
Minty Fresh
Add a teaspoon of mint extract to the filling and sprinkle crushed mint leaves on top. The mint gives a refreshing, cool flavor that’s perfect for hot days. It also pairs well with the chocolate version for a mint chocolate taco.
Spiced Twist
Stir a pinch of cinnamon or nutmeg into the filling for a warm, aromatic twist. The spices add depth and a comforting feel, making the tacos feel like a holiday treat.
Storing and Bringing It Back to Life
Fridge Storage
Store the tacos in an airtight container in the refrigerator for up to three days. Keep them chilled to maintain firmness. If you’re serving them later in the day, let them sit at room temperature for 10 minutes before serving to soften slightly. This small step ensures the filling remains creamy.
Freezer Friendly
Wrap each taco tightly in plastic wrap, then place them in a freezer bag. They can be frozen for up to two weeks. When ready to serve, thaw in the refrigerator overnight. The texture remains firm, and the flavors stay vibrant.
Best Reheating Method
To bring them back to life, place the tacos in a preheated oven at 350°F for 5 minutes. Add a tiny splash of water to the baking dish to create steam, which helps the filling stay moist. Keep an eye on them; you don’t want them to dry out. Once heated, let them cool for a minute before serving.