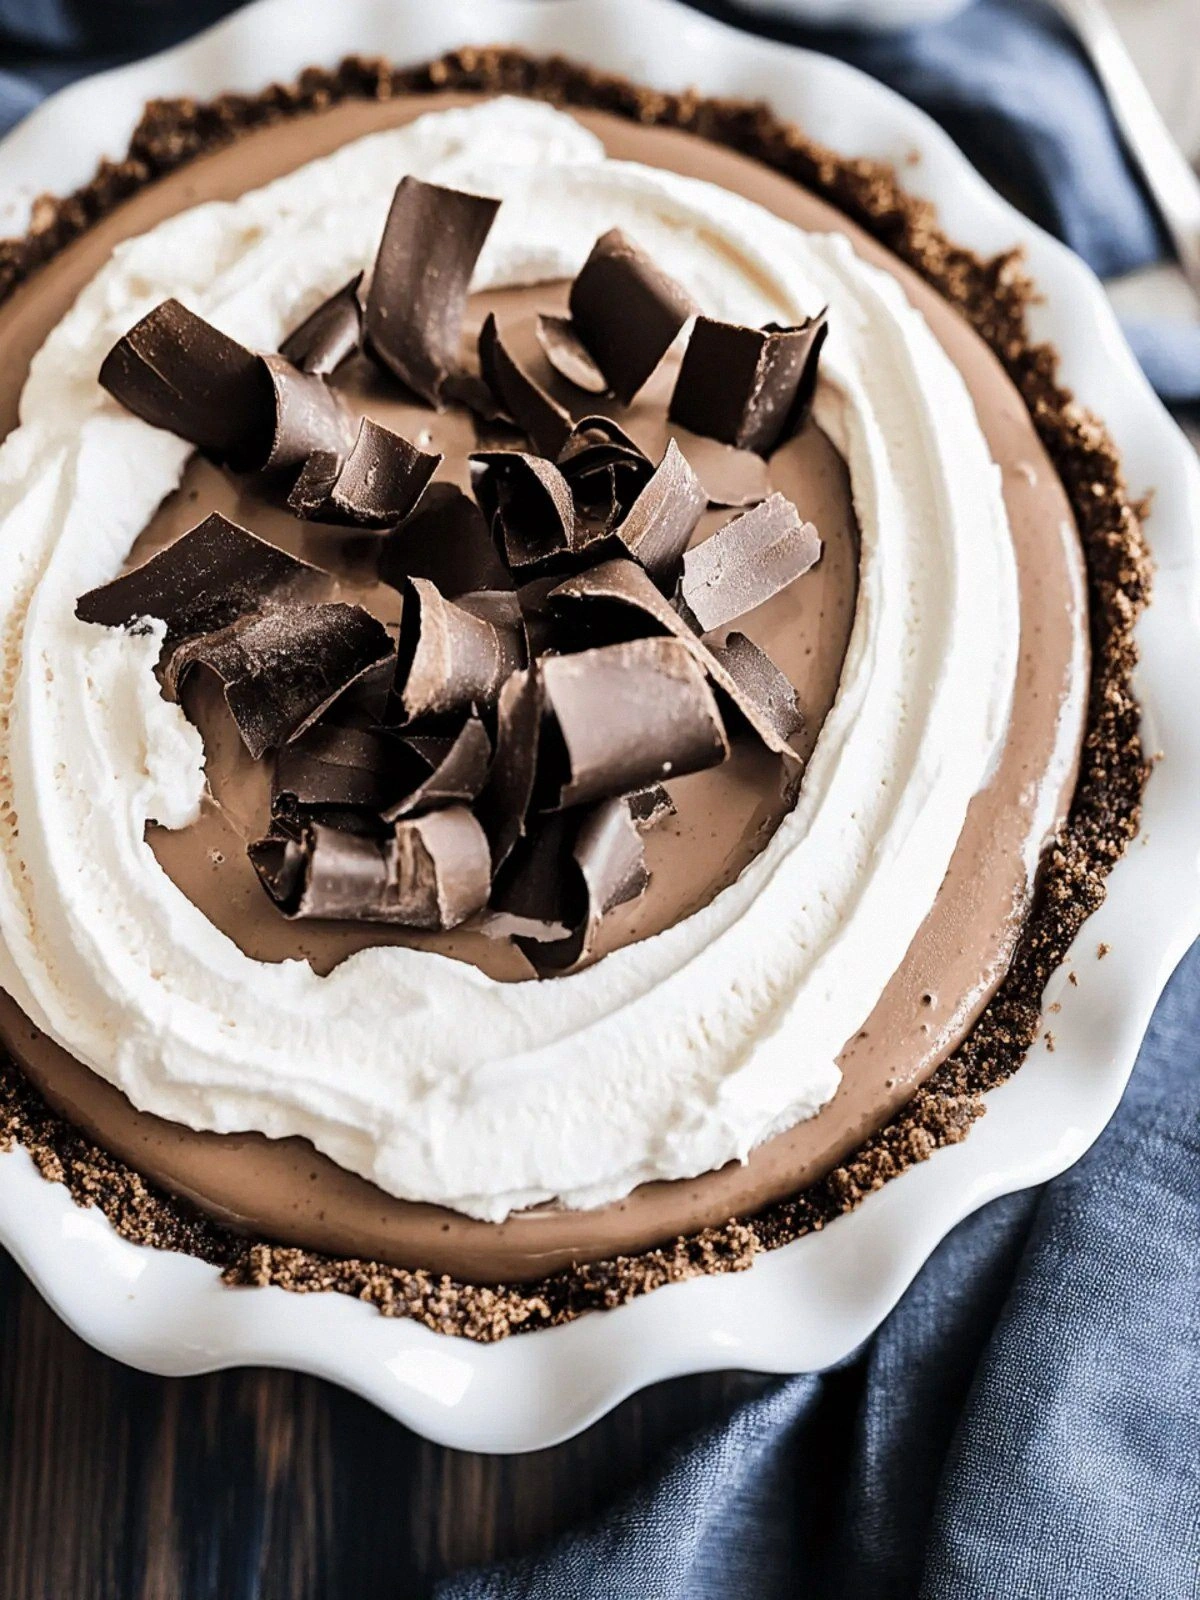
I was halfway through a midnight snack, eyes bleary, when the kitchen became a battlefield. A jar of Oreo cookies had slipped from my hand and landed on the counter with a satisfying thud. The crumbs scattered like confetti, and the sweet scent of chocolate seemed to haunt the air. I stared at the mess, wondering if there was a way to turn that chaos into something edible. I decided to turn the disaster into a dessert, and thus the idea of a silky chocolate mousse with a buttery Oreo crust was born.
The kitchen was a symphony of sounds: the clatter of spoons, the hiss of butter melting, and the gentle thump of a mixing bowl against the counter. The air filled with the rich aroma of chocolate melting into butter, a scent that made my mouth water. My fingertips tingled as I pressed the crushed Oreos into the base of a pan, feeling the crumbs compress into a solid foundation. The sound of the spoon hitting the bowl was almost meditative, a rhythm that guided my hands. With each stir, the mixture thickened, the chocolate deepening into a glossy, velvety hue.
What makes this version different is the way the Oreo crust holds the mousse like a velvet glove. The crust is not just a base; it’s a buttery, caramelized shell that adds crunch and a subtle sweetness that balances the bitterness of the chocolate. The mousse, on the other hand, is airy and light, yet rich enough to satisfy any chocolate craving. The vanilla infusion in both the crust and the mousse adds depth, creating a harmonious flavor profile that lingers on the palate. This combination of textures and flavors makes the dessert unforgettable.
And there’s a twist: a splash of vanilla in the crust that turns it into a caramelized secret. This subtle addition gives the crust an unexpected depth, almost like a hidden layer of caramel that melts in your mouth. The vanilla also brightens the chocolate, cutting through the richness without overpowering it. The result is a dessert that feels indulgent yet surprisingly balanced. It’s the kind of detail that turns a simple recipe into a culinary masterpiece.
Let me walk you through every single step — by the end, you'll wonder how you ever made it any other way. I’ll share the secrets that keep the mousse silky, the crust buttery, and the overall experience unforgettable. This is hands down the best version you'll ever make at home. I dare you to taste this and not go back for seconds. Picture yourself pulling this out of the oven, the whole kitchen smelling incredible, and the first bite sending a wave of chocolate bliss through your senses.
What Makes This Version Stand Out
- Texture: The Oreo crust offers a buttery crunch that contrasts perfectly with the smooth, airy mousse. The crust’s caramelized edges provide a subtle caramel flavor that lingers. It’s a textural dance that keeps each bite interesting.
- Flavor Depth: The combination of bittersweet chocolate and vanilla creates a layered taste profile. The vanilla’s warmth cuts through the chocolate’s richness, leaving a clean finish. This depth turns a simple dessert into a sophisticated treat.
- Ease of Prep: The recipe requires minimal equipment and can be made in under an hour. The steps flow naturally, making it beginner-friendly yet impressive. It’s the kind of dish that feels effortless when you’re done.
- Make‑Ahead Friendly: Once the mousse sets, it can be refrigerated for up to 24 hours. The crust remains crisp, and the mousse stays silky. This makes it perfect for parties or last-minute dessert needs.
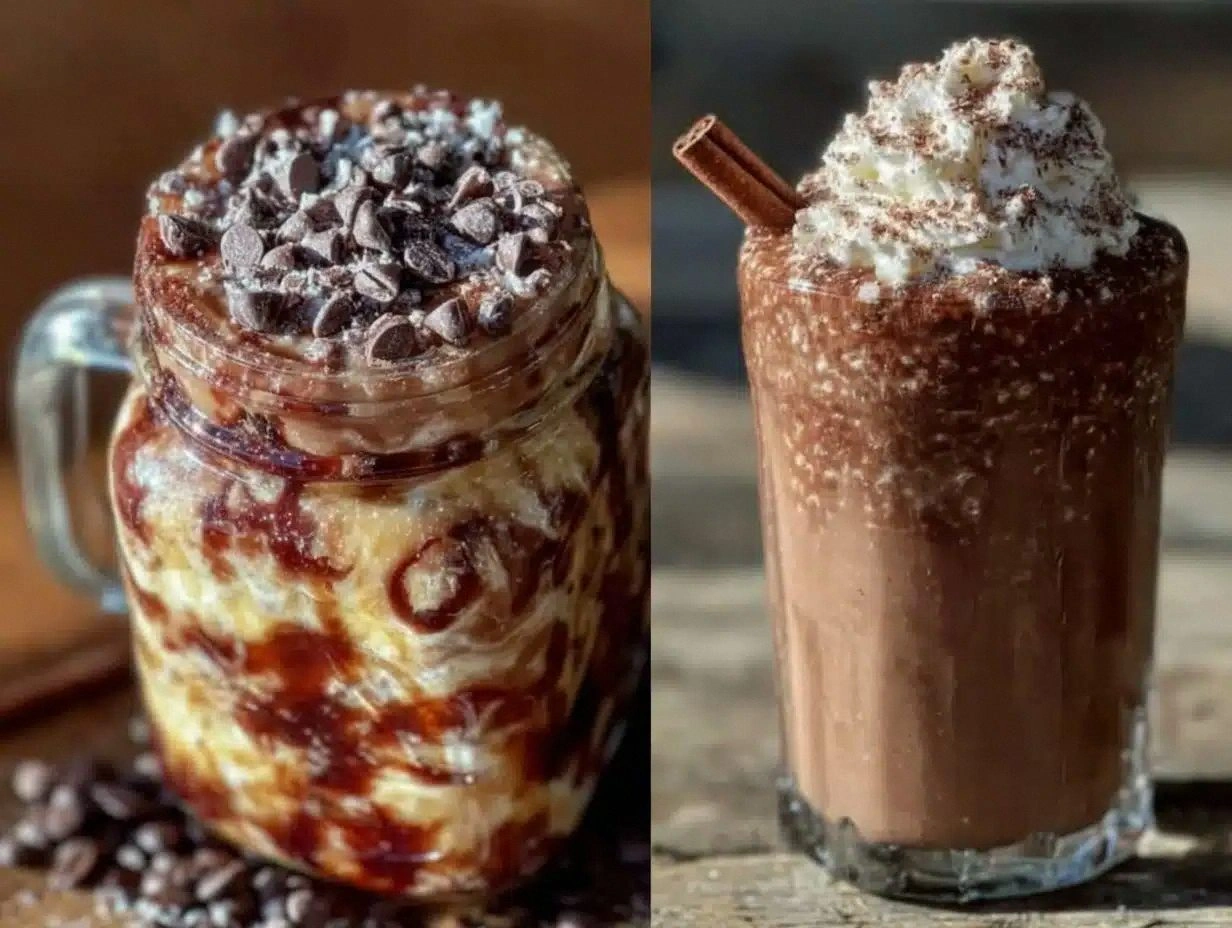
- Visual Appeal: The glossy chocolate top and the contrast of the golden crust make the dessert a showstopper. A dusting of cocoa or chocolate shavings adds an elegant finish. It’s a dessert that looks as good as it tastes.
- Ingredient Quality: Using high-quality bittersweet chocolate and fresh eggs elevates the flavor profile. The butter’s richness is essential for the crust’s buttery character. Every ingredient plays a role in creating a flawless dessert.
- Guest Reaction: Most people who try this dessert are surprised by how light it feels, even though it’s packed with chocolate. The crowd reaction is always enthusiastic, making it a conversation starter at gatherings.
- Versatility: The recipe can be adapted for dietary restrictions, such as using dairy-free chocolate or vegan butter. This flexibility makes it a go-to dessert for many different occasions.
Inside the Ingredient List
The Flavor Base
The 20 Oreo cookies are the backbone of the crust. They provide both crunch and a subtle chocolate flavor that sets the stage for the mousse. If you prefer a slightly sweeter crust, you can substitute half of the Oreos with chocolate sandwich cookies. The cookies’ filling adds a hint of vanilla that complements the vanilla in the mousse. Skipping the Oreos would dramatically change the texture and flavor profile.
Granulated sugar, 1 1/3 cups, balances the bitterness of the chocolate. It also helps caramelize the crust, giving it that golden-brown finish. If you’re watching your sugar intake, you can reduce the amount to 1 cup, but the crust will be slightly less sweet. The sugar’s role is to create a smooth, glossy surface. It’s an essential component that cannot be omitted.
Unsalted butter, 3 tablespoons, melts into the Oreo crumbs, binding them together and adding richness. Butter’s high fat content creates a tender crust that doesn’t crumble. If you’re vegan, you can use a plant‑based butter alternative. The butter also helps the crust brown evenly during baking. Without butter, the crust would be dry and crumbly.
Vanilla extract, 2 teaspoons, is added to the crust to deepen the flavor. Vanilla’s warm, floral notes counteract the chocolate’s bitterness. It also adds a subtle aroma that makes the dessert more inviting. If you’re allergic to vanilla, you can replace it with almond extract for a different twist. The vanilla is a small but crucial element in the crust’s overall profile.
The Texture Crew
Large eggs, 4 in total, are the backbone of the mousse. They provide structure and help the mousse set firmly. The yolks also add richness, while the whites help to aerate the mixture. If you’re concerned about raw eggs, you can use pasteurized eggs or a commercial mousse mix. Skipping eggs would result in a runnier mousse that won’t hold its shape.
Bittersweet baking chocolate, 8 ounces, gives the mousse its deep, complex flavor. The high cocoa content ensures a robust chocolate taste without being overly sweet. If you prefer a lighter chocolate, you can use dark chocolate with a lower cocoa percentage. The chocolate also contributes to the mousse’s silky texture when melted properly. It’s the star ingredient that defines the dessert.
Unsalted butter, 10 tablespoons, is folded into the chocolate to create a glossy, buttery mousse. The butter’s fat content smooths the chocolate, preventing lumps. If you’re looking for a vegan version, you can use coconut oil or a dairy-free butter substitute. The butter also adds a subtle caramel note that pairs well with the chocolate. Without it, the mousse would be dry and less luxurious.
Heavy cream, 1 1/3 cups, is whipped into the chocolate mixture to create a light, airy texture. The cream’s fat content gives the mousse a silky mouthfeel. If you’re lactose intolerant, you can use a non‑dairy cream alternative. The cream also helps the mousse set quickly in the refrigerator. It’s a key ingredient that gives the dessert its signature fluffiness.
The Unexpected Star
Powdered sugar, 4 teaspoons, is added to the mousse for sweetness and to help stabilize the mixture. It dissolves quickly, preventing gritty textures. If you prefer a sugar-free version, you can use a sugar substitute that dissolves well, such as erythritol. The powdered sugar’s fine texture is essential for a smooth mousse. Skipping it would make the mousse taste raw and unbalanced.
Vanilla extract, 1 teaspoon, is folded into the mousse to enhance the chocolate flavor. This small amount of vanilla adds depth and warmth. If you want a stronger vanilla presence, you can increase the amount to 2 teaspoons. The vanilla also balances the bitterness of the chocolate. It’s a subtle yet vital flavor enhancer.
The Final Flourish
Heavy cream, 1 cup, is whipped into a light, airy topping that crowns the mousse. The whipped cream’s lightness contrasts beautifully with the dense chocolate mousse. If you prefer a richer topping, you can add a tablespoon of butter to the cream before whipping. The whipped cream also adds a silky finish that makes each bite feel indulgent. It’s the final touch that completes the dessert.
Powdered sugar, 2 tablespoons, sweetens the whipped topping and helps it hold its shape. It also adds a slight sparkle to the surface. If you’re watching sugar, you can reduce the amount to 1 tablespoon. The powdered sugar’s fine texture prevents clumps in the whipped cream. It’s an essential component for a stable, sweet topping.
Vanilla extract, 1 teaspoon, is folded into the whipped topping for a fragrant finish. The vanilla’s warmth enhances the cream’s sweetness and adds a fragrant aroma. If you’re allergic to vanilla, you can replace it with a pinch of cinnamon for a different twist. The vanilla also balances the richness of the cream. It’s a small but powerful flavor enhancer.
Chocolate shavings or cocoa powder, optional garnish, add a final touch of decadence. They provide an extra burst of chocolate flavor and a pleasing visual contrast. If you’re vegan, you can use cocoa powder instead of shavings. The garnish also adds a subtle crunch if you choose shavings. It’s a simple addition that elevates the dessert.
Everything's prepped? Good. Let's get into the real action.
The Method — Step by Step
- Preheat your oven to 350°F (175°C). Line a 9-inch springform pan with parchment paper, ensuring it’s snug and secure. Press the crushed Oreo crumbs, butter, sugar, and vanilla into the pan, forming an even crust. Chill the crust in the refrigerator for 15 minutes to set. This step ensures a firm base that won’t crumble when you add the mousse.
- In a heat‑proof bowl, combine the bittersweet chocolate and 10 tablespoons of butter. Place the bowl over a pot of simmering water, stirring until the chocolate melts smoothly. The butter should fully incorporate, creating a glossy mixture. Remove from heat and let it cool slightly so it’s warm but not hot when you fold in the eggs.
- Whisk the eggs in a separate bowl until they’re slightly frothy. Slowly pour the warm chocolate mixture into the eggs, whisking constantly to avoid scrambling. This gentle incorporation creates a smooth, airy mixture. The result is a mousse that’s light yet rich, with a glossy sheen.
- Fold in the heavy cream, powdered sugar, and vanilla extract until the mixture is silky and uniform. The cream’s fat content helps stabilize the mousse, while the sugar ensures a balanced sweetness. If the mixture looks too thick, add a splash of milk to thin it out slightly. This step is crucial for achieving the perfect texture.
- Pour the mousse into the chilled crust, smoothing the top with a spatula. Tap the pan lightly on the counter to release any air bubbles. This ensures a smooth surface that will set evenly. The mousse should be glossy and slightly shiny. This is the moment where the dessert starts to look as good as it tastes.
- Refrigerate the assembled dessert for at least 4 hours, or overnight for best results. The mousse will firm up, making it easy to slice and serve. The flavors will meld together, creating a cohesive taste experience. This step is essential for achieving the perfect consistency.
- Whip the 1 cup of heavy cream with 2 tablespoons of powdered sugar and 1 teaspoon of vanilla until soft peaks form. Gently fold the whipped cream into the chilled mousse, creating a light, airy layer. This topping adds a delicate sweetness and a fluffy finish. The mousse should now be smooth, glossy, and ready to serve.
- Before serving, garnish with chocolate shavings or a dusting of cocoa powder. This final touch adds a visual pop and an extra burst of chocolate flavor. Chill the dessert for an additional 15 minutes if you’re serving it cold. Slice carefully using a warm knife for clean edges. Present your masterpiece and watch your guests’ faces light up.
Insider Tricks for Flawless Results
The Temperature Rule Nobody Follows
Chocolate is temperamental; too hot and it becomes greasy, too cold and it’s grainy. Keep the chocolate at a steady 110°F to 120°F while melting. This temperature range ensures a glossy finish and prevents seizing. I once melted chocolate at 140°F, and the mousse turned into a clumpy mess. Always use a thermometer for precision.
Why Your Nose Knows Best
Smell the chocolate as it melts; it should emit a deep, nutty aroma. If it starts to smell burnt, the heat is too high. The scent is a reliable indicator that your chocolate is in the sweet spot. My friend once smelled the chocolate before adding the eggs, and her mousse turned out silky. Trust your nose to guide you.
The 5‑Minute Rest That Changes Everything
After folding the cream into the mousse, let the mixture sit for 5 minutes before pouring it into the crust. This brief pause allows the air bubbles to settle, preventing a lumpy texture. I’ve seen many people skip this step, resulting in a mousse that’s uneven. The rest also helps the flavors meld together for a richer taste.
The Whisk vs. the Mixer Debate
Whisking by hand gives you better control over the mixture’s consistency. However, a hand mixer can speed up the process, especially when whipping the cream. Use a low speed to avoid overwhipping. A friend once used a high speed, and the cream separated, ruining the topping. Find the right balance for your comfort level.
The Secret to a Crispy Crust
Bake the crust for just 10 minutes, then cool it before adding the mousse. Overbaking can make the crust too hard and brittle. The brief bake creates a golden, caramelized surface that crisps nicely. I’ve tried baking for 20 minutes, and the crust turned out dry and crumbly. Stick to the short bake for the perfect crunch.
The Final Touch: A Dash of Espresso
Adding a teaspoon of espresso powder to the chocolate mixture deepens the flavor. Espresso enhances the chocolate’s bitterness without adding a coffee taste. It’s a simple tweak that elevates the dessert to a gourmet level. I’ve used it for special occasions, and the result is always a hit. Try it next time you crave an extra punch.
Creative Twists and Variations
Nutty Crunch
Add chopped pistachios to the Oreo crust for a nutty crunch. The pistachios pair beautifully with the chocolate, adding a subtle earthiness. They also provide a contrasting texture that elevates the dessert. My friend loves this version, especially during spring gatherings. It’s a quick upgrade that impresses.
Minty Delight
Swirl in a teaspoon of mint extract into the mousse for a refreshing twist. The mint cuts through the richness, creating a balanced flavor profile. It’s a perfect dessert for summer parties. The mint also adds a subtle green hue, making the dessert visually appealing. Give it a try if you’re craving something cool.
Caramelized Banana
Fold in sliced caramelized bananas into the mousse before chilling. The bananas add natural sweetness and a buttery texture that complements the chocolate. They also give the dessert a tropical flair. My sister loves this version for brunches. It’s an easy way to add fruit to your chocolate dessert.
Sea Salt Finish
Sprinkle a pinch of sea salt over the finished mousse before serving. The salt enhances the chocolate’s depth and balances the sweetness. It creates a delightful contrast on the palate. A friend once added sea salt and said it was the best trick she’d ever used. Try it and taste the difference.
Almond Crumble
Replace the Oreo crust with a mixture of crushed almonds and honey. The almonds provide a nutty flavor, while honey adds a natural sweetness. This version is gluten‑free and adds a crunchy texture. It’s a great alternative for those with dietary restrictions. The almond crumble also pairs well with the mousse.
Chocolate‑Covered Coffee Beans
Drop in a handful of chocolate‑coated coffee beans into the mousse before chilling. The beans add a subtle coffee flavor and a crunchy texture. They also make the dessert feel like a dessert bar. I’ve used this version for holiday parties, and it’s always a hit. It’s a simple way to add a coffee twist.
Storing and Bringing It Back to Life
Fridge Storage
Store the mousse in an airtight container in the refrigerator for up to 48 hours. The mousse will firm up and maintain its texture. Keep it covered to prevent it from absorbing fridge odors. When ready to serve, let it sit at room temperature for 10 minutes to soften slightly. This method preserves the dessert’s quality.
Freezer Friendly
Wrap the mousse tightly in plastic wrap and then in a foil pouch before freezing. It can be stored for up to 2 weeks in the freezer. Thaw the dessert overnight in the refrigerator before serving. The texture remains silky, and the chocolate stays intact. I’ve frozen this dessert for holiday parties, and it always comes out great.
Best Reheating Method
To reheat, place the mousse in a heat‑proof bowl and warm it gently over a pot of simmering water. Stir occasionally until the mousse is warm but not melted. Add a splash of heavy cream to restore moisture and silkiness. Avoid microwaving, as it can cause the chocolate to seize. This method keeps the dessert silky and luscious.