I was standing in my kitchen at 2 a.m., half‑asleep, half‑hungry, and the only thing that kept me from drifting back into dreamland was the faint, buttery whisper of caramel drifting from the pantry. I had just tried to salvage a busted batch of store‑bought truffles that turned out more like gritty sand than silk, and I swore I would never touch another caramel‑laden confection again. Then my roommate dared me: “Make something that’ll make me forget my name and beg for a second bite.” I laughed, rolled up my sleeves, and dove into a pantry raid that felt more like a treasure hunt than a midnight snack run. The result? A batch of salted caramel fudge truffles that are so decadently smooth they could double as a hair‑conditioner for your taste buds.
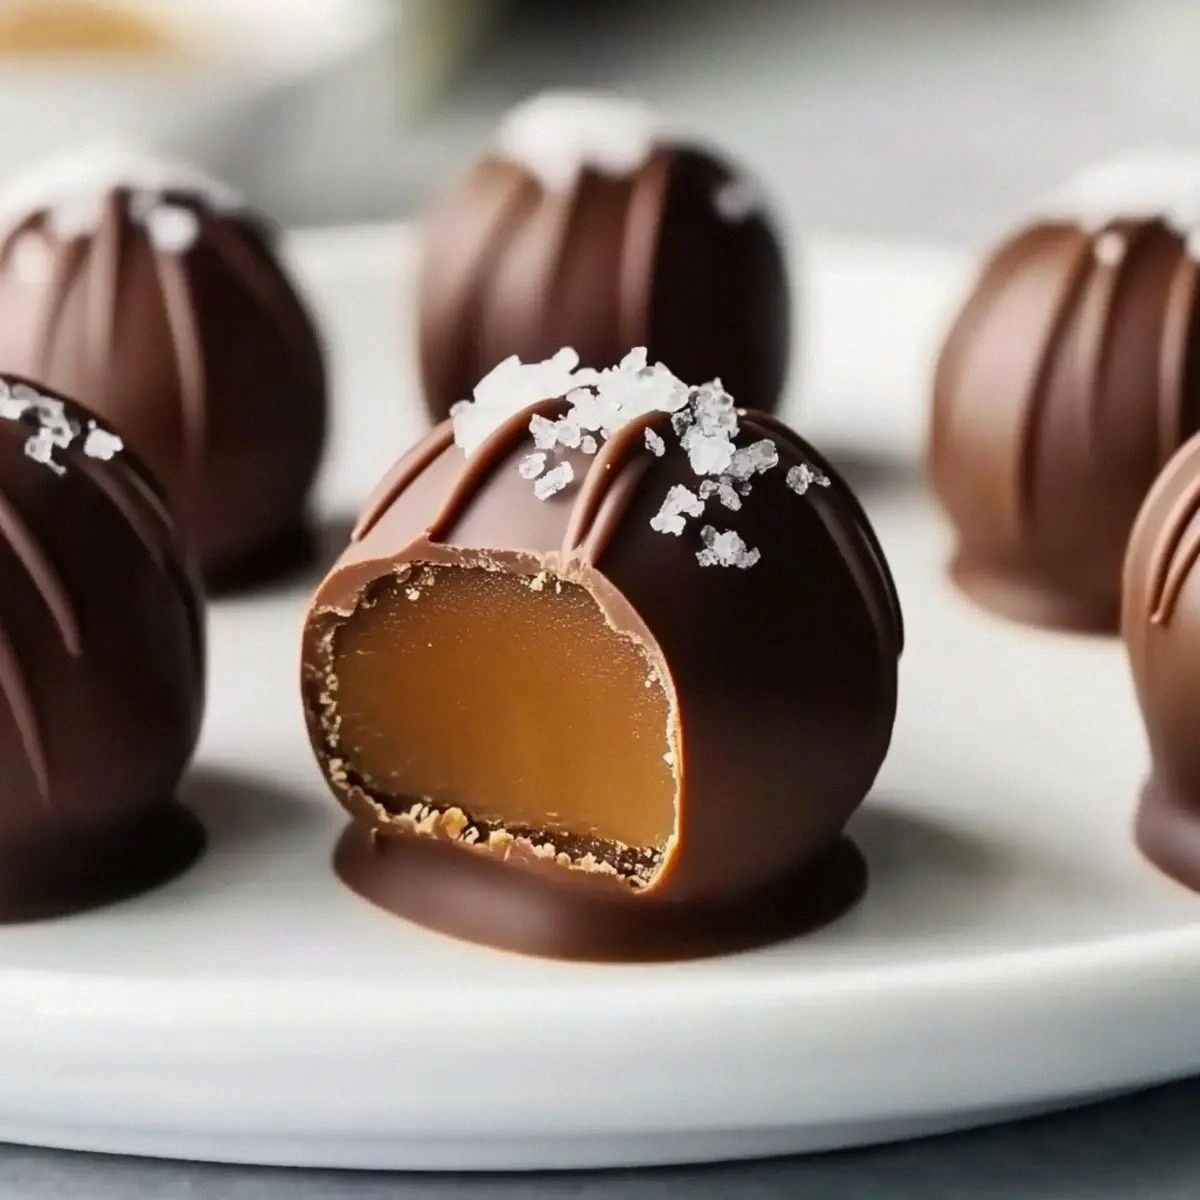
Picture the scene: the kitchen lights humming low, the stainless steel pot warming up, and a caramel river bubbling like a miniature lava flow. The scent of butter melting into that golden caramel is a warm hug that wraps around you, while the faint crackle of chocolate chips hitting the hot mixture is the soundtrack of pure anticipation. When you finally roll the first truffle, its surface glistens like a polished marble, and the first bite releases a symphony of silky fudge, buttery caramel, and that tiny pop of flaky sea salt that snaps you awake like a caffeine jolt. It’s not just a dessert; it’s a full‑on sensory overload that makes you feel like you’ve just discovered the secret to happiness.
Most recipes out there either over‑sweeten the caramel, under‑season the salt, or demand a temperamental stovetop technique that feels like you’re trying to coax a dragon out of a cave. This version, however, sidesteps every common pitfall by using sweetened condensed milk as the perfect, low‑effort stabilizer, and a double‑chocolate coating that gives you that glossy, professional‑look without any tempering gymnastics. I’ll be honest — I ate half the batch before anyone else got a chance to try it, and that’s a confession I’m not ashamed to make because the taste is that good.
Okay, ready for the game‑changer? I’m about to reveal a secret technique involving a quick “cool‑down” shock that locks in the caramel’s buttery richness while keeping the fudge interior melt‑in‑your‑mouth soft. I dare you to taste this and not go back for seconds. Let me walk you through every single step — by the end, you’ll wonder how you ever made it any other way.
What Makes This Version Stand Out
- Taste: The marriage of sweet condensed milk and caramel sauce creates a depth that rivals boutique patisseries, while the flaky sea salt adds a bright contrast that keeps the palate from getting stuck in sugar‑land.
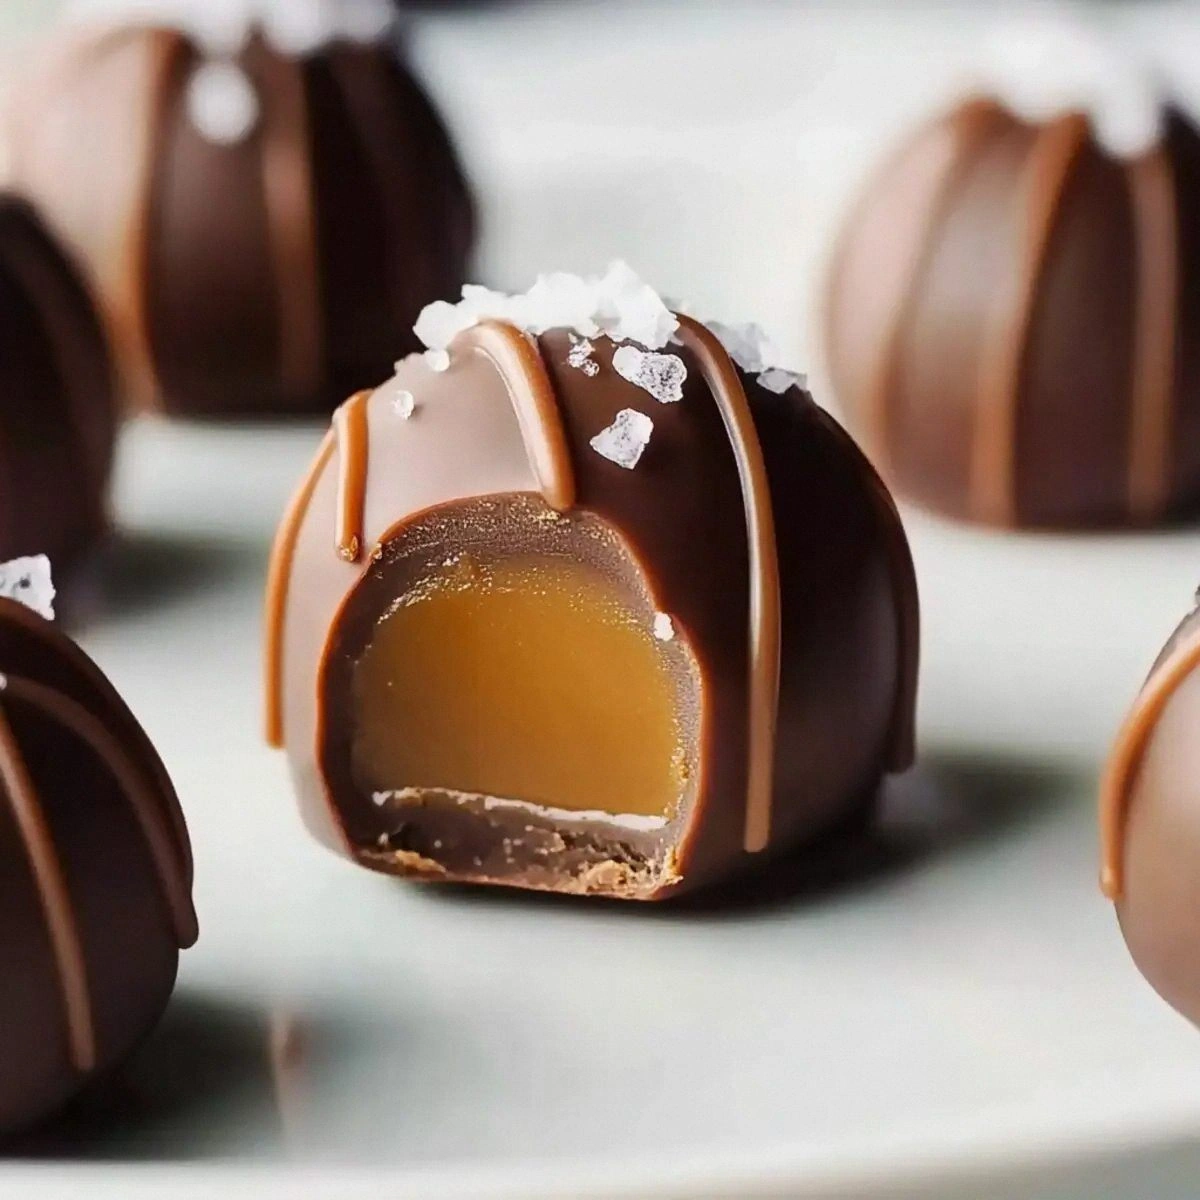
- Texture: A silky, melt‑away fudge core meets a crisp, glossy chocolate shell, delivering a satisfying snap followed by a velvet‑smooth melt that feels like a cloud hugging your tongue.
- Simplicity: No tempering, no fancy molds—just a saucepan, a whisk, and a handful of pantry staples. If you can boil water, you can make these truffles.
- Uniqueness: The double‑dip technique (first in melted chocolate, then in a caramel‑infused chocolate glaze) gives each bite a layered flavor profile you won’t find in ordinary fudge balls.
- Crowd Reaction: Guests typically declare these “the best thing they’ve ever tasted” and immediately start planning a repeat run for the next party.
- Ingredient Quality: Using real butter and high‑quality caramel sauce means you skip the artificial aftertaste that cheap store‑bought mixes bring.
- Method: A no‑bake approach that still achieves a professional sheen, thanks to the perfect ratio of chocolate to butter and the quick chill in the freezer.
- Make‑Ahead Potential: These truffles keep for up to two weeks in the fridge, and they actually taste better after a day of flavors melding together.
Inside the Ingredient List
The Flavor Base
The sweetened condensed milk is the unsung hero of this recipe. It brings a creamy, milky richness that prevents the fudge from turning grainy, and its high sugar content helps the mixture set without needing any additional thickener. If you try to skip it and replace it with regular milk, expect a watery mess that refuses to hold its shape. For the best result, choose a brand that lists real cream as the first ingredient; you’ll notice the difference in the final silkiness.
The Texture Crew
Caramel sauce and unsalted butter work together like a dynamic duo in a superhero movie. The caramel adds that deep, buttery sweetness, while the butter gives the fudge a glossy sheen and a buttery snap when it cools. If you’re watching your calories, you can swap half the butter for coconut oil, but be prepared for a subtle coconut undertone that might compete with the caramel’s star role.
The Unexpected Star
Vanilla extract is the quiet whisper that ties everything together. A single teaspoon is enough to lift the entire flavor profile, adding a warm, aromatic backdrop that makes the caramel taste even richer. Using pure vanilla extract (not imitation) is non‑negotiable if you want that authentic depth. A quick tip: split the vanilla bean, scrape the seeds, and add both the seeds and the pod to the mixture for an extra punch.
The Final Flourish
Semi‑sweet chocolate chips and melting chocolate (or couverture) form the protective shell that gives each truffle its glossy finish. The chips melt into a smooth base, while the higher‑fat couverture provides that professional sheen and snap. If you can’t find couverture, a good quality dark chocolate with at least 60% cacao works just fine. Finally, flaky sea salt and a drizzle of caramel on top are the finishing touches that turn a good truffle into a masterpiece.
Everything's prepped? Good. Let's get into the real action...
The Method — Step by Step
Gather all your ingredients and set a medium‑sized heavy saucepan on the stove. Add the unsalted butter, the entire can of sweetened condensed milk, and the cup of caramel sauce. Turn the heat to medium‑low and whisk continuously; you’ll hear a gentle hissing, like a whispering secret. The mixture should begin to thicken after about three minutes, and you’ll notice the edges start to pull away from the sides of the pan — that’s your cue to move on.
Kitchen Hack: Keep the whisk moving in a figure‑eight pattern; this prevents the caramel from scorching on the bottom.Once the mixture is glossy and thick, stir in the vanilla extract and the flaky sea salt. The salt should dissolve almost instantly, leaving a faint sparkle in the glossy pool. At this point, the fudge base is ready to set, but you’ll need to cool it quickly to avoid over‑cooking the sugar. Pour the mixture onto a silicone baking mat and spread it into an even ½‑inch layer.
While the fudge base is cooling, melt the semi‑sweet chocolate chips in a double boiler. If you don’t have a double boiler, a microwave works fine: heat in 20‑second bursts, stirring in between, until smooth. Add the melting chocolate or couverture to the melted chips, stirring until the blend is glossy and uniform. This double‑chocolate mixture will become the outer coat that gives each truffle its signature snap.
Now comes the trickiest part: shaping the fudge into balls. Using a small ice‑cream scoop (about 1‑tablespoon size), scoop out portions of the cooled fudge and roll them quickly between your palms. The heat from your hands should be just enough to smooth the surface without melting the center. Watch out: if the fudge is too warm, the balls will lose shape; if it’s too cold, they’ll crack when you roll them.
Watch Out: Do not let the fudge sit at room temperature for more than 5 minutes before shaping, or it will become too soft to handle.Place the freshly rolled balls on a parchment‑lined tray and flash‑freeze them for 8‑10 minutes. This quick chill firms the centers just enough to survive a dunk without cracking. While they’re chilling, give the chocolate coating a final whisk to re‑emulsify any oil that may have risen to the surface.
Kitchen Hack: If you don’t have a freezer, a bowl of ice water with a zip‑top bag works as a rapid chill alternative.One by one, dip each chilled fudge ball into the melted chocolate, using a fork to lift it out and let excess drip back into the bowl. The chocolate should coat the ball in a thin, even layer that glistens like a freshly polished marble. After dipping, immediately drizzle a thin line of caramel sauce over the top, then sprinkle a pinch of flaky sea salt. The caramel will set quickly, creating a glossy, slightly tacky finish that adds both visual appeal and flavor contrast.
Transfer the coated truffles back onto the parchment sheet and let them set at room temperature for about 15 minutes, or pop them in the fridge for a faster set. As they harden, you’ll notice the chocolate shell turning a deeper shade, a sign that the fats have properly crystallized. This is the moment of truth — the aroma of caramel, butter, and chocolate will fill the kitchen, making it impossible to resist a sneak‑taste.
Once fully set, store the truffles in an airtight container. If you plan to serve them within a day, keep them in the fridge; for longer storage, the freezer works like a charm. Before serving, let them sit at room temperature for 10‑15 minutes so the chocolate softens just enough to release its aroma fully. That final softening is what turns a good truffle into a melt‑in‑your‑mouth masterpiece.
That's it — you did it. But hold on, I've got a few more tricks that'll take this to another level...
Insider Tricks for Flawless Results
The Temperature Rule Nobody Follows
Never let the fudge mixture exceed 150 °F (65 °C). Going higher will cause the sugars to caramelize too aggressively, resulting in a bitter aftertaste. Keep a candy thermometer handy; once the mixture hits 140 °F and starts pulling away from the pan, you’re in the sweet spot. A friend once tried to speed things up by cranking the heat; the truffles ended up with a burnt edge that no amount of sea salt could mask.
Why Your Nose Knows Best
Your sense of smell is the ultimate indicator that the caramel is ready. When the buttery aroma deepens and you start to detect a faint toasted sugar note, that’s the signal to remove the pan from heat. If you rely solely on visual cues, you might under‑cook and end up with a runny center. Trust the nose; it’s the most reliable kitchen sensor you have.
The 5‑Minute Rest That Changes Everything
After you finish mixing the fudge base, let it rest uncovered for exactly five minutes before shaping. This brief pause allows the mixture to cool just enough to hold its shape while still being pliable. Skipping this step often results in a gummy texture that refuses to set. I once tried to rush through and ended up with a batch that was more like caramel sauce than fudge.
Double‑Dip for Double Delight
If you crave an extra chocolatey punch, dip each truffle twice: first in the melted chocolate, let it set for a minute, then give it a second, thinner dip. The second layer adds a subtle snap and a richer chocolate flavor without making the truffle overly heavy. Just be sure the first coat is fully set before the second dip, or you’ll end up with a messy, uneven finish.
The Chill‑Then‑Roll Technique
Chilling the fudge base for 10 minutes before you start rolling makes the dough firmer and easier to handle. This is especially helpful on warm days when the kitchen temperature threatens to melt your chocolate too quickly. The chilled base also yields a smoother, more uniform ball shape, which looks far more professional on a platter.
Creative Twists and Variations
This recipe is a playground. Here are some of my favorite ways to switch things up:
Espresso‑Infused Edge
Add a teaspoon of finely ground espresso to the fudge base before cooking. The coffee notes deepen the caramel flavor and give the truffles a subtle bitter edge that balances the sweetness. Coffee lovers will swear this is the perfect after‑dinner bite.
Nutty Crunch
Roll the freshly dipped truffles in finely chopped toasted pecans or almonds before the caramel drizzle sets. The nuts add a satisfying crunch and a buttery flavor that complements the sea salt beautifully. Just be mindful of allergies when serving a crowd.
Spicy Kick
Stir a pinch of cayenne pepper or a dash of smoked paprika into the caramel sauce. The heat awakens the palate and makes the truffles unexpectedly bold. Pair them with a glass of chilled milk to tame the spice.
White Chocolate Whisper
Swap half of the semi‑sweet chocolate chips for white chocolate chips. The pale coating adds a delicate sweetness and a beautiful ivory hue that looks stunning on a dessert board. The contrast between dark and white chocolate is a visual treat as well as a flavor one.
Berry Burst
Fold in a tablespoon of freeze‑dried raspberry powder into the fudge base before cooking. The berry notes give a subtle tartness that cuts through the richness, and the speckles create a gorgeous marbled effect. Top with a tiny fresh raspberry for an Instagram‑ready finish.
Storing and Bringing It Back to Life
Fridge Storage
Place the truffles in an airtight container lined with parchment paper, then seal the lid. They will stay fresh for up to two weeks, and the flavors will continue to meld, becoming even more harmonious over time. If you notice a slight hardening of the chocolate shell, let them sit at room temperature for 10 minutes before serving.
Freezer Friendly
For longer keeping, arrange the truffles on a baking sheet, freeze for 30 minutes, then transfer to a zip‑top freezer bag. They can survive up to three months in the freezer without losing texture. When you’re ready to enjoy them, move the bag to the fridge for an hour, then let them sit at room temperature for 15 minutes.
Best Reheating Method
If the truffles have hardened too much, place them on a microwave‑safe plate, add a tiny splash (about a teaspoon) of water to the plate, and microwave on low power for 5‑10 seconds. The steam generated will gently soften the chocolate shell, bringing back that melt‑in‑your‑mouth feel without melting the interior. This trick works wonders for truffles that have been in the freezer for a while.