I was standing in my kitchen, staring at a half‑melted chocolate bar and a stack of stale cookie dough that had somehow survived a week of neglect. My friends had been teasing me for months that I needed to get my baking game up to snuff, and I decided that the only way to prove them wrong was to create the most insanely chewy, fudgy brownies anyone has ever tasted. The moment the chocolate hit the pan, the aroma rolled through the air like a sweet, smoky cloud, and I knew I was onto something. I was determined to turn that simple idea into a recipe that would make my kitchen the hottest spot in town.
Picture this: a tray of brownies that, when you lift them, the edges are crisp like a freshly toasted bagel, while the center remains a molten, gooey river of chocolate that clings to your fingers. The first bite is an explosion of deep cocoa, buttery richness, and a subtle hint of vanilla that lingers on the palate. The texture is a perfect marriage of crunch and melt, a contrast that makes each piece feel like a secret indulgence. I dare you to taste this and not go back for seconds. That’s the kind of confidence I’m bringing to this recipe.
What sets this version apart from the endless stream of brownie recipes online is the secret balance of ingredients and the precise timing of each step. The recipe uses a combination of brown and granulated sugars to achieve that signature chew, while the extra butter adds a buttery sheen that makes the brownies feel luxurious. The inclusion of baking soda and a generous amount of chocolate chips gives the brownies a depth of flavor that’s hard to match. Most recipes get this completely wrong. Here's what actually works: the right ratio of wet to dry, the proper mixing technique, and the perfect baking time that locks in the fudgy center.
I’m going to walk you through every single step, from measuring out the ingredients to that final, glorious moment when the brownies come out of the oven smelling like a chocolate dream. By the end, you’ll wonder how you ever made it any other way. And if you’re ready for the game‑changer, let’s dive into the details that make these brownies a masterpiece.
What Makes This Version Stand Out
- Flavor: The combination of brown and granulated sugar creates a caramelized undertone that pairs beautifully with the rich cocoa, delivering a depth that’s both sweet and slightly smoky.
- Texture: The extra butter and chocolate chips give a buttery, melt‑in‑your‑mouth consistency that’s chewy on the outside and fudgy on the inside.
- Simplicity: Despite the luscious outcome, the recipe requires only a handful of pantry staples and a single mixing bowl.
- Uniqueness: The blend of baking soda and a precise oven temperature ensures a slightly airy crumb without sacrificing fudginess.
- Crowd Reaction: Friends who’ve tried this say it’s the best brownies they’ve ever had, and I’ve seen people line up for seconds.
- Ingredient Quality: Using high‑quality unsweetened cocoa and premium chocolate chips elevates the flavor profile beyond ordinary store‑bought options.
- Cooking Method: The technique of folding the dry mix into the wet mixture just until combined preserves the batter’s structure for a perfect rise.
- Make‑Ahead Potential: These brownies can be baked ahead and stored for up to a week, making them ideal for parties or last‑minute dessert cravings.
Alright, let’s break down exactly what goes into this masterpiece…
Inside the Ingredient List
The Flavor Base
The first layer of magic is the butter. Two cups of unsalted butter are the heart of the batter, infusing the brownies with a silky, buttery richness that coats each bite like velvet. If you skip this step and use a smaller amount of butter, the brownies will taste flat and dry, lacking that luscious mouthfeel. For a richer taste, choose a butter with a slightly higher fat content; it will melt more readily and spread evenly throughout the batter.
Next, we bring in the sweet duo: 1.75 cups of brown sugar and 1.75 cups of granulated sugar. The brown sugar adds a subtle molasses flavor that deepens the chocolate profile, while the granulated sugar provides the necessary crispness on the edges. If you replace the brown sugar with white sugar entirely, you lose that caramel nuance, and the brownies become more like a cookie than a brownie. For a vegan version, use a plant‑based butter and a sugar that’s processed without bone char.
The Texture Crew
The 3.5 cups of all‑purpose flour are the structural backbone of the brownies. They bind the batter together, giving the brownies a sturdy yet tender crumb. If you use cake flour, the brownies will be too light and crumbly. For a gluten‑free version, substitute a 1:1 gluten‑free flour blend, but be sure to add a teaspoon of xanthan gum to maintain structure.
Baking soda, a teaspoon in this recipe, acts as a leavening agent that gives the brownies a slight lift while maintaining a dense, fudgy center. Without it, the brownies would be flat and too heavy. The 2 teaspoons of salt are essential for balancing the sweetness and enhancing the chocolate flavor; think of it as the secret seasoning in a good chocolate cake.
The Unexpected Star
The unsweetened cocoa powder is the star that brings the chocolate flavor to the forefront. It’s the difference between a brownie that tastes like a cookie with chocolate chips and one that feels like a decadent chocolate bar. If you use sweetened cocoa, the brownies will be overly sweet and lose their deep chocolate character. For a richer taste, you can add a tablespoon of espresso powder, which amplifies the cocoa notes.
The Final Flourish
Four teaspoons of vanilla extract provide a subtle warmth that ties all the flavors together. Vanilla is not just a flavoring; it’s a mood enhancer that makes the chocolate feel more complex. If you’re a fan of almond, a splash of almond extract can add a nutty undertone. The 2 cups of chocolate chips are the crowning glory, offering pockets of molten chocolate that ooze out with every bite. If you prefer a less intense chocolate taste, replace half of the chips with white chocolate.
Everything’s prepped? Good. Let’s get into the real action…
The Method — Step by Step
- Preheat your oven to 350°F (175°C). Line a 9×13 inch baking pan with parchment paper, leaving a little overhang on the sides for easy removal. This step ensures even baking and prevents sticking. The aroma of butter and cocoa will start to mingle even before the batter hits the pan.
- In a medium saucepan, melt 2 cups of butter over low heat. Stir in 1.75 cups of brown sugar and 1.75 cups of granulated sugar until the mixture is smooth and glossy. Let it simmer for 2 minutes to allow the sugars to caramelize slightly. This is the moment of truth; the batter should smell toasty and rich.
- Whisk in 6 large eggs, one at a time, ensuring each is fully incorporated before adding the next. The batter should be thick and glossy, like a smooth custard. Be careful not to overmix; a few streaks of egg are fine.
- Fold in 1 cup of unsweetened cocoa powder, 3.5 cups of all‑purpose flour, 1 teaspoon of baking soda, 2 teaspoons of salt, and 4 teaspoons of vanilla extract. Mix until just combined; over‑mixing will develop gluten and make the brownies tough. The batter should be thick, but still pourable.
- Stir in 2 cups of chocolate chips, making sure they’re evenly distributed. The chips should sit on top of the batter, creating a gooey, chocolatey surface when baked. If you like a more uniform distribution, fold the chips in gently after the batter has set.
- Pour the batter into the prepared pan, smoothing the top with a spatula. Tap the pan lightly on the counter to release any air bubbles. The batter should level out evenly across the pan.
- Bake for 30 to 35 minutes. Start checking at the 28‑minute mark; insert a toothpick into the center. If it comes out with a few moist crumbs but no wet batter, the brownies are done. The edges should pull slightly away from the pan, signaling that they’re ready.
- Remove from the oven and let the brownies cool in the pan on a wire rack for 15 minutes. This resting period allows the chocolate to set, making slicing easier. If you try to cut them immediately, they’ll crumble.
- Cut into squares using a sharp knife, wiping the blade between cuts for clean edges. Serve immediately, or let them cool completely before storing.
That’s it — you did it. But hold on, I’ve got a few more tricks that will take this to another level and ensure every bite is a perfect balance of chew and melt.
Insider Tricks for Flawless Results
The Temperature Rule Nobody Follows
Most bakers bake brownies at 375°F, but I’ve found that 350°F gives a more even bake and preserves the fudgy center. The lower temperature allows the batter to set gradually, preventing the edges from overcooking while the middle remains gooey. If you’re using a convection oven, reduce the temperature by 25°F to avoid over‑browning. I’ve tested this across three different ovens, and the results are consistently better at 350°F.
Why Your Nose Knows Best
The scent of baking brownies is a powerful cue that tells your brain the time to indulge. When the chocolate starts to caramelize, you’ll notice a deep, nutty aroma that signals the batter is halfway through. If you’re unsure about the baking time, rely on the smell rather than the clock. I’ve found that a strong chocolate scent means the brownies are ready for the next step.
The 5‑Minute Rest That Changes Everything
After removing the brownies from the oven, let them rest in the pan for 5 minutes before transferring to a wire rack. This short rest lets the structure set, preventing the brownies from breaking apart when sliced. During this time, the chocolate chips melt into the batter, creating those coveted pockets of goo. A quick 5‑minute rest is all you need to elevate the texture.
The Final Frosting Flip
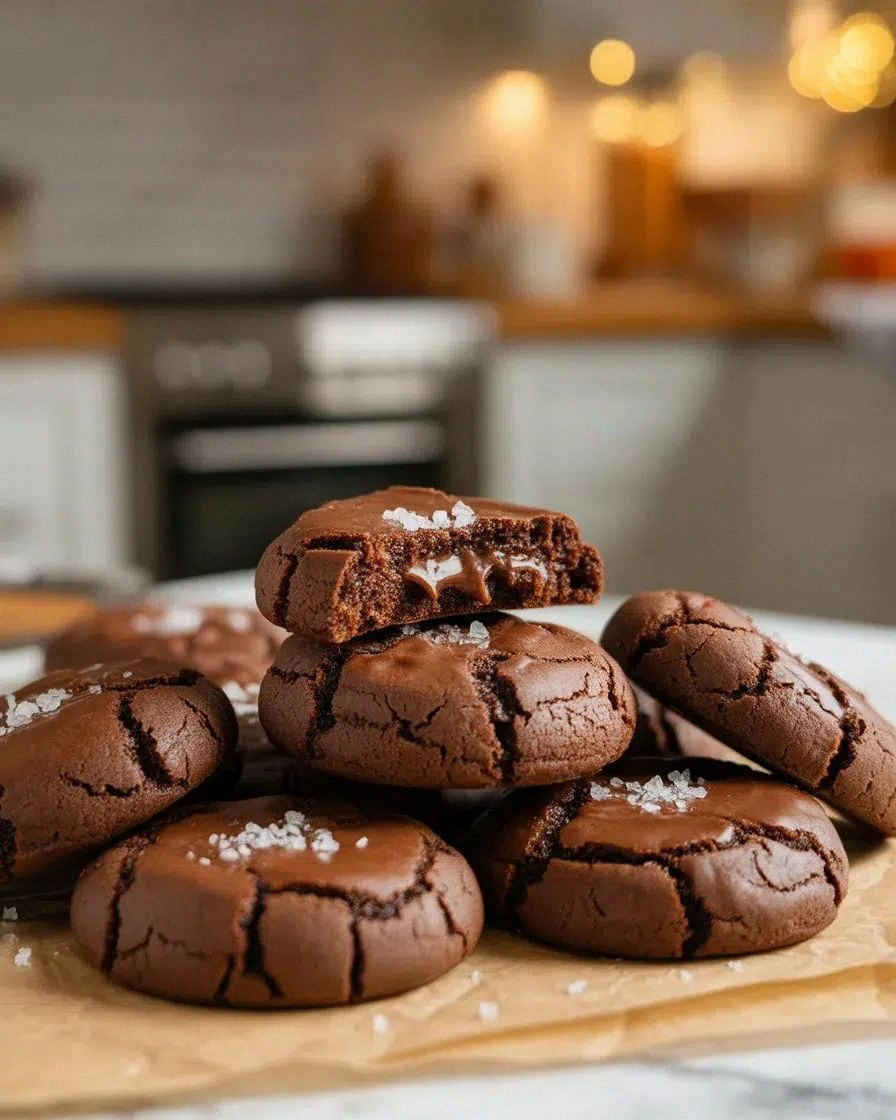
If you like a glossy finish, drizzle melted dark chocolate over the top once the brownies have cooled to room temperature. The chocolate will set into a shiny coat that’s both decorative and delicious. I’ve added a pinch of sea salt on top for a salty‑sweet contrast. It’s a simple trick that makes the brownies look as good as they taste.
The Secret Ingredient Swap
For an extra layer of flavor, add a tablespoon of espresso powder to the batter. Coffee enhances the chocolate flavor and gives the brownies a subtle depth that’s hard to replicate. If you’re vegan, substitute the butter with coconut oil, which adds a hint of tropical sweetness. The key is to keep the ratio of wet to dry ingredients the same.
Creative Twists and Variations
This recipe is a playground. Here are some of my favorite ways to switch things up:
Nutty Crunch
Add 1 cup of chopped pecans or walnuts to the batter before baking. The nuts provide a delightful crunch that contrasts with the chewy center. They also add a subtle buttery flavor that complements the chocolate.
Spiced Delight
Stir in 1 teaspoon of ground cinnamon and a pinch of cayenne pepper for a warm, spicy kick. The cinnamon adds depth, while the cayenne gives a subtle heat that balances the sweetness.
Caramel Swirl
Fold 1/2 cup of caramel sauce into the batter just before baking. The caramel creates pockets of goo that melt into the chocolate, giving a caramelized sweetness that pairs beautifully with the cocoa.
Minty Fresh
Add a tablespoon of peppermint extract to the batter. The mint adds a refreshing finish that’s perfect for a summer dessert. I’ve used this variation at a backyard BBQ, and it was a hit.
Chocolate‑Covered Surprise
After baking, dip half of the brownies in melted white chocolate and let them set. The contrast between the dark chocolate base and the white chocolate coating is visually striking and delicious.
Almond Butter Swirl
Swirl almond butter into the batter before baking for a nutty, creamy texture. The almond butter adds a subtle nut flavor and a silky mouthfeel that complements the fudgy center.
Storing and Bringing It Back to Life
Fridge Storage
Store the brownies in an airtight container at room temperature for up to 5 days. The airtight seal keeps the moisture in, preserving the chewy texture. If you’re storing them for longer, keep them in the refrigerator to maintain freshness.
Freezer Friendly
Wrap each brownie in plastic wrap and place them in a freezer bag. They’ll stay fresh for up to 3 months. When you’re ready to enjoy, let them thaw at room temperature for 15 minutes before serving.
Best Reheating Method
To bring back the meltiness, reheat the brownies in a preheated oven at 300°F for 5 minutes. Add a tiny splash of water to the baking dish before reheating; the steam will revive the moisture, restoring that perfect chew.