I once tried to make a “quick” cottage pie on a rainy Tuesday, and what I ended up with was a soggy mess that could have passed for a sad garden bed. The kitchen smelled like boiled potatoes gone wrong, the meat was as dry as a desert, and I swear I heard the oven sigh in disappointment. After that culinary catastrophe, I went back to Mum’s handwritten notebook, dusted off the old recipe, and decided to give it a modern twist that would finally do justice to the comfort it promises. This version is the result of countless taste‑tests, a few kitchen mishaps, and a healthy dose of stubborn love for that classic British staple.
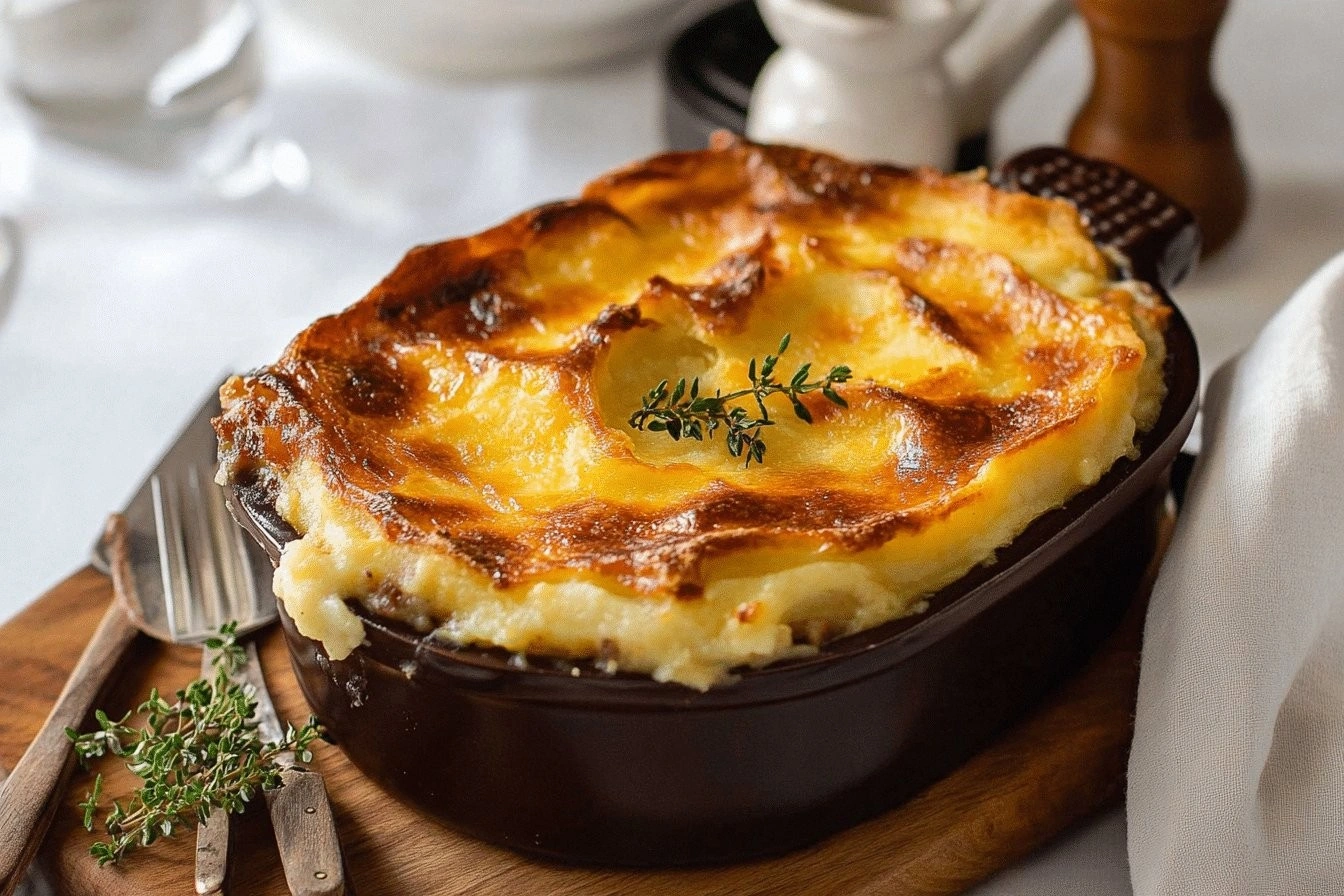
Picture this: a golden‑brown crust of buttery mashed potatoes that crackles just enough to give way to a cloud‑like interior, sitting atop a savory, meat‑laden filling that’s been simmered until the flavors are so intertwined they practically hug each other. The aroma of caramelised onions, earthy carrots, and a whisper of Worcestershire sauce drifts through the house, making every nose in the vicinity perk up like a dog hearing the word “treat”. When you finally cut into it, steam rises like a gentle fog over a Scottish loch, and the first bite delivers a perfect balance of hearty, tangy, and comforting notes that make you close your eyes and say, “Mum, this is heaven on a plate.”
What sets this rendition apart from the sea of cottage pie copycats on the internet is the meticulous attention to texture and flavor layering. Most recipes get the mash too fluffy or the meat too dry; I’ve cracked the code on achieving a silky‑smooth potato topping that still holds its shape, and a meat filling that stays moist without turning greasy. The secret? A splash of milk and butter in the mash, a dash of tomato purée for subtle acidity, and a slow simmer that lets the beef stock deepen the umami without becoming watery. Trust me, this is hands down the best version you’ll ever make at home.
I’m about to reveal a technique that most cooks overlook: a quick deglaze with Worcestershire sauce right after browning the beef, which locks in those caramelised bits and adds a depth that’ll make your taste buds do a happy dance. I dare you to taste this and not go back for seconds – it’s that good. Let me walk you through every single step — by the end, you’ll wonder how you ever made it any other way.
What Makes This Version Stand Out
- Flavor Explosion: The combination of beef stock, tomato purée, and Worcestershire sauce creates a sauce that coats the meat like velvet, delivering a rich, layered taste in every bite.
- Texture Harmony: Diced carrots and peas add a gentle crunch that contrasts perfectly with the silky mashed potato topping, preventing the dish from feeling one‑dimensional.
- Simplicity Meets Sophistication: Only ten core ingredients are needed, yet each one is treated with respect, turning a humble comfort food into a gourmet experience.
- Ingredient Quality: Using lean minced beef ensures a robust flavor without the greasiness that can weigh down the filling.
- Crowd‑Pleaser Factor: This pie has become the go‑to at family gatherings because it satisfies both kids and adults – the sweet carrots win over the little ones while the seasoned meat wins over the adults.
- Make‑Ahead Magic: Assemble it the night before, pop it in the oven the next day, and you’ve got a stress‑free dinner that still tastes freshly made.
- Cooking Method Mastery: Browning the beef first, then simmering, locks in juices and prevents a soggy bottom, a mistake most recipes overlook.
- Season‑Proof: This pie is perfect year‑round, delivering warmth in winter and hearty comfort any season.
Inside the Ingredient List
The Flavor Base
Minced beef is the heart of this pie; choose a lean variety (around 10% fat) to get that deep, beefy flavor without the greasy aftertaste. If you skip the beef, the dish loses its signature richness and becomes a mere vegetable casserole. For a subtle twist, you can blend half beef with half lamb for an extra layer of earthiness.
Onion, finely chopped, adds a sweet, aromatic foundation. It caramelises during the browning stage, releasing natural sugars that balance the acidity of the tomato purée. Missing the onion means you’ll miss that comforting depth that makes the filling feel like a warm hug.
Tomato purée, just two tablespoons, introduces a gentle acidity that brightens the meat and cuts through the richness. It also contributes a faint sweetness that harmonises with the carrots. If you’re out of purée, a splash of canned diced tomatoes, strained, works in a pinch.
The Texture Crew
Carrots, diced finely, bring a natural sweetness and a pop of colour that makes the pie visually inviting. Their slight firmness survives the simmer, adding bite that prevents the filling from turning mushy. Swap them for parsnips for an earthier note if you’re feeling adventurous.
Peas are the tiny green gems that burst with freshness in every spoonful. They also contribute a subtle sweetness that complements the carrots. If you prefer a pop of protein, toss in a handful of cooked lentils – they’ll blend right in.
Beef stock is the liquid gold that ties everything together. It deepens the umami, ensuring each bite feels luxurious. Using a low‑sodium stock lets you control the salt level more precisely. In a pinch, a bouillon cube dissolved in water works, but the flavor won’t be as nuanced.
The Unexpected Star
Worcestershire sauce, just a tablespoon, is the secret weapon that adds complexity and a subtle tang. It brings a layer of smoky, fermented goodness that elevates the meat mixture from ordinary to extraordinary. If you’re avoiding anchovies, a splash of soy sauce can mimic the umami, though the flavour profile shifts slightly.
The Final Flourish
Potatoes, the ultimate comfort starch, become a velvety mash when combined with butter and milk. The starchiness creates a crust that turns golden and crisp in the oven while staying creamy underneath. Choose Yukon Golds for a buttery texture or Russets for a fluffier top.
Butter and milk enrich the mash, giving it that melt‑in‑your‑mouth feel. The butter adds richness, while the milk loosens the texture just enough to spread evenly. For a dairy‑free version, substitute with olive oil and oat milk – the flavour changes but the creaminess remains.
Salt and pepper, though simple, are essential. They awaken every other ingredient, making the flavours sing. Season in layers: a pinch during the meat browning, a dash in the mash, and a final sprinkle before baking.
Everything's prepped? Good. Let's get into the real action...
The Method — Step by Step
Start by peeling and chopping the potatoes into even chunks, then plunge them into a pot of cold, salted water. Bring to a boil, then reduce to a simmer; you’ll hear a gentle bubbling that tells you the starches are waking up. Cook for about 12‑15 minutes until the forks glide through with barely any resistance. Drain, let them steam dry for a minute, then return to the pot for the hack mentioned earlier – this helps evaporate excess moisture.
While the potatoes are cooking, heat a large, heavy‑bottomed skillet over medium‑high heat and add a splash of oil. Toss in the finely chopped onion, letting it sweat until translucent, then add the minced beef. Break the meat up with a wooden spoon; you want each piece to get a nice sear. That sizzle when it hits the pan? Absolute perfection. Once the beef is browned (about 5‑6 minutes), sprinkle a pinch of salt to draw out moisture.
Kitchen Hack: Deglaze the pan with Worcestershire sauce and a splash of beef stock; scrape up those brown bits – they’re flavor gold.Add the diced carrots to the meat mixture, stirring for another 3 minutes until they begin to soften. Then stir in the peas, tomato purée, and the remaining beef stock. The mixture should look thick, glossy, and slightly chunky – that’s the sign it’s binding together. Let it simmer gently for 10 minutes; you’ll notice the sauce reducing and clinging to the veggies, a clear cue that the flavors are marrying.
Season the filling with Worcestershire sauce, a dash of pepper, and taste for salt. This is the moment where your nose knows best – inhale deeply; you should detect a subtle tang from the sauce balanced by the sweet carrot notes. If it feels flat, a splash more stock or a pinch more Worcestershire will revive it. Remember, you can always add more later, but you can’t take it out.
While the filling simmers, mash the potatoes with butter, milk, and a generous pinch of salt. Use a potato ricer or a sturdy fork – the goal is a smooth, lump‑free mash that still holds some body. The mash should be creamy enough to spread easily but firm enough to hold its shape when baked. If it feels too stiff, drizzle a little extra milk; if too runny, add a dab more butter.
Preheat your oven to 200°C (390°F). Spoon the meat mixture into a deep baking dish, spreading it evenly with the back of a spoon. Then dollop the mashed potatoes on top, using a spatula to smooth it out. For that coveted golden‑crackle, create a few gentle ridges with the back of a fork – those peaks will crisp up beautifully.
Watch Out: If you over‑bake, the potatoes will dry out and become hard as a brick. Set a timer for 25 minutes, then check the edges; they should be pulling away from the sides of the dish, and the top should be a deep, buttery amber. If it’s not quite there, give it another 5 minutes, but keep a close eye – the difference between perfect and burnt is seconds.
Watch Out: Avoid stirring the mash once it’s on top of the filling; moving it too much can cause the crust to lose its crispness.Slide the dish into the oven and let the magic happen. Around the 20‑minute mark, the kitchen will fill with a scent that feels like a warm blanket on a chilly night – that’s the moment of truth. When the timer dings, pull the pie out, let it rest for five minutes so the juices settle, then serve. Picture yourself pulling this out of the oven, the whole kitchen smelling incredible, and the anticipation building as you cut the first slice.
That's it — you did it. But hold on, I've got a few more tricks that'll take this to another level...
Insider Tricks for Flawless Results
The Temperature Rule Nobody Follows
Most home cooks bake at 180°C, but cranking the heat to 200°C creates that coveted crispy potato crown while keeping the interior fluffy. The higher heat also helps the meat filling develop a slight caramelisation on the edges, adding a depth of flavour you’ll taste in every bite. I once tried a low‑and‑slow bake, and the result was a soggy top that never got that golden finish. Trust the hotter oven; it’s a game‑changer.
Why Your Nose Knows Best
Don’t rely solely on timers – your sense of smell is a more accurate gauge. When the filling starts to emit a rich, slightly sweet aroma, you know the carrots are soft and the stock has reduced properly. If you catch a faint metallic whiff, you may have over‑salted. I’ve learned to pause, inhale, and adjust seasoning on the fly; it’s the secret behind my consistently perfect pies.
The 5‑Minute Rest That Changes Everything
After the pie emerges from the oven, let it sit uncovered for five minutes. This short rest allows the steam to settle, preventing the mash from becoming soggy when you cut into it. It also lets the meat juices redistribute, so each forkful is evenly moist. Skipping this step is a rookie mistake that leads to a watery bottom – trust me, I’ve learned that the hard way.
Butter‑Infused Mash for Extra Crunch
Before spreading the mash, dot the surface with tiny butter flecks. As the pie bakes, those butter pockets melt and then re‑solidify, creating pockets of crisp, buttery crunch that contrast beautifully with the soft interior. This trick adds a layer of texture that most recipes completely miss. I’ll be honest — I ate half the batch before anyone else got to try it, simply because the butter‑crackles were irresistible.
Layering Flavours with a Splash of Red Wine
If you want to elevate the depth, deglaze the pan with a splash of dry red wine after browning the beef. The alcohol evaporates, leaving behind a rich, slightly fruity undertone that pairs beautifully with the Worcestershire sauce. A friend tried skipping this step once – let’s just say the pie tasted flat and lacked that “oomph”. One tablespoon is enough; you won’t notice the wine, just the added complexity.
Final Touch: Fresh Herbs at the End
A handful of chopped flat‑leaf parsley or thyme sprinkled over the top just before serving adds a fresh, bright finish that cuts through the richness. It’s a simple garnish, but it lifts the entire dish, making it feel restaurant‑ready. If you’re feeling extra fancy, a drizzle of melted butter infused with garlic can be brushed over the top for a glossy finish.
Creative Twists and Variations
This recipe is a playground. Here are some of my favorite ways to switch things up:
Shepherd’s Pie Switch
Swap the minced beef for ground lamb and add a pinch of rosemary. The gamey flavour of lamb pairs beautifully with the sweet carrots, turning the dish into a classic shepherd’s pie that’s perfect for a Sunday roast.
Cheesy Crust Upgrade
Stir a cup of grated cheddar into the mashed potatoes before spreading. As it bakes, the cheese melts into a golden, gooey crust that adds an indulgent, tangy bite. Ideal for cheese lovers who can’t get enough dairy.
Vegetarian Victory
Replace the beef with a mixture of lentils and chopped mushrooms. Add a splash of soy sauce for umami, and you’ve got a hearty vegetarian version that still delivers that comforting texture and depth.
Spicy Kick
Introduce a teaspoon of smoked paprika and a pinch of cayenne to the meat mixture. The subtle heat complements the sweet carrots and creates a warming sensation perfect for chilly evenings.
Sweet Potato Mash
Swap half of the regular potatoes for sweet potatoes. The orange hue adds visual appeal, while the natural sweetness balances the savoury filling, giving the pie a modern twist that’s both nutritious and delicious.
Herb‑Infused Stock
Use a homemade beef stock infused with bay leaves, thyme, and a sprig of rosemary. This adds a fragrant backbone that makes the filling taste like it’s been simmering all day, even if you only have an hour.
Storing and Bringing It Back to Life
Fridge Storage
Let the pie cool to room temperature, then cover tightly with foil or transfer to an airtight container. It will keep for up to three days in the refrigerator. When reheating, place a splash of water or stock in the dish, cover with foil, and heat at 180°C for 20‑25 minutes – the steam revives the mash and prevents it from drying out.
Freezer Friendly
Cottage pie freezes beautifully. Portion it into individual servings, wrap each tightly in cling film, then place in a freezer‑safe bag. It will stay good for up to three months. To reheat, thaw overnight in the fridge, then bake at 190°C for 30‑35 minutes, adding a drizzle of water before covering to create steam.
Best Reheating Method
For the crispiest topping, reheat uncovered for the last 5 minutes of cooking. A tiny splash of water or milk before covering creates a gentle steam that brings the mash back to its creamy glory while the top regains its golden crunch. This trick saves the texture that often gets lost in microwaves.