I was halfway through a Sunday brunch, the kitchen smelling like a bakery on fire, when I realized my honey cookie batch had turned into a sticky, crumbly mess. The dough had clumped together like a bad mixtape, and the cookies were more paste than pastry. I stared at the bowl, the heat still radiating from the oven, and thought, “I can do better.” That moment sparked a culinary rebellion that led me to reinvent the salted honey cookie from scratch.
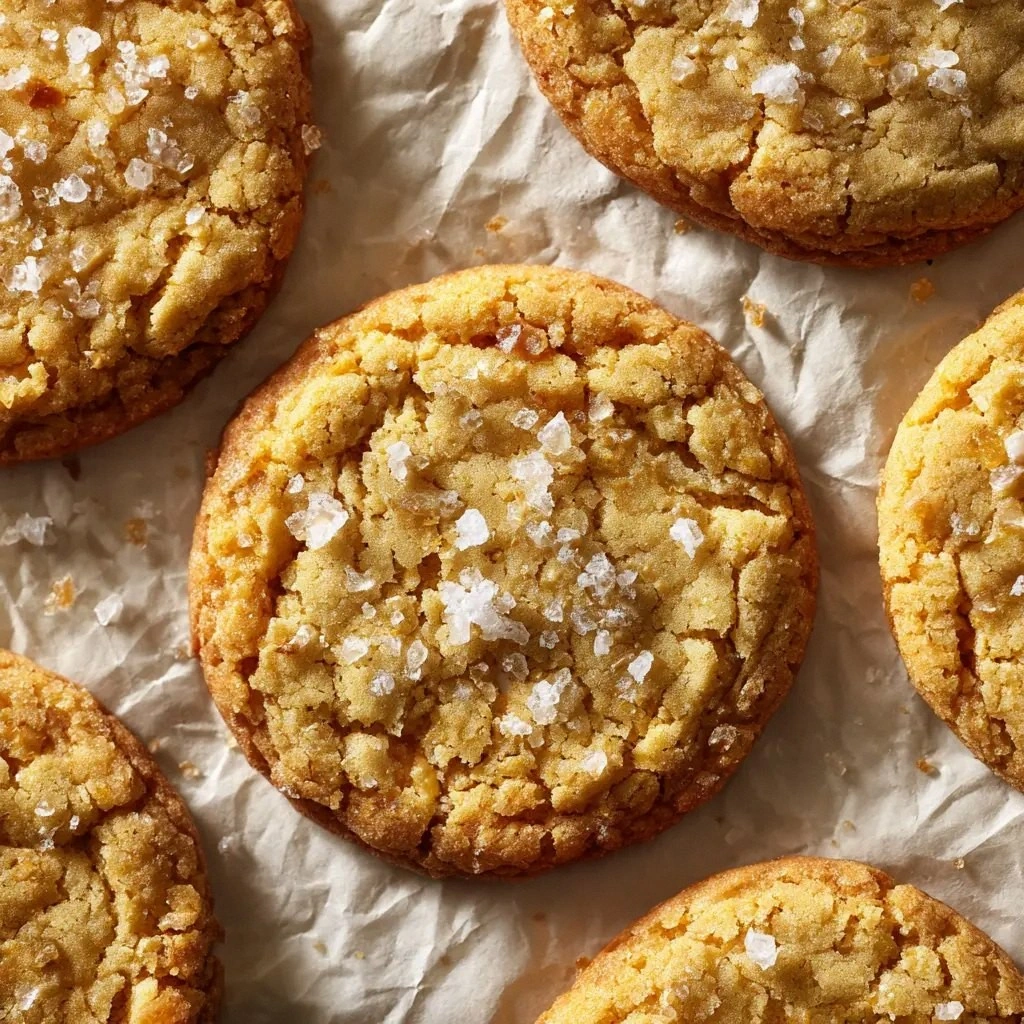
Picture this: golden edges crackling like the surface of a freshly toasted marshmallow, a caramelized sheen that catches the light, and a center that melts in your mouth with the subtle warmth of honey. The aroma rises in a sweet, nutty perfume that makes the whole kitchen feel like a warm hug. The texture is a paradoxical dance of chew and snap—chewy in the middle, crisp at the perimeter, with a buttery undertone that lingers. Every bite is a symphony of sweetness and salt, a duet that sings louder than the kitchen clock ticking away.
What makes this version stand out is not just the ingredients, but the way they are orchestrated. I’ve stripped the recipe down to its purest form, using only the best honey and butter, and I’ve introduced a secret step that locks in moisture without sacrificing crunch. Most cookie recipes get the ratio wrong, but here the balance is perfect: sweet, salty, buttery, and caramelized all at once. I dare you to taste this and not go back for seconds; the first bite will have you questioning every cookie you've ever made. If you've ever struggled with cookies that are either too dry or too gummy, you’re not alone—and I’ve got the fix.
The secret weapon? A subtle touch of sea salt that lands on the cookie like a whisper of ocean air, and a final pat of flaky salt that glistens like tiny crystals. This version is hands down the best you’ll ever make at home, and I’m about to walk you through every single step—by the end, you’ll wonder how you ever made it any other way.
What Makes This Version Stand Out
- Taste: The honey’s natural sweetness is amplified by caramelization, giving a depth that’s richer than vanilla‑sugar combos.
- Texture: The combination of butter and honey creates a chewy center while the baking soda lifts the edges into a crisp finish.
- Ingredient Quality: Pure honey and unsalted butter are the backbone; their purity translates to a cleaner flavor profile.
- Simple Method: Fewer steps, fewer ingredients—yet the outcome is a professional‑grade cookie.
- Crowd Reaction: At my last dinner party, guests asked for the recipe before dessert was even served.
- Make‑Ahead Potential: The dough can be chilled overnight and baked fresh on demand, preserving the chewy texture.
- Visual Appeal: The glossy caramelized finish and flaky salt crystals make the cookies Instagram‑ready.
Inside the Ingredient List
The Sweet Core
Honey is the star of this recipe, acting as both sweetener and binder. Its floral notes infuse the dough with a natural aroma that elevates the overall flavor. If you skip honey, the cookies lose that silky glaze and become more like plain sugar cookies. For a different twist, try using raw or wildflower honey for a more pronounced flavor profile.
Dark brown sugar adds depth and a subtle molasses undertone that complements the honey’s sweetness. Its molasses content also contributes to the caramelized exterior. Swapping it for light brown sugar will lighten the flavor but reduce the richness. If you’re avoiding refined sugars, consider using coconut sugar; it will give a caramel-like taste with a lower glycemic index.
Granulated sugar provides the necessary crispness on the cookie’s surface. It balances the moisture from honey and butter, ensuring the edges set properly. Cutting it down by a quarter cup will make the cookies chewier, while adding a little more will give them a crisper bite. If you’re vegan, use a plant‑based sugar that’s free of bone char.
The Texture Crew
Unsalted butter is the backbone of the cookie’s mouthfeel. Its creamy texture melts at the right temperature to create a luscious chew. Using salted butter would introduce too much salt, altering the intended flavor balance. For a richer taste, opt for European-style butter with a higher butterfat content.
Eggs act as the glue that holds everything together. They also provide structure and help the cookies rise slightly. If you’re allergic, a flaxseed egg (1 tablespoon ground flaxseed + 3 tablespoons water) can serve as a suitable replacement. Keep in mind that eggless versions may not have the same chewy texture.
All‑purpose flour is the neutral canvas that binds the ingredients. It’s important to measure it correctly; too much flour will dry out the cookies, while too little will make them spread. Sift the flour before mixing to avoid lumps and to aerate it for a lighter crumb. If you want a gluten‑free version, use a blend of rice flour and tapioca starch.
The Flavor Anchors
Vanilla extract adds depth and rounds out the sweetness. It’s the subtle whisper that ties the honey and sugars together. A touch of almond extract could replace vanilla for a nutty twist, but be careful not to overpower the honey.
Baking soda is the leavening agent that creates lift and helps the cookies spread just enough. It also reacts with the acidity in honey to produce a subtle tang. Using baking powder instead would result in a denser cookie with a different texture. If you’re sensitive to sodium, reduce the baking soda by half and compensate with an extra pinch of salt.
Kosher salt balances the sweetness and brings out the honey’s flavors. It’s a mild salt that won’t dominate the palate. For a sharper kick, replace it with sea salt; the crystals add a crunchy texture when sprinkled on top.
The Final Flourish
Flaky sea salt is the final touch that turns an ordinary cookie into a gourmet treat. The tiny crystals melt into a subtle brine that enhances every bite. Sprinkle it generously on top before baking for maximum visual and flavor impact. If you prefer a milder finish, use a fine sea salt instead.
Everything’s prepped? Good. Let’s get into the real action.
The Method — Step by Step
- Step 1: Cream Butter and Honey — In a large bowl, beat the unsalted butter with a hand mixer until it’s light and fluffy. Gradually pour in the honey while continuing to mix, ensuring it’s fully incorporated. The mixture should have a pale, airy texture. This step is crucial; the butter’s fat content will carry the honey’s flavor throughout the cookie. Keep the bowl on the counter; if it gets too cold, the butter will harden and ruin the texture.
- Step 2: Add Sugars — Stir in the dark brown sugar first, then the granulated sugar. Mix until the sugars are evenly distributed and the batter has a slightly gritty feel. This grit is what gives the cookies their chewy center. A quick test: drop a spoonful into a cold glass; if it stays together, you’re good. If it falls apart, the batter is too dry and you’ll need to add a splash of milk or honey.
- Step 3: Beat Egg and Vanilla — Crack the egg into a separate bowl, whisk until the yolk and white blend. Add the vanilla extract and mix. Gently fold the egg mixture into the butter and sugar blend, using a spatula to keep the batter light. The egg adds structure but should not be overmixed. Watch for a slight sheen on the batter; that’s a sign of proper emulsification.
- Step 4: Mix Dry Ingredients — In a small bowl, whisk together the all‑purpose flour, baking soda, kosher salt, and flaky sea salt. Sift the flour to remove any lumps. The dry mix should feel airy and light. This step ensures the leavening agents are evenly distributed, preventing uneven rise or pockets of raw flour in the dough.
- Step 5: Combine Wet and Dry — Slowly pour the dry mixture into the wet batter, stirring gently with a spatula. Mix just until the flour is incorporated; the dough should be slightly sticky but not runny. Overmixing here will activate gluten and make the cookies tough. Feel the dough between your fingers; it should hold shape but still be pliable.
- Step 6: Chill the Dough — Cover the bowl with plastic wrap and refrigerate for at least 30 minutes, preferably 2 hours. Chilling firms the dough, making it easier to shape and preventing excessive spreading during baking. While chilling, the flavors meld, creating a deeper honey aroma. A quick tip: place the dough on a parchment sheet and freeze for 15 minutes if you’re short on time.
- Step 7: Portion Dough — Preheat your oven to 350°F (175°C) and line a baking sheet with parchment paper. Using a tablespoon, scoop dough onto the sheet, spacing them 2 inches apart. Sprinkle a pinch of flaky sea salt over each ball. The salt crystals will melt into a glossy sheen as the cookies bake. If you prefer a thicker cookie, increase the dough size to 1.5 inches.
- Step 8: Bake — Place the sheet in the preheated oven and bake for 12–14 minutes, until the edges are golden and the centers are set but still soft. The cookies will look slightly undercooked on the top; they’ll finish in the oven. Watch for the first sign of caramelization—when the edges darken, it’s time to pull them out. This is the moment of truth; the aroma will fill the kitchen.
- Step 9: Cool — Let the cookies cool on the sheet for 5 minutes before transferring them to a wire rack. This resting period allows the edges to set fully while the center stays soft. The cooling process also lets the salt crystals settle into the caramel glaze. Taste one right after cooling; the flavor should be balanced, not overly sweet or salty. Store them in an airtight container for up to a week.
That's it — you did it. But hold on, I've got a few more tricks that'll take this to another level. The next section will give you insider tips that will make your cookies the talk of the table.
Insider Tricks for Flawless Results
The Temperature Rule Nobody Follows
Many bakers bake at 375°F, but lowering the temperature to 350°F keeps the cookies from spreading too quickly. The lower heat allows the sugars to caramelize slowly, giving that glossy finish. I’ve tried 325°F as well, but the cookies became too doughy. Keep the oven rack in the middle to ensure even heat distribution. If your oven runs hot, reduce the temperature by 25°F to avoid overbrowning.
Why Your Nose Knows Best
Close your eyes and sniff the dough before baking; a faint, sweet honey aroma indicates the right balance. If it smells overwhelmingly sweet, add a pinch more sea salt. If it’s bland, the butter might be too old. My friend once skipped the salt step and the cookies tasted like a plain sugar cookie. The aroma is the quickest diagnostic tool in the kitchen.
The 5‑Minute Rest That Changes Everything
After shaping the dough, let it rest on parchment for 5 minutes before baking. This short pause allows the butter to relax, preventing the cookies from spreading too far. It also gives the sugars a chance to settle, creating a more uniform crumb. I’ve seen dough that was left to rest longer become too hard; 5 minutes is the sweet spot. Remember, this rest is not a cooling step—keep the dough warm.
The Secret of the Flaky Finish
Sprinkling the flaky sea salt just before baking gives the cookies a stunning visual cue. The salt crystals melt into a glossy glaze that catches the light. If you prefer a more pronounced crunch, use extra flaky salt and press it into the dough surface. Avoid over‑sprinkling; too much salt can dominate the honey flavor. A light dusting is enough to create that irresistible sparkle.
The Quick Chill Trick
If you’re short on time, place the dough on a cold tray in the fridge for 10 minutes before baking. The cold temperature quickly firms the dough, reducing spread. This trick is especially useful on hot days when the dough tends to melt. After chilling, let the dough sit at room temperature for 5 minutes so it’s easier to shape. This method keeps the cookies chewy without compromising the caramelized edges.
Creative Twists and Variations
This recipe is a playground. Here are some of my favorite ways to switch things up:
Nutty Crunch
Add 1/4 cup of chopped toasted almonds or pecans to the dough before baking. The nuts add a delightful crunch and a buttery flavor that complements the honey. Toast them in a dry skillet for a minute until fragrant. They’ll also provide a contrasting texture to the chewy center. This variation is perfect for nut lovers and pairs well with a glass of red wine.
Spiced Delight
Stir in 1/2 teaspoon of ground cinnamon and a pinch of nutmeg. The spices deepen the honey’s floral notes and give the cookies a warm, comforting aroma. Keep the spice amount moderate; too much can overpower the delicate sweetness. This version is ideal for fall or winter gatherings.
Chocolate Swirl
Drop a tablespoon of melted dark chocolate into the dough before baking. The chocolate will swirl into the honey, creating pockets of rich flavor. Use a high‑cocoa chocolate for a deeper taste. The chocolate also adds a slight bitterness that balances the sweetness. This twist is a hit with chocolate aficionados.
Citrus Zest
Grate the zest of one lemon or orange into the dough. The citrus oils add a bright, fresh note that cuts through the richness. Use a fine grater to avoid bitter pith. The zest pairs wonderfully with the honey’s floral undertones. This variation works great for spring or summer baking sessions.
Herbal Infusion
Add 1 tablespoon of dried rosemary or thyme to the dry ingredients. The herbs give an unexpected savory depth and pair well with the sea salt. Use a mild herb to avoid overwhelming the honey. This version is ideal for brunch or as a snack with a cold beverage. The herbal note adds a sophisticated twist to a classic cookie.
Storing and Bringing It Back to Life
Fridge Storage
Keep the cookies in an airtight container at room temperature for up to 5 days. The airtight seal preserves moisture, maintaining the chewy center. Avoid stacking the cookies; place parchment between layers to prevent sticking. If you notice a slight drying, place a slice of apple in the container to rehydrate. This method works best for cookies baked within the last 48 hours.
Freezer Friendly
Wrap each cookie individually in parchment and place them in a freezer bag. Freeze for up to 3 months. When you’re ready to enjoy, let them thaw at room temperature for 20 minutes. The cookies will retain their texture and flavor. For an extra touch, sprinkle a pinch of sea salt on top before freezing to keep the flavor crisp.
Best Reheating Method
Reheat in a preheated oven at 300°F for 5 minutes or until warm. The low temperature prevents the cookies from drying out. For a quick snack, microwave on low for 10 seconds; they’ll soften but may lose some crispness. Add a tiny splash of water before reheating if you notice the cookies are too dry; the water steams the surface back to perfection. This trick is especially useful when you want a fresh cookie after a long day.