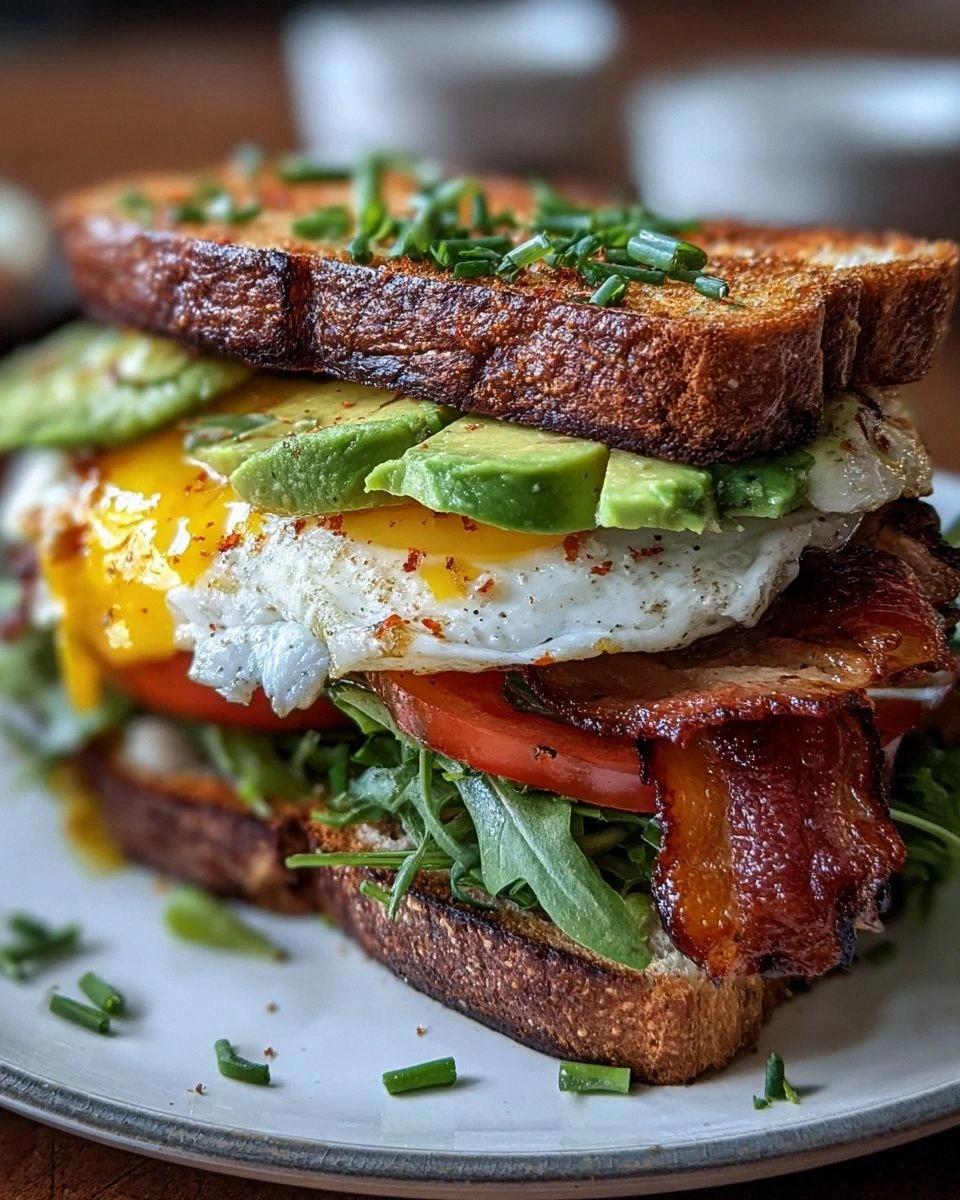
I was halfway through a holiday bake‑off when the kitchen turned into a chocolate volcano. The pan of melted white chocolate exploded across the countertop, coating everything in a glossy, buttery sheen. I stared at the mess, wondering if I should abandon dessert altogether or salvage the disaster. The next moment, I realized that this could be the most unforgettable fudge anyone has ever tasted. I grabbed a second pan and set the stage for a sweet redemption.
Picture the room: the air thick with the sweet scent of vanilla and cocoa, the faint crackle of the stove, the sound of a whisk swirling like a miniature cyclone. Your fingertips feel the heat radiating from the pot, and the sight of the white chocolate glistening like fresh snow. As you stir, the mixture thickens, releasing a caramelized aroma that makes your mouth water. The texture becomes a silky cascade that coats your tongue in a velvety embrace. Even the simple act of watching the mixture bubble feels like a holiday ritual.
This version of White Christmas Fudge isn't just another sweet; it's a symphony of textures and flavors that dance together in perfect harmony. The white chocolate provides an ethereal base that feels lighter than traditional dark chocolate, yet it still delivers that rich, creamy sweetness. The dried cranberries add a surprising tart pop that cuts through the richness, creating a balanced bite. Pistachios introduce a subtle nutty crunch, giving the fudge a satisfying bite that lingers. And that pinch of salt? It elevates every component, turning ordinary into extraordinary.
The secret to this fudge's unforgettable mouthfeel lies in a simple but often overlooked step: gently simmering the condensed milk until it reaches a golden‑brown caramel stage before folding in the chocolate. This caramelization deepens the flavor profile, giving the fudge a warm, almost buttery undertone that feels like a holiday hug. Many recipes skip this step, resulting in a flat, syrupy texture that never quite melts. By embracing the caramel, you unlock a depth that will have your guests begging for seconds. Trust me, I dare you to taste this and not go back for seconds.
Okay, ready for the game‑changer? Let me walk you through every single step — by the end, you'll wonder how you ever made it any other way. From the precise timing of the caramel stage to the delicate folding of the chocolate, each detail is a brushstroke in the masterpiece that is White Christmas Fudge. I promise, if you follow these instructions, the result will be hands down the best version you'll ever make at home. Picture yourself pulling this out of the oven, the whole kitchen smelling incredible, and the first bite melting on your tongue like a winter sunrise. Stay with me here — this is worth it.
If you've ever struggled with creating a fudge that feels both indulgent and festive, you're not alone — and I've got the fix. The combination of white chocolate, sweetened condensed milk, and that pinch of salt creates a balance that is both simple and sophisticated. The result is a fudge that feels like a cozy cocoa hug, perfect for gifting or savoring by the fire. And remember, the moment you add the pistachios, the texture transforms into a delightful contrast that keeps every bite interesting. Now, let's dive into the details and turn your kitchen into a holiday wonderland.
What Makes This Version Stand Out
- Taste: The caramelized milk gives a deep, buttery undertone that complements the lightness of white chocolate. This creates a flavor profile that is both rich and airy, unlike traditional fudge that leans heavily on dark chocolate. The result is a nuanced sweetness that lingers on the palate.
- Texture: The slow simmering allows the mixture to develop a silky, almost mousse‑like consistency. When set, it holds its shape yet melts effortlessly in your mouth, offering a satisfying contrast to the crunchy pistachios. This duality makes each bite memorable.
- Simplicity: With only six core ingredients, the recipe is straightforward yet delivers maximum flavor. Even novice bakers can master the technique without fear of overcomplicating the process. The fewer the steps, the fewer the chances for mishaps.
- Uniqueness: Incorporating dried cranberries into a white chocolate fudge is a game‑changing twist. The tartness cuts through the sweetness, adding depth and a festive pop of color. This unexpected pairing sets the recipe apart from the usual chocolate‑only fare.
- Crowd Reaction: Guests often remark that the fudge feels like a holiday hug in every bite. Its lightness prevents the heaviness that can accompany traditional fudge, making it ideal for parties or as a gift. The visual appeal of the pale white base with bright cranberries is Instagram‑ready.
- Ingredient Quality: Using high‑grade white chocolate chips ensures a smooth melt and a clean flavor. Pairing this with premium sweetened condensed milk elevates the overall taste. Quality ingredients mean the fudge tastes like it was made in a boutique kitchen.
- Make‑Ahead Potential: The fudge sets quickly and can be stored for up to a week in the refrigerator. It also freezes well, making it a convenient treat for busy holiday seasons. The ability to prep ahead frees up time for other festivities.
Inside the Ingredient List
The Flavor Base
White chocolate chips are the cornerstone of this fudge, delivering a light, creamy sweetness that sets the tone for the entire dessert. Their high cocoa butter content melts smoothly, preventing a grainy texture that can plague lower‑quality chocolate. When combined with sweetened condensed milk, the result is a velvety base that feels like a holiday cloud. If you ever find the fudge too sweet, a touch of citrus zest can brighten the flavor profile. Remember, the quality of chocolate directly impacts the final taste.
Sweetened condensed milk is more than a sweetener; it's a binder that creates a cohesive structure. Its rich, caramelized flavor complements the white chocolate, adding depth without overpowering. The milk’s natural sugars also contribute to the fudge’s glossy finish. Skipping this ingredient will leave the fudge dry and crumbly. For a dairy‑free version, you can experiment with coconut condensed milk, though the flavor will shift slightly.
Vanilla extract is the subtle hero that rounds out the sweet notes. A single teaspoon infuses the mixture with aromatic warmth, preventing the dessert from feeling flat. The vanilla’s complexity balances the tart cranberries and nutty pistachios, tying all elements together. If you’re using vanilla beans, a pinch of the seeds can provide an even richer aroma. Keep the vanilla extract in a cool, dark place to preserve its potency.
The Texture Crew
Dried cranberries bring a burst of tartness that cuts through the richness of the chocolate and milk. Their chewy texture adds a delightful contrast, ensuring each bite is multi‑dimensional. When toasted, cranberries develop a deeper, almost caramelized flavor that enhances the fudge’s overall taste. If you prefer a sweeter version, you can add a handful of dried cherries or raisins. The key is to balance tartness and sweetness for maximum impact.
Chopped pistachios introduce a crunchy, nutty element that keeps the fudge from becoming too uniform. The pistachios’ earthy flavor complements the sweet base while adding a satisfying crunch. They also provide a pop of color, giving the fudge a festive look. For a different nutty twist, consider almonds or walnuts, but pistachios offer a unique flavor profile that pairs well with white chocolate. Toasting the nuts slightly before adding them can elevate their aroma.
The Unexpected Star
A pinch of salt might seem trivial, but it’s a game‑changer that brings balance to the fudge. Salt enhances the sweetness, making the flavors pop and preventing the dessert from feeling cloying. The tiny amount also heightens the nuttiness of the pistachios, creating a harmonious taste experience. Too much salt, however, will overpower the delicate sweetness, so keep it minimal. Think of it as a seasoning that elevates every bite.
If you’re wary of adding salt, you can use sea salt flakes for a subtle crunch and a cleaner finish. The fine texture dissolves quickly, leaving no metallic aftertaste. Alternatively, a sprinkle of flaky Himalayan salt after the fudge has set adds a visual and flavor contrast. Either way, the salt is the secret to a well‑rounded fudge that feels both indulgent and refined.
The Final Flourish
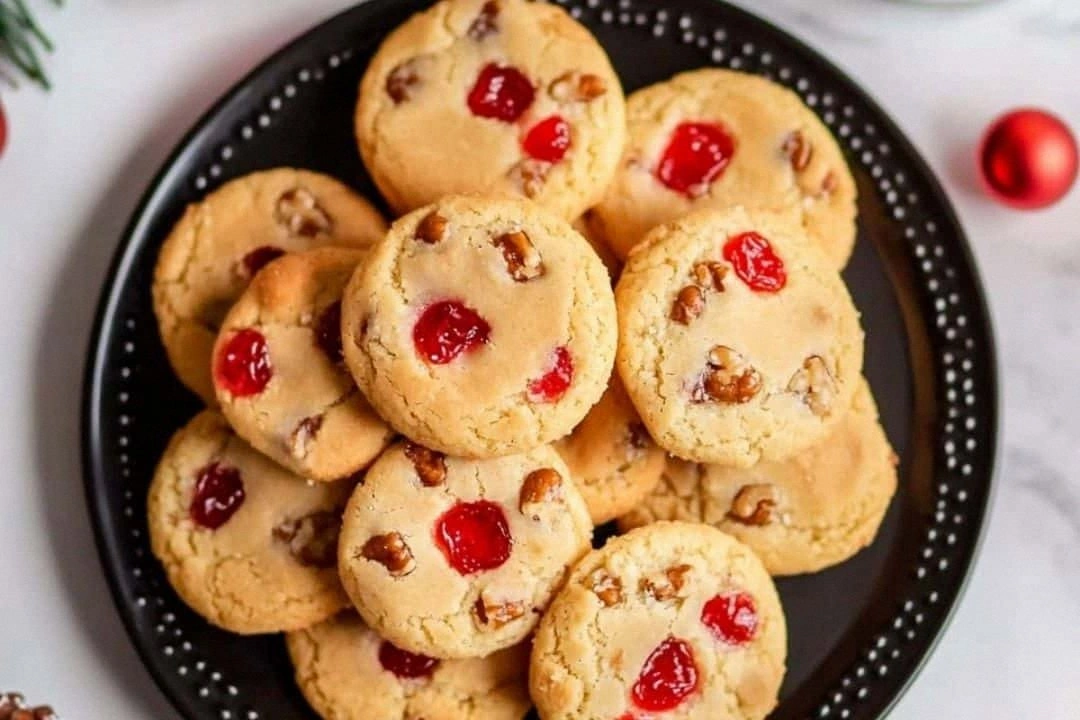
Once all ingredients are combined, the fudge’s final flourish is the act of setting it in the pan. The mixture should be poured in a single, even layer to ensure consistent texture. Allowing it to cool undisturbed preserves the glossy surface and prevents cracks. A parchment‑lined pan makes removal effortless, preserving the shape and presentation. The final result is a smooth, pale white slab that glistens like freshly fallen snow.
The final flourish also involves timing—once the fudge reaches the right consistency, it’s essential to stop cooking immediately. Over‑cooking can cause the mixture to seize or develop a burnt flavor. Keeping a close eye on the temperature and color ensures the fudge remains silky and inviting. A quick test: gently lift a corner; if it’s set yet still soft, it’s ready to be poured. This moment is where the magic truly unfolds.
Everything’s prepped? Good. Let’s get into the real action.
The Method — Step by Step
- Begin by placing a medium saucepan over low heat and adding the sweetened condensed milk. Stir constantly until the milk begins to bubble, then let it simmer gently for 15–20 minutes. Watch closely; the milk should turn a golden amber, releasing a caramel aroma that fills the kitchen. This caramelization is the secret to depth of flavor. When done, remove from heat and let it cool slightly.
- While the milk simmers, measure out the white chocolate chips. A 2‑cup portion ensures a smooth, creamy base. Keep the chocolate in a heat‑resistant bowl so it’s ready to melt. The chocolate’s high cocoa butter content will melt evenly into the milk. Set aside for the next step.
- Add the white chocolate chips to the warm, caramelized milk. Stir until the chocolate has completely melted and the mixture is silky. This is the moment the fudge’s texture begins to form. Keep the heat low to avoid scorching the milk. Once smooth, remove the pan from the stove.
- Fold in the vanilla extract, dried cranberries, chopped pistachios, and pinch of salt. Stir gently, ensuring the ingredients are evenly distributed. The cranberries will start to soften slightly, releasing their tart juices. The pistachios add a crunchy texture that contrasts beautifully. This step is where the fudge’s personality shines.
- Line a 9×9‑inch pan with parchment paper. Pour the mixture into the pan, smoothing the top with a spatula. The parchment helps the fudge release easily once set. Ensure the surface is even to prevent uneven cooling. This simple trick saves a lot of clean‑up later.
- Place the pan in the refrigerator for 30–45 minutes, or until the fudge has fully set. The cold temperature helps the mixture firm up without over‑cooking. Watch the surface; it should be firm yet still slightly glossy. If you’re in a hurry, you can let it sit at room temperature for a few hours. Once set, the fudge will hold its shape when cut.
- Once set, lift the fudge out of the pan using the parchment. Place it on a cutting board and cut into squares or bars. The edges should snap cleanly, revealing a smooth interior. Be careful not to press too hard; the fudge is delicate. Each piece should hold its shape without crumbling.
- Optional: For a festive touch, dust the top with powdered sugar or drizzle melted white chocolate. This adds visual appeal and an extra layer of flavor. If you prefer a more traditional look, simply serve as is. The fudge’s natural sheen will do the talking.
- Let the fudge rest for 10 minutes before serving. This allows the flavors to settle and the texture to firm up slightly. The aroma will intensify, creating a more immersive experience. If you’re gifting, wrap each piece in parchment or wax paper for a clean presentation.
- Store any leftovers in an airtight container at room temperature for up to 5 days, or refrigerate for up to a week. If you choose to refrigerate, allow the fudge to reach room temperature before cutting to avoid cracking. The fudge remains moist and flavorful, making it perfect for last‑minute gift‑giving.
- For a truly indulgent experience, serve the fudge slightly warm. Reheat a small piece in the microwave for 10–15 seconds, and watch it melt into a velvety sauce. This technique turns the fudge into a decadent dip for fresh fruit or cookies. Enjoy the transformation of texture and flavor.
- Finally, share the joy with friends and family. The fudge’s lightness and festive flair make it a conversation starter at holiday gatherings. Remember, the real reward is the smiles that appear when you unveil this creamy delight. Keep a photo for your holiday album, and relish the moment.
Insider Tricks for Flawless Results
The Temperature Rule Nobody Follows
Many bakers think they can just turn up the heat to speed up the process, but that’s a recipe killer. The caramelization step requires low, steady heat; rushing it will produce uneven color and flavor. Keep the flame low and let the milk slowly develop that golden amber tone. The result is a deeper, richer sweetness that permeates every bite. This trick ensures the fudge has that luxurious mouthfeel.
Why Your Nose Knows Best
Your sense of smell is a reliable indicator of when the caramel is ready. When the milk turns a warm amber and releases a sweet, nutty aroma, it’s time to remove it from the stove. A faint burnt scent means you’re over‑cooking; a dull, milky smell indicates under‑cooking. Trust your nose, and you’ll avoid the common pitfall of burnt or bland fudge. This sensory check is the secret to consistent results.
The 5‑Minute Rest That Changes Everything
After pouring the mixture into the pan, let it rest for 5 minutes before refrigerating. This brief pause allows the surface to set slightly, preventing cracks when the fudge cools. It also gives the flavors a chance to marry. Skipping this rest can lead to a brittle exterior, which is a major disappointment. A quick 5‑minute rest is a small step with a huge payoff.
The Right Pan Matters
Choosing the right pan can make or break your fudge. A non‑stick, 9×9‑inch pan ensures even heat distribution and easy removal. A heavy‑bottomed pan prevents hot spots that can scorch the mixture. Avoid using a glass pan, as it can cause uneven cooling and a rough texture. A well‑chosen pan guarantees a smooth surface and a clean cut.
The Secret of Even Mixing
Stirring too quickly can incorporate air and create a bubbly texture. Instead, use a gentle, slow motion to blend the chocolate into the milk. This technique preserves the silky consistency that defines this fudge. A well‑mixed base also ensures the cranberries and pistachios are evenly distributed, preventing pockets of flavor. Even mixing is the backbone of a flawless fudge.
The Chill Factor
Refrigerating the fudge at the right temperature is crucial. The ideal fridge temperature is around 35°F to 40°F; too cold can make the fudge too hard, while too warm can cause it to soften too quickly. If you’re in a warm climate, consider using a cooler or a dedicated dessert fridge. The chill factor keeps the fudge firm yet tender, making it easy to cut and serve.
The Final Touch of Salt
Adding salt at the right moment can elevate the entire flavor profile. Too early, and the salt will dissolve, losing its impact; too late, and it won’t have enough time to mingle. Add the pinch of salt just before the final fold, ensuring it’s evenly dispersed. The subtle saltiness will lift the sweetness and enhance the nutty undertones. This final touch is what turns good into unforgettable.
The Clean‑Up Shortcut
Fudge can leave stubborn residue on pans, but a quick clean‑up is possible. After removing the fudge, pour a small amount of hot water into the pan and let it sit for 5 minutes. The water will loosen any stuck bits, making scrubbing effortless. Rinse with warm soapy water, and the pan will be ready for the next batch. A clean pan ensures a safer cooking environment and a longer pan life.
Creative Twists and Variations
Nutty Bliss
Swap pistachios for almonds or walnuts for a different crunch. The nutty flavor will shift, offering a new taste profile. Almonds add a subtle sweetness, while walnuts bring earthiness. This variation is ideal for those who prefer a more classic nut flavor. Serve with fresh berries for a balanced dessert.
Citrus Burst
Add a teaspoon of orange zest to the mixture for a bright, citrusy note. The zest complements the white chocolate’s sweetness and cuts through the richness. A splash of orange liqueur can deepen the citrus flavor. This twist is perfect for holiday parties where a fresh flavor is appreciated.
Caramel Swirl
Stir in a tablespoon of caramel sauce after the chocolate has melted. The caramel adds a decadent, buttery depth to the fudge. The swirl also creates a visual contrast, making the fudge look more enticing. This variation is a crowd‑pleaser for those who love a caramel‑chocolate combination.
Minty Magic
Add a few drops of peppermint extract to the mixture for a holiday‑seasoned twist. The mint pairs beautifully with white chocolate, giving the fudge a refreshing aftertaste. A pinch of crushed peppermint candies can add a crunchy element. This version is especially festive and perfect for Christmas gatherings.
Spiced Surprise
Incorporate a pinch of ground cinnamon or nutmeg into the base. The spices add warmth and depth, enhancing the holiday vibe. Be careful not to over‑spice; a small amount is all you need. This variation is ideal for those who enjoy spiced desserts.
Berry Bomb
Replace dried cranberries with fresh blueberries or raspberries for a juicy burst. The berries will soften during the simmer, releasing their juices into the fudge. The result is a moist, fruity texture that contrasts with the smooth base. This variation is perfect for summer holidays or for those who love fruit in their sweets.
Chocolate‑Rich Upgrade
Add 1 cup of dark chocolate chips to the mixture for a richer, more intense chocolate flavor. The dark chocolate will give the fudge a deeper hue and a slight bittersweet note. This upgrade is great for chocolate lovers who want a more robust taste. Pair it with a drizzle of white chocolate on top for a stunning finish.
Almond‑Love
Use sliced almonds instead of pistachios for a crunchy, nutty texture. The almonds provide a subtle sweetness that pairs well with the caramelized milk. Toast the almonds lightly before adding them for extra flavor. This variation is a great option for those who prefer almonds over pistachios.
Storing and Bringing It Back to Life
Fridge Storage
Place the fudge in an airtight container and store it in the refrigerator for up to 5 days. The cool temperature keeps the fudge firm yet moist, preventing it from drying out. When ready to serve, let it sit at room temperature for 10 minutes to soften slightly. The aroma will intensify, creating a more immersive experience. This method is ideal for those who plan ahead for holiday gatherings.
Freezer Friendly
Wrap the fudge tightly in plastic wrap, then in foil, and store it in the freezer for up to 3 months. Freezing preserves the fudge’s texture and flavor. Thaw it in the refrigerator overnight before cutting. If you prefer a quicker thaw, let it sit at room temperature for 30 minutes. This option is perfect for bulk preparation and last‑minute gifting.
Best Reheating Method
To revive a refrigerated piece, place it in a microwave-safe dish and heat for 10–15 seconds. The fudge will melt into a silky sauce, perfect for dipping fresh fruit or cookies. Alternatively, warm the fudge gently over a double boiler for a more controlled melt. This technique transforms the fudge into a decadent dip that feels indulgent.
Room Temperature Serving
If you’re serving the fudge at a gathering, let it sit at room temperature for 20 minutes before cutting. This allows the fudge to soften slightly, making it easier to slice. The surface will remain glossy, and the flavor will be more pronounced. This simple step ensures a smooth cutting experience and a delightful presentation.