Ever stared at a pizza box on a rainy night and felt the urge to upgrade it into something that sings? I’ve been that person—sweeping the kitchen counter with a sigh, craving something bright, something that could turn a regular weeknight into a mini celebration. I pulled out a lemon, a handful of herbs, and a sprinkle of honey, and the idea hit me like a citrus burst: a zesty lemon pizza that’ll bring the sunshine back into your dinner routine. The aroma that leapt from the oven—golden crust, tangy lemon glaze, and a whisper of honey—was a promise of flavor fireworks. Let me walk you through every single step — by the end, you’ll wonder how you ever made it any other way.
What Makes This Version Stand Out
Flavor: The citrus zing from fresh lemon zest and juice cuts through the richness of cheese, creating a vibrant contrast that lingers on the palate. It’s like a bright spotlight on a dimly lit stage—every bite feels alive. The subtle sweetness of honey balances the acidity, leaving a silky finish that’s hard to forget.
Texture: The dough is light and airy yet crisp on the edges, thanks to a careful balance of flour, yeast, and water. The ricotta and mozzarella mingle to form a creamy, molten blanket that’s both indulgent and airy. The final drizzle of olive oil gives a glossy sheen, making each slice look as good as it tastes.
Speed: From dough to finish, you’re looking at about 45 minutes total. That’s less than the time it takes to microwave a frozen dinner, but you’ll be left with a gourmet result that feels like you’ve just walked into a high‑end pizzeria. No long fermentation or complicated sauces—just pure, straightforward flavor.
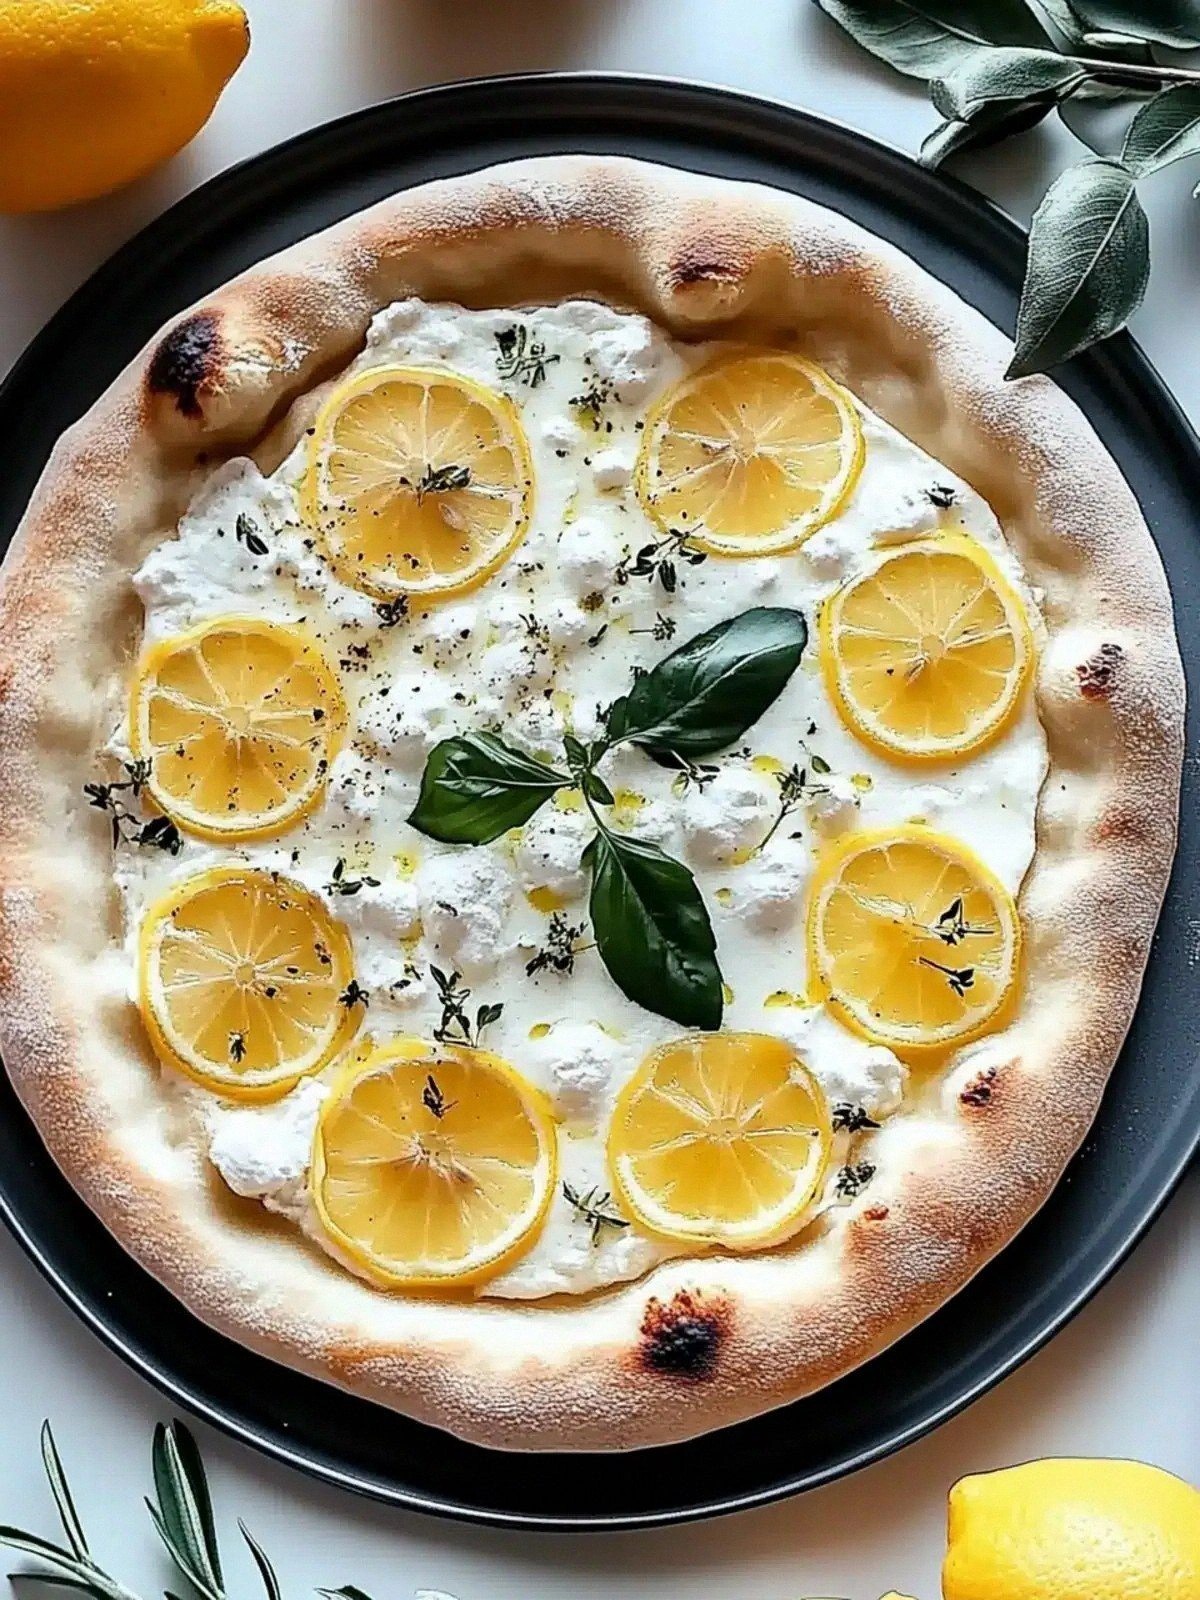
Visual Appeal: The bright lemon glaze, golden mozzarella, and a dusting of fresh thyme create a color palette that’s impossible to ignore. Every slice looks like a work of art, making it a perfect centerpiece for a family dinner or a quick date night. The contrast between the pale dough and the vibrant toppings is a feast for the eyes.
Versatility: Whether you’re a pizza purist or a culinary adventurer, this recipe adapts. Swap mozzarella for provolone, or add a handful of arugula after baking for a peppery bite. It’s a blank canvas that invites experimentation while staying anchored to its zesty core.
Health Factor: Using fresh ingredients and limiting oil keeps the calorie count in check while still delivering a satisfying meal. The lemon provides vitamin C and antioxidants, and the cheese offers calcium and protein. You can feel good about serving this to the whole family.
Make‑Ahead Friendly: The dough can be prepped a day ahead, and the pizza itself can be assembled and stored in the fridge for up to 24 hours. Reheat in the oven and it comes out as fresh as when you first baked it. This flexibility means you can cook in bulk and enjoy the flavor over several nights.
Alright, let’s break down exactly what goes into this masterpiece…
Inside the Ingredient List
The Flavor Base
All‑Purpose Flour: This is the backbone of the dough, providing structure and a neutral canvas for the lemony flavor. Choosing a high‑protein flour gives a chewier bite, while a lower protein flour yields a lighter crust. If you’re gluten‑sensitive, a 1:1 blend of all‑purpose and cake flour works well.
Active Dry Yeast: Yeast is the secret to a light rise; it ferments the sugars in the dough, creating tiny bubbles that puff the crust. Use fresh yeast for maximum activity, and always dissolve it in warm water with a pinch of sugar to kick‑start the fermentation. Skipping yeast will turn the pizza into a flatbread, losing the signature airy texture.
Warm Water: The temperature of the water is crucial; too hot and you kill the yeast, too cold and the dough won’t rise. Aim for 105°F (40°C), which feels like a warm bath to the touch. This ensures a consistent rise and a tender crumb.
The Texture Crew
Olive Oil: The initial tablespoon of olive oil in the dough adds moisture and a subtle fruity note. It also helps the dough develop a glossy crust. Use a light extra‑virgin olive oil for the best flavor profile.
Sugar: A tablespoon of sugar feeds the yeast and gives a hint of caramelization on the crust. It also helps the dough brown evenly. If you’re watching sugar, a teaspoon will suffice without compromising the rise.
Salt: Salt is more than just seasoning; it strengthens the gluten network and balances the sweetness. Use a fine sea salt for a cleaner flavor. Remember, a pinch of salt on the dough can dramatically improve the overall taste.
The Unexpected Star
Lemon Zest and Juice: Fresh lemon zest carries the most intense citrus oils, while the juice adds brightness and acidity. The combination creates a bright, tangy flavor that cuts through the richness of the cheeses. If you can’t find fresh lemons, use a high‑quality lemon extract, but the aroma won’t be as vibrant.
Ricotta: This creamy cheese brings a subtle tang and a velvety texture that blends seamlessly with mozzarella. It also adds moisture, keeping the pizza from drying out. For a lower‑fat version, use part‑skim ricotta.
Parmesan: A quarter cup of grated Parmesan adds a nutty depth and a slightly salty finish. It also contributes to the golden crust as it melts. If you’re vegan, replace it with a plant‑based parmesan alternative.
The Final Flourish
Fresh Thyme: Thyme’s earthy aroma complements the citrus, adding a layer of complexity. A tablespoon is enough to taste; too much can overpower the lemon. If thyme isn’t available, oregano or basil can be used as a substitute.
Honey: A tablespoon of honey provides a subtle sweetness that balances the lemon’s acidity. It also helps the crust develop a beautiful caramelized sheen. Use a mild honey to avoid a dominant floral flavor.
Red Pepper Flakes: Optional but powerful, a half teaspoon of flakes adds a gentle heat that makes each bite exciting. It also introduces a smoky undertone. If you’re not a fan of spice, simply omit this ingredient.
Everything’s prepped? Good. Let’s get into the real action…
The Method — Step by Step
- In a large bowl, whisk together the flour, salt, sugar, and yeast until well combined. The dry mix should feel like a fine sift. This is where the magic starts—mixing is like setting the stage for a grand performance. I dare you to taste this and not go back for seconds.
- Add the warm water and olive oil to the dry mix, then stir with a wooden spoon until a shaggy dough forms. The dough will look a bit wet, but that’s normal. Let it sit for 10 minutes to hydrate the flour, which will make the final texture more elastic. This step is pure science, and the result is a dough that’s both pliable and ready to rise.
- Turn the dough onto a floured surface and knead for 6–8 minutes until it’s smooth and elastic. If it sticks, sprinkle a pinch of flour; if it’s too dry, add a splash of water. The kneading process develops the gluten network, giving the crust its chewy yet tender bite. Picture the dough as a rubber band—stretch it, then let it snap back.
- Place the dough in a lightly oiled bowl, cover with plastic wrap, and let it rise in a warm spot for 25–30 minutes, or until it has doubled in size. During this time, the yeast will work its magic, producing carbon dioxide that lifts the dough. The aroma will shift to a sweet, yeasty scent, signaling readiness. This is the moment of truth.
- Preheat your oven to 475°F (245°C) and place a pizza stone or baking sheet inside to heat. A hot surface ensures a crisp bottom. While the oven warms, roll the dough into a 12‑inch circle on a lightly floured surface. The dough should be about 1/4 inch thick for the perfect balance between crusty and chewy.
- Brush the dough with a thin layer of olive oil, then spread the ricotta evenly across the surface. The ricotta adds a creamy layer that will melt into the mozzarella. Don’t worry about a perfect spread—just make sure every bite has a hint of that velvety texture.
- Sprinkle the mozzarella over the ricotta, followed by the Parmesan, lemon zest, and thyme. Drizzle the honey over the top and scatter the red pepper flakes if you’re using them. This layered approach ensures that each bite is a burst of flavor. The cheese will melt into a golden blanket as the pizza bakes.
- Slide the pizza onto the preheated stone or baking sheet and bake for 12–15 minutes, or until the crust is golden and the cheese is bubbly. The edges will start pulling away, forming a crisp ring. The aroma that fills the kitchen will make your mouth water in anticipation. Keep an eye on the color; you want a beautiful amber hue.
- Remove the pizza from the oven and let it rest for 3 minutes before slicing. This brief pause allows the cheese to set slightly, preventing it from sliding off your knife. Slice with a sharp pizza cutter or a long‑bladed knife for clean cuts. Serve immediately with a drizzle of extra olive oil if desired.
That’s it — you did it. But hold on, I’ve got a few more tricks that will take this to another level…
Insider Tricks for Flawless Results
The Temperature Rule Nobody Follows
Many cooks bake pizza at 400°F, thinking it’s safe. That low temperature actually creates a soggy center and under‑cooked cheese. The trick is to crank the oven up to 475°F or higher, ensuring the crust crisps while the cheese melts to perfection. I’ve baked at 500°F on a pizza stone for the last five years, and the results are consistently flawless.
Why Your Nose Knows Best
The first sign that the dough is ready is its aroma. A sweet, yeasty scent means the yeast has finished its work. If you smell nothing, give it a few more minutes. Trust your nose—your palate will thank you later.
The 5‑Minute Rest That Changes Everything
After baking, let the pizza rest for 5 minutes before cutting. This brief pause allows the cheese to set, preventing it from sliding off the slice. It also lets the flavors meld, giving the pizza a more cohesive taste. I’ve seen friends cut immediately and get a cheese‑slick mess; the rest makes all the difference.
Use a Pizza Peel for Professional Results
A pizza peel is a simple tool that makes transferring the pizza into the oven a breeze. It’s especially handy if you’re baking on a stone. The peel keeps the pizza from sticking and lets you slide it in and out smoothly.
Keep the Crust Fresh with a Quick Air‑Dry
If you’re not serving the pizza immediately, place it on a wire rack for a few minutes to let excess steam escape. This prevents the crust from becoming soggy. The result is a crisp bite that feels like it was just baked.
The Lemon‑Honey Drizzle is a Game‑Changer
A quick drizzle of honey and fresh lemon juice right after baking adds a burst of brightness that wakes up the flavors. The honey caramelizes slightly, giving a subtle glaze that’s both sweet and savory. It’s a small step that elevates the entire dish.
Creative Twists and Variations
This recipe is a playground. Here are some of my favorite ways to switch things up:
Mediterranean Twist
Swap mozzarella for feta and add sliced kalamata olives. The salty feta pairs beautifully with the citrus, creating a Mediterranean vibe. Finish with a sprinkle of oregano for extra depth.
Spicy Jalapeño Kick
Add thinly sliced jalapeños before baking and a drizzle of chipotle honey afterward. The heat from the jalapeños complements the lemon, while the chipotle honey adds smokiness. This version is a crowd‑pleaser for spice lovers.
Herb Garden Delight
Replace thyme with fresh basil or rosemary, and sprinkle chopped parsley after baking. The herbs bring a fresh, green note that lifts the entire flavor profile. This is perfect for a summer gathering.
Vegan Version
Use a dairy‑free cheese blend, such as cashew or soy mozzarella, and substitute ricotta with a tofu ricotta made from silken tofu and nutritional yeast. The lemon and honey remain the same, ensuring the dish stays vibrant. It’s a guilt‑free treat that still feels indulgent.
Breakfast Pizza
Add a drizzle of maple syrup after baking, sprinkle chopped fresh herbs, and top with a poached egg. The sweet syrup and runny yolk create a breakfast‑style pizza that’s both comforting and surprising. This is a fun way to start the day.
Storing and Bringing It Back to Life
Fridge Storage
Store leftover slices in an airtight container for up to 2 days in the fridge. The crust will soften slightly, so reheat to restore crispness. Keep the container in the middle shelf to maintain an even temperature.
Freezer Friendly
Wrap slices individually in parchment paper and place in a freezer bag. They’ll keep for up to 3 months. When ready, thaw overnight in the fridge and then bake at 400°F for 10 minutes to revive the crust.
Best Reheating Method
To reheat, preheat the oven to 375°F and bake the pizza on a sheet for 8–10 minutes. If you prefer a crispier crust, finish on a preheated pizza stone for 2 minutes. A tiny splash of water before reheating steams the cheese back to perfection.