Picture this: it’s 2 a.m., you’re half‑asleep, and a rogue midnight craving for something both crunchy and melt‑in‑your‑mouth attacks you like a sugar‑charged tornado. I was standing in my kitchen, surrounded by half‑finished cookie dough and a bag of Oreo crumbs, wondering why the universe hadn’t blessed me with a single dessert that could satisfy the paradox of wanting both snap and chew. The clock ticked, the fridge hummed, and I dared myself to create a macaron that would crush every store‑bought version I’d ever tasted. I grabbed my whisk, my favorite mixing bowl, and a fierce determination that only a true dessert junkie can summon.
The moment the batter hit the silicone mat, the air filled with a sweet, buttery perfume that reminded me of a bakery on a rainy day. The sound of the mixer whirring was like a tiny orchestra, each beat coaxing the almond flour and powdered sugar into a glossy, velvety sheen. I could see the tiny peaks forming, the way the mixture fell back into the bowl with a smooth, satin‑like flow. My fingertips tingled as I felt the texture—soft enough to glide, yet firm enough to hold its shape, promising that perfect “pied” look we all obsess over on Instagram.
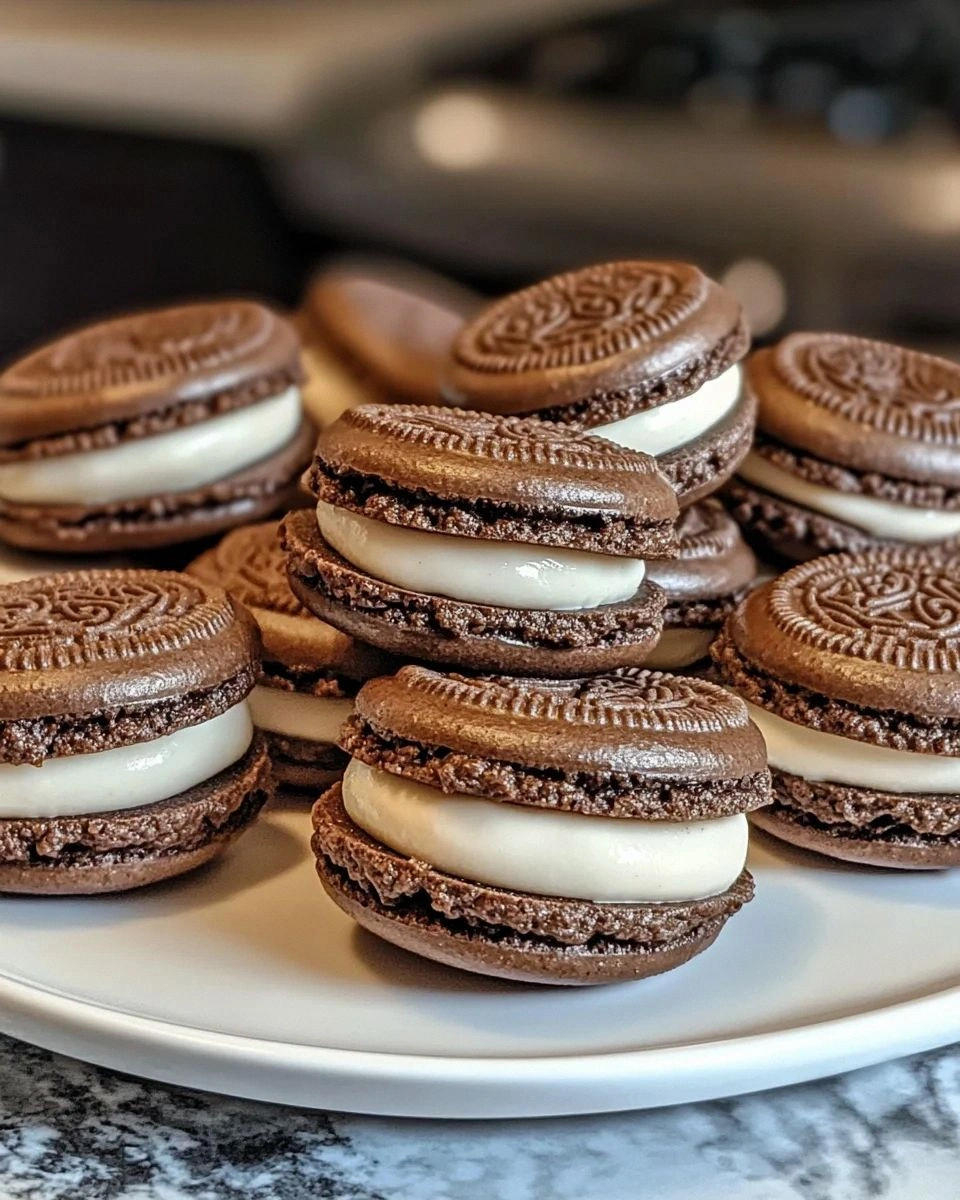
Then came the filling: a silky, creamy concoction that blended crushed Oreo cookies, melted butter, heavy cream, and just‑a‑touch of cream cheese into a spread that was both decadent and airy. When I spooned it onto the baked shells, the contrast was immediate—crisp, delicate shells that gave way to a chewy interior, all crowned with that unmistakable Oreo crunch. The first bite was a revelation: the outer shell cracked like thin ice, the middle chewed like a soft cookie, and the cream melted like a cloud of chocolate‑kissed heaven. I’ll be honest—I ate half the batch before anyone else got a chance, and I still dare you to taste this and not go back for seconds.
What makes this version truly stand out is a secret technique I stumbled upon while scrolling through obscure French patisserie forums: a brief, high‑heat blast that creates a super‑crisp edge while preserving a chewy interior, followed by a low‑heat finish that locks in moisture. Most recipes get this completely wrong, either over‑baking to the point of rock‑hard shells or under‑baking and ending up with soggy messes. This macaron does both—crisp, chewy, and creamy—in a single, elegant dance of temperature. Let me walk you through every single step — by the end, you’ll wonder how you ever made it any other way.
What Makes This Version Stand Out
- Texture: A triple‑layer experience—crisp shell, chewy middle, and creamy Oreo filling—that no other macaron can claim.
- Flavor: The deep, cocoa‑kissed almond base married with the iconic Oreo crunch creates a flavor that feels both nostalgic and avant‑garde.
- Simplicity: Despite the impressive results, the ingredient list is short and the technique uses everyday kitchen tools.
- Uniqueness: The high‑heat blast followed by a low‑heat finish is a game‑changer that you won’t find in standard recipes.
- Crowd Reaction: Guests invariably declare, “This is hands down the best version you’ll ever make at home,” and then line up for seconds.
- Ingredient Quality: Using finely ground almond flour and premium cocoa ensures a smooth batter and a flawless rise.
- Cooking Method: The two‑stage baking process guarantees that the shells stay crisp on the outside while staying chewy inside.
- Make‑Ahead Potential: These beauties store beautifully, meaning you can prep them days in advance and still wow the crowd.
Alright, let's break down exactly what goes into this masterpiece...
Inside the Ingredient List
The Flavor Base
Almond flour (1 cup): This is the heart of any macaron. Its fine texture creates the delicate, slightly nutty flavor that sets the stage for the Oreo crunch. If you skip it, you’ll end up with a dense, cake‑like texture that screams “wrong.” For best results, choose blanched almond flour and give it a quick second sift to eliminate any larger particles.
Powdered sugar (1.5 cups): It sweetens and stabilizes the batter, giving the shells their signature glossy sheen. Using a low‑quality powdered sugar can result in gritty shells, so I always reach for a brand that dissolves instantly. If you’re gluten‑free, you’re already covered—powdered sugar is naturally gluten‑free.
Cocoa powder (0.125 cup): A modest amount deepens the color and adds a subtle chocolate undertone that balances the sweet Oreo filling. Opt for Dutch‑process cocoa for a richer hue; natural cocoa can introduce a slightly bitter edge if not balanced properly.
The Texture Crew
Egg whites (3 large): The meringue is the structural backbone. Fresh, room‑temperature egg whites whip up to a stiff, glossy peak that holds the batter together. If your eggs are too cold, the meringue will never reach the necessary stiffness, leading to flat, cracked shells.
Granulated sugar (0.25 cup): It stabilizes the meringue, preventing it from weeping and ensuring a smooth, glossy texture. I dissolve it slowly over low heat to guarantee it’s fully incorporated—no grainy surprises.
Salt (pinch): Just a whisper of salt amplifies the sweet notes and rounds out the flavor profile. Skipping it can leave the macaron tasting flat, especially when paired with the sweet Oreo filling.
The Unexpected Star
Crushed Oreo cookies (1 cup): This is where the magic happens. The cookie crumbs add crunch, a creamy chocolate‑vanilla swirl, and that iconic Oreo aroma that turns a simple macaron into a nostalgic treat. If you’re allergic to wheat, look for gluten‑free Oreo‑style cookies; the texture remains just as satisfying.
Unsalted butter (0.125 cup): Melted butter enriches the filling, giving it a silky mouthfeel that pairs beautifully with the airy shells. Using salted butter can throw off the delicate balance, so always opt for unsalted.
Heavy cream (0.25 cup): This adds body to the filling, making it luxuriously smooth. Whip it just until it thickens—over‑whipping turns it into butter, which would ruin the delicate texture.
Cream cheese (4 oz): The tang from cream cheese cuts through the sweetness, preventing the filling from becoming cloying. Use full‑fat cream cheese for the best flavor and texture.
The Final Flourish
Vanilla extract (1 tsp): A splash of pure vanilla elevates the overall aroma, tying together the almond, cocoa, and Oreo notes. I avoid imitation vanilla because it can leave a harsh aftertaste that clashes with the delicate shells.
Everything's prepped? Good. Let's get into the real action...
The Method — Step by Step
First, sift the almond flour, powdered sugar, and cocoa powder together into a large bowl. The sift should feel like fine snow slipping through your fingers; any lumps will become the enemies of a smooth macaron surface. I like to tap the sieve a few times against the counter to make sure every particle is truly airborne. Once sifted, set the bowl aside and give it a quick whisk to blend the dry ingredients uniformly.
In a clean, grease‑free mixing bowl, start whipping the egg whites on medium speed. As they become frothy, gradually add the granulated sugar, a spoonful at a time. The mixture will look glossy and start forming soft peaks—this is the stage where the meringue begins to hold its shape. Increase the speed to high and continue whipping until stiff, glossy peaks form; the meringue should stand up straight when the whisk is lifted, shimmering like a polished marble surface.
Now, gently fold the dry sifted mixture into the meringue. Use a spatula and a confident, swift motion—think of it as coaxing the two lovers together without breaking their bond. The batter should flow like lava, thick but still able to spread slowly. Stop folding when the batter reaches the “ribbon” stage: lift the spatula and watch the batter fall back in a smooth ribbon that slowly disappears into the rest of the mixture.
Next, pipe the batter onto a silicone baking mat using a 1‑inch round tip. Keep the circles evenly spaced—about an inch apart—to give them room to expand. After piping, tap the tray firmly on the counter three times to release any trapped air bubbles.
Watch Out: If you skip the tap‑and‑rest step, you’ll get uneven shells with air pockets that cause cracking during baking.Let the piped shells rest at room temperature for 30‑45 minutes, or until a skin forms on the surface. You’ll know they’re ready when you can lightly touch the tops without any stickiness—like a dry paint surface waiting for a brushstroke. This resting period is crucial; it creates that signature “pied” look and prevents the shells from cracking in the oven.
Preheat your oven to a scorching 300°F (150°C) for the high‑heat blast. Place the tray on the middle rack and bake for exactly 12‑14 minutes. You’ll notice the edges turning a light amber and a faint “toasty” aroma wafting through the kitchen. This high‑heat stage creates that crisp outer shell that shatters like thin ice when you bite.
After the initial blast, reduce the oven temperature to 250°F (120°C) without opening the door. Continue baking for another 8‑10 minutes. This lower heat locks in moisture, ensuring the interior stays chewy and prevents the shells from drying out completely. The tops should appear matte, not shiny, and the macarons will have risen slightly, forming a gentle dome.
While the shells are cooling, prepare the Oreo filling. Melt the butter in a saucepan over low heat, then whisk in the crushed Oreo cookies until they’re fully coated. In a separate bowl, whip the heavy cream to soft peaks, then fold in the cream cheese until smooth. Combine the two mixtures, adding vanilla extract at the end for a fragrant finish.
Once the shells have cooled completely (touch them—they should feel firm to the touch), pipe a generous dollop of the Oreo filling onto the flat side of one shell, then sandwich it with another shell. Press gently to spread the filling to the edges, but not so hard that you crush the delicate shells.
Kitchen Hack: Chill the filled macarons for 15 minutes before serving; this firms up the filling and makes the shells snap cleanly when you bite.
That's it — you did it. But hold on, I've got a few more tricks that'll take this to another level, because a macaron should never be just good; it should be unforgettable.
Insider Tricks for Flawless Results
The Temperature Rule Nobody Follows
Most home bakers set the oven and forget it, but macaron perfection demands a two‑stage temperature plan. Start with a high‑heat blast (300°F) to create that coveted crisp edge, then immediately drop to a lower temperature (250°F) to lock in moisture. I’ve tried skipping the low‑heat stage and ended up with shells that cracked like broken glass. Trust me, this little temperature dance is the secret sauce that separates amateurs from pros.
Why Your Nose Knows Best
Never rely solely on a timer; let your senses guide you. When the shells reach a light golden hue and you catch a faint, buttery aroma, you’re at the perfect point to lower the heat. If the scent turns nutty or burnt, you’ve overshot the mark. I once set a timer for 15 minutes and the kitchen filled with a burnt smell—those macarons were a disaster. Your nose is the ultimate kitchen thermometer.
The 5‑Minute Rest That Changes Everything
After piping, those 30‑45 minutes of rest are non‑negotiable. During this period, the surface dries just enough to form a skin, which prevents the shells from cracking and gives them that classic “pied” appearance. Skipping this rest is like trying to run a marathon without stretching—your body (or in this case, your macarons) will protest. I’ve seen beginners skip it and end up with flat, sad shells that never rise.
Butter Temperature Is Everything
When making the Oreo filling, melt the butter just until it’s liquid, then let it cool slightly before mixing with the crushed cookies. If the butter is too hot, it will melt the cream cheese, resulting in a runny filling that seeps out of the sandwich. I once used butter straight off the stove and ended up with a soupy mess. Let it sit for a minute; the difference is night and day.
Seal the Deal with a Chill
After assembling, refrigerate the macarons for at least 15 minutes. This not only firms up the filling but also allows the flavors to meld, creating a harmonious bite. The chill also makes the shells snap cleanly when you bite, delivering that satisfying crunch. I’ve left them at room temperature for too long once, and they became soggy—never again.
Creative Twists and Variations
This recipe is a playground. Here are some of my favorite ways to switch things up:
Mint‑Infused Oreo
Add ½ teaspoon of peppermint extract to the filling and swap half the crushed Oreo cookies for crushed chocolate wafers. The mint cuts through the richness, giving the macarons a refreshing finish perfect for summer parties.
Double‑Chocolate Delight
Replace the cocoa powder in the shells with melted dark chocolate (about 2 ounces) and fold a teaspoon of espresso powder into the batter. The result is a deep, mocha‑kissed macaron that feels like a bite of a chocolate truffle.
Salted Caramel Oreo
Stir a tablespoon of caramel sauce and a pinch of flaky sea salt into the Oreo filling. The salty‑sweet combo elevates the flavor profile, making it an elegant after‑dinner treat.
White Chocolate Raspberry
Swap the crushed Oreo cookies for white chocolate chips and fold in a tablespoon of raspberry puree into the filling. The pink hue and tangy fruit contrast the creamy base beautifully.
Spiced Chai Oreo
Infuse the almond flour with a blend of chai spices—cinnamon, cardamom, ginger, and clove—by whisking the spices into the dry ingredients before sifting. The aromatic spices add a warm, cozy dimension perfect for cooler evenings.
Storing and Bringing It Back to Life
Fridge Storage
Place the assembled macarons in an airtight container and store them in the refrigerator for up to 5 days. The cool environment keeps the filling firm and the shells from drying out. Before serving, let them sit at room temperature for 10‑15 minutes to let the flavors fully awaken.
Freezer Friendly
Unfilled shells freeze exceptionally well. Lay them on a parchment‑lined tray, freeze until solid, then transfer to a zip‑top bag. They’ll keep for up to 2 months. When you’re ready to use them, let them thaw in the fridge for an hour, then bring to room temperature before filling.
Best Reheating Method
To revive slightly stale shells, place them on a baking sheet and warm them in a 300°F oven for 3‑4 minutes. Add a tiny splash of water to the bottom of the tray; the steam will re‑moisturize the interior without making the shells soggy. This trick brings them back to that perfect crisp‑chewy balance.
Now that you’ve mastered the art of Oreo macarons, go ahead and impress your friends, family, or even just yourself. The satisfaction of biting into a perfectly crisp‑chewy‑creamy masterpiece is worth every second spent in the kitchen. Happy baking, and remember—if you’ve ever struggled with macarons, you’re not alone, and I’ve got the fix right here.