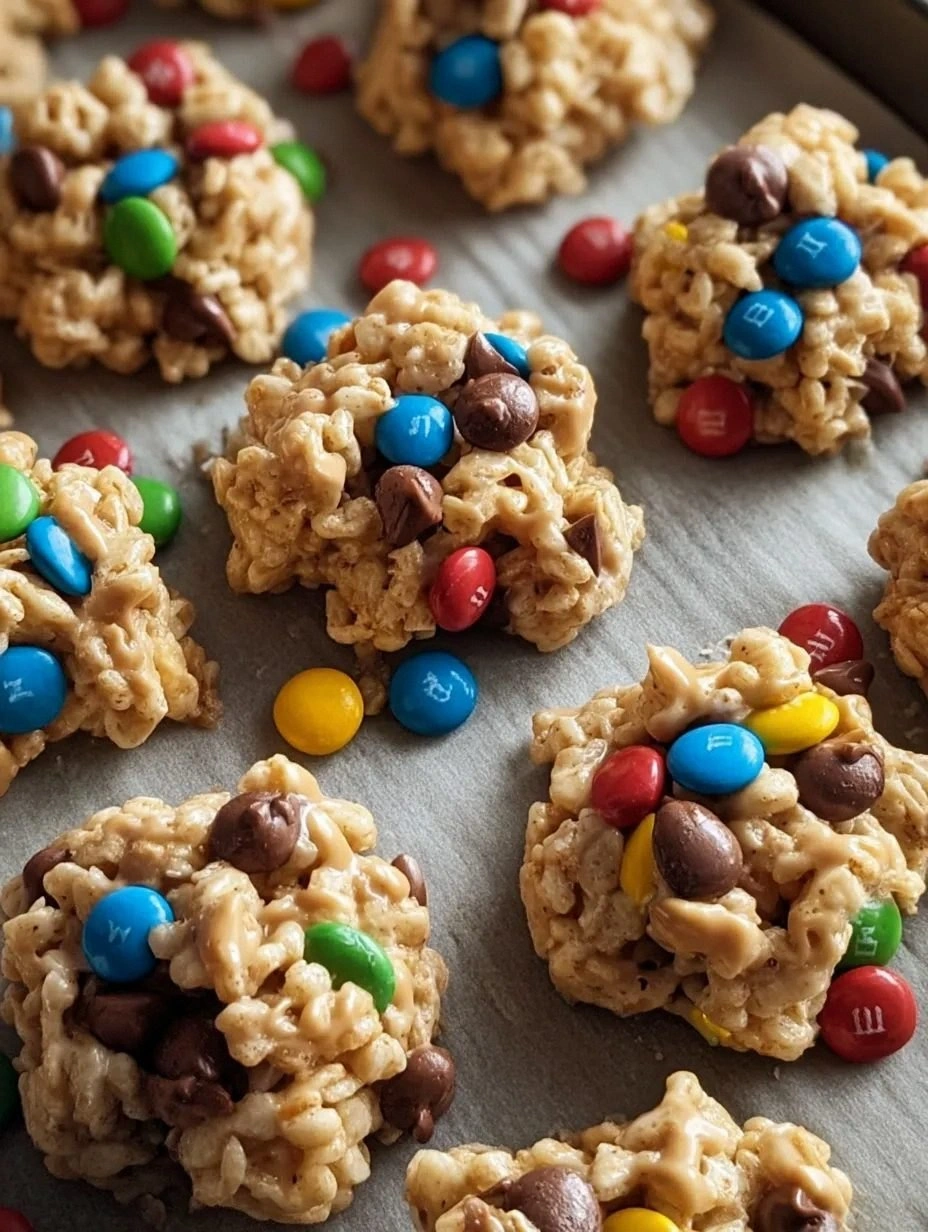
I’m going to be blunt: the moment I first tasted these Peanut Butter Rice Krispie Treats with M&M’s and Chocolate Chips, I knew I had stumbled onto a culinary holy grail. It all started on a rainy Tuesday when I was trying to salvage a half‑finished batch of classic Rice Krispie treats that had somehow turned into a sticky, flavor‑less mess. I was half‑heartedly rummaging through the pantry, daring myself to throw in whatever I could find, when a jar of creamy peanut butter shouted, “Come on, let’s make this interesting!” The result was a sweet‑salty, crunchy‑chewy masterpiece that made my kitchen smell like a candy‑store after a fireworks show. I dare you to taste this and not go back for seconds; it’s that good.
Picture this: a golden‑brown pan on the stove, the butter melting into a glossy pool, the marshmallows bubbling like tiny fireworks, and the peanut butter swirling in, turning the mixture into a glossy, caramel‑like river. The sound? A gentle hiss that says, “We’re about to create something legendary.” The texture? Imagine the crunch of fresh rice cereal meeting the silky melt of chocolate chips, all wrapped in a buttery peanut‑butter hug that sticks to your fingers like a warm, sticky blanket. When you finally press the mixture into the pan, the edges pull away with a satisfying sigh, and the whole slab looks like a glossy, colorful marble slab begging to be sliced.
Most recipes get this completely wrong. They either drown the treats in too much butter, turning them into a greasy slab, or they skimp on the peanut butter, leaving the flavor flat and boring. My version stands out because it balances the richness of peanut butter with the bright pop of M&M’s and the deep decadence of chocolate chips, all while staying unbelievably simple—no oven, no fancy equipment, just a pot, a spatula, and a willingness to get a little sticky. The secret? A pinch of sea salt that amplifies every sweet note, and a splash of vanilla that adds a fragrant backdrop you never saw coming.
I’m going to let you in on a little secret ingredient that most people overlook: a tiny drizzle of honey right at the end of the melt. That honey doesn’t just add a whisper of floral sweetness; it also helps the mixture set faster, giving you that perfect snap when you bite into it. Okay, ready for the game‑changer? Let me walk you through every single step — by the end, you’ll wonder how you ever made it any other way.
What Makes This Version Stand Out
- Flavor Explosion: The combination of salty peanut butter, sweet marshmallows, and colorful M&M’s creates a taste fireworks display that hits every sweet‑tooth craving in one bite.
- Texture Symphony: Crunchy rice cereal, creamy chocolate chips, and the occasional snap of a candy‑coated M&M give you a multi‑layered mouthfeel that’s impossible to resist.
- Simplicity Redefined: No oven, no mixer, no fuss—just a pot and a spatula, making it perfect for last‑minute dessert emergencies.
- Unique Twist: A drizzle of honey and a pinch of sea salt elevate the classic treat into something restaurant‑worthy.
- Crowd‑Pleaser Factor: Kids love the bright colors, adults love the nostalgic crunch, and everyone loves the peanut butter depth.
- Ingredient Quality: Using real butter, high‑quality peanut butter, and premium chocolate chips makes the difference between “good” and “mind‑blowing.”
- Effortless Make‑Ahead: These treats keep their shape and flavor for days, so you can prep them ahead of a party and still wow your guests.
- Versatile Base: The recipe is a perfect canvas for endless variations—swap M&M’s for dried fruit, add a dash of espresso, or go full‑on nutty.
Inside the Ingredient List
The Flavor Base
Butter is the silent hero that carries the heat, creating a glossy foundation for the marshmallows to melt into. Use unsalted butter so you can control the salt level precisely; if you grab salted butter, you’ll need to cut back on the sea salt later. Skipping butter entirely results in a dry, crumbly treat that refuses to hold together, no matter how much peanut butter you add. If you’re dairy‑free, try coconut oil—just remember it will add a faint coconut aroma that can be delightful or distracting depending on your taste.
The Texture Crew
Rice Krispies cereal is the star of the show when it comes to crunch. Choose the original, plain version; flavored varieties will introduce unwanted sweetness or salt that can throw off the balance. If you can’t find Rice Krispies, puffed quinoa or toasted cornflakes work in a pinch, though they’ll change the texture slightly. The marshmallows are the glue that binds everything together; mini marshmallows melt faster and distribute more evenly, while large ones give you pockets of gooey goodness.
The Unexpected Star
Peanut butter brings that deep, nutty umami that turns a simple sweet treat into something sophisticated. I recommend using a natural, unsweetened variety—no added sugars, no hydrogenated oils. If you love a sweeter profile, a spoonful of honey or maple syrup can be added without compromising the texture. Skipping the peanut butter entirely turns this into a plain Rice Krispie bar, which is fine, but you’ll lose the signature richness that makes this recipe unforgettable.
The Final Flourish
M&M’s add color, crunch, and a burst of chocolate that pairs perfectly with the peanut butter. The chocolate chips melt into the mixture, creating pockets of molten chocolate that ooze out when you bite. If you’re allergic to peanuts, try almond butter and swap the M&M’s for toasted coconut flakes for a tropical twist. A pinch of flaky sea salt on top right before the mixture sets amplifies the sweet‑salty contrast, turning each bite into a flavor fireworks display.
Everything's prepped? Good. Let's get into the real action…
The Method — Step by Step
Grab a large, heavy‑bottomed saucepan and set it over medium‑low heat. Add 1/2 cup (1 stick) of unsalted butter and let it melt completely, listening for that gentle sizzle that tells you the butter is ready but not scorching. Once the butter is a clear, golden pool, toss in 1 cup of mini marshmallows. Stir continuously with a silicone spatula; the marshmallows will begin to puff and turn a soft caramel color within 2‑3 minutes. Watch out: If the heat is too high, the marshmallows will brown too quickly and develop a bitter taste.
When the marshmallows have fully dissolved into a glossy, honey‑colored sauce, it’s time to introduce the star of the show: 1 cup of creamy peanut butter. Drop the peanut butter in a slow, steady stream, allowing each dollop to melt before adding the next. The mixture will become thick and glossy, resembling a thick caramel that clings to the spatula. This is the moment of truth—if you can smell the nutty aroma rising, you’re on the right track. Add 1 tablespoon of honey and 1 teaspoon of pure vanilla extract; stir until everything is fully incorporated and the sauce is smooth.
Now comes the crunch component. Remove the pan from heat and quickly fold in 4 cups of Rice Krispies cereal. Use a gentle folding motion; you want the cereal to stay airy, not crushed. The cereal should become evenly coated, each piece shimmering with the peanut‑butter‑marshmallow glaze. If you notice any dry spots, drizzle a tiny splash of milk and stir—this will bring everything together without making the mixture soggy.
Time to add the chocolatey goodness. Sprinkle in 1 cup of semi‑sweet chocolate chips and 1 cup of M&M’s (color‑sorted for visual appeal). Fold gently until the chocolate chips melt just enough to create marbled pockets, while the M&M’s retain their crunchy shells. The mixture should look like a glossy, speckled mosaic—think of a night sky dotted with colorful stars.
Prepare a 9×13‑inch baking dish by lining it with parchment paper, allowing the paper to hang over the edges for easy lift‑out later. Lightly spray the parchment with non‑stick cooking spray or brush with a thin layer of melted butter. This step is crucial; it prevents the treats from sticking and makes the final cut clean and crisp.
Transfer the sticky mixture into the prepared pan. With a dampened spatula (wet the spatula under running water and shake off excess), press the mixture firmly into an even layer. The edges should pull away from the sides of the pan, indicating that the mixture has set enough to hold its shape. Press down firmly—this is where the “snap” factor is built.
While the treats are still warm, sprinkle a pinch of flaky sea salt over the top for that final flavor pop. Let the pan sit at room temperature for 15‑20 minutes, or speed things up by placing it in the refrigerator for 10 minutes. The treats will firm up, becoming easy to slice without crumbling.
Finally, lift the parchment paper out of the pan and place the slab on a cutting board. Using a sharp, serrated knife, cut the slab into 12 equal bars—each bar should be about 2‑inch squares. Serve immediately, or store in an airtight container for up to 5 days. This next part? Pure magic. If you’re serving at a party, arrange the bars on a platter with a drizzle of extra melted chocolate for an Instagram‑worthy finish.
That's it — you did it. But hold on, I've got a few more tricks that'll take this to another level…
Insider Tricks for Flawless Results
The Temperature Rule Nobody Follows
Never let the marshmallow‑butter mixture exceed a gentle simmer. If the temperature climbs above 250°F (120°C), the sugars can caramelize too quickly, producing a bitter aftertaste. Keep your eye on the pot and adjust the flame as soon as you see the mixture bubbling vigorously. A quick tip: dip the tip of a wooden spoon into the mixture; if it forms a thin, glossy film that slides off easily, you're at the perfect temperature.
Why Your Nose Knows Best
Your sense of smell is the most reliable indicator that the mixture is ready. When the butter‑marshmallow blend starts to give off a warm, toasted scent with hints of nutty peanut, you’re at the sweet spot. If you detect any burnt or acrid notes, you’ve gone too far and the final treats will taste off. Trust your nose more than a timer; it’s the secret weapon of seasoned bakers.
The 5‑Minute Rest That Changes Everything
After pressing the mixture into the pan, let it rest undisturbed for exactly five minutes before sprinkling the sea salt. This short pause lets the butter and peanut butter solidify just enough to hold the salt crystals in place without melting them away. Skipping this rest will cause the salt to sink, losing that delightful pop on the surface.
Cold Spatula, Warm Mix
When spreading the mixture into the pan, a chilled silicone spatula glides through the sticky mass like a hot knife through butter. It prevents the mixture from tearing or sticking to the pan, giving you a smooth, even surface. I keep a spare spatula in the freezer for this exact reason—just pull it out a minute before you need it.
The “Double‑Dip” Chocolate Finish
For a glossy, professional finish, melt an extra ½ cup of chocolate chips and dip each bar halfway into the chocolate after they’ve cooled. Place the dipped bars on a wire rack set over parchment; the excess chocolate will drip off, creating a beautiful sheen. A friend tried skipping the double‑dip and claimed the bars were “good enough,” but let’s just say the visual impact (and the extra chocolate crunch) was missing.
Creative Twists and Variations
This recipe is a playground. Here are some of my favorite ways to switch things up:
Nutty Banana Boost
Swap half of the peanut butter for smooth almond butter and fold in ½ cup of mashed ripe banana. The banana adds natural sweetness and a moist crumb, while the almond butter brings a subtle earthiness. Perfect for those who love a tropical twist.
Coffee‑Infused Crunch
Add 1 tablespoon of instant espresso powder to the butter‑marshmallow mixture and replace M&M’s with dark chocolate-covered espresso beans. The coffee notes deepen the chocolate flavor, making the treats a sophisticated after‑dinner bite.
White Chocolate Raspberry
Use white chocolate chips instead of semi‑sweet, and fold in ½ cup of freeze‑dried raspberry pieces. The tangy raspberries cut through the sweetness, while the white chocolate adds a buttery melt‑in‑your‑mouth texture.
Coconut‑Caramel Dream
Replace the regular butter with coconut oil and add ¼ cup of shredded coconut toasted until golden. Drizzle a caramel sauce made from brown sugar and a splash of coconut milk over the top before setting. This version transports you to a beachside sundae.
Spicy Mexican Mocha
Incorporate ½ teaspoon of cayenne pepper and a pinch of cinnamon into the peanut butter mixture, and use Mexican chocolate chips (which contain a hint of cinnamon). The subtle heat pairs surprisingly well with the sweet base, giving a kick that’s perfect for adventurous eaters.
Storing and Bringing It Back to Life
Fridge Storage
Place the cooled bars in an airtight container lined with parchment paper. Store in the refrigerator for up to a week. The cool environment keeps the chocolate from blooming and preserves the crispness of the cereal.
Freezer Friendly
Wrap each bar individually in plastic wrap, then place them in a zip‑top freezer bag. They’ll stay fresh for up to three months. When you’re ready to enjoy one, let it thaw at room temperature for 10‑15 minutes, then give it a quick microwave zap (about 10 seconds) to revive the melt‑in‑your‑mouth texture.
Best Reheating Method
If the bars have become a bit firm after refrigeration, pop them in the microwave for 5‑7 seconds, or gently warm them in a 300°F oven for 3‑4 minutes. Add a tiny splash (about a teaspoon) of water to the pan before reheating; the steam will bring the interior back to that perfect, chewy consistency without drying out the outer crust.