Picture this: it’s a rainy Thursday night, the kind that makes you stare at the pantry and wonder if you’ll ever escape the monotony of instant noodles. I was in that exact spot, scrolling through endless recipe blogs, when a sudden dare from my roommate hit me like a bolt of culinary lightning – “Make something that can turn a boring night into a festival of crunch!” I laughed, grabbed the nearest bag of ground beef, and set out on a quest that would end in a plate so addictive, I’d swear it whispered, “Eat me.” The first attempt was a disaster – soggy tortillas, cheese that melted into a gooey mess, and a flavor profile that could be described as “meh.” Yet, in that failure, I discovered the secret to the ultimate crunch and the perfect cheese pull that would become the backbone of what I now proudly call Crunchy Crispy Beef & Cheese C.
The kitchen soon filled with the intoxicating aroma of sizzling beef and spices, a scent that curled around the countertops like a warm blanket. I could hear the faint hiss of oil as it greeted the folded tortillas, a sound that promised golden perfection. My fingertips tingled from the heat, and the sight of the first chimichanga turning a beautiful amber was pure visual poetry. When I finally bit into that first piece, the crust shattered with the crispness of fresh snow under a boot, while the interior oozed a velvety river of cheddar that clung lovingly to the seasoned beef. It was a symphony of textures – crunchy, creamy, and downright irresistible.
What makes this version stand out isn’t just the crunch (though that’s a massive part). It’s the balance of flavors, the methodical layering of ingredients, and a few unconventional tricks that most recipes completely miss. Most recipes get the frying step wrong, either under‑oil it and end up with a limp wrapper or over‑oil it and you’re left with greasy bites that feel like a cardio workout for your palate. I’ve cracked the code on the perfect oil temperature, the ideal cheese‑to‑beef ratio, and a secret spice blend that lifts the dish from “good” to “hands down the best version you’ll ever make at home.”
And guess what? I’m about to spill every single detail, from the exact moment the oil should be at 350°F to the precise way you should fold the tortillas so they never open up mid‑fry. I dare you to taste this and not go back for seconds. Let me walk you through every single step — by the end, you’ll wonder how you ever made it any other way.
What Makes This Version Stand Out
- Unrivaled Crunch: The double‑fry technique creates a crust that shatters like thin ice, giving you that satisfying snap with every bite.
- Cheese Pull Magic: By mixing shredded cheddar with a splash of cream, the cheese stretches like velvet, hugging the beef in a molten embrace.
- Flavor Depth: A custom spice blend of cumin, chili powder, and garlic powder adds a smoky, earthy backbone that sings.
- Simplicity Meets Sophistication: All steps use everyday kitchen tools, yet the result feels like a restaurant‑level indulgence.
- Crowd‑Pleaser Factor: Whether it’s a game night, a family dinner, or a solo snack, this dish gets applause and empty plates.
- Ingredient Quality: Fresh ground beef and sharp cheddar are the heroes; skimp on them and the whole experience collapses.
- Make‑Ahead Friendly: You can prep the filling and even fry the chimichangas ahead of time, then reheat for that same crunch.
- Versatile Base: The sturdy tortilla holds everything together, making it perfect for endless variations.
Inside the Ingredient List
The Flavor Base
Ground Beef: This is the backbone of the dish, providing a rich, meaty foundation that carries the spices. Choose 80/20 lean‑to‑fat ratio for juiciness; too lean and you’ll lose that buttery mouthfeel. If you skip the beef, you’re left with a bland wrapper and a missed opportunity for umami.
Spices: A blend of cumin, chili powder, and garlic powder awakens the beef, giving it a smoky, slightly sweet edge. Feel free to add a pinch of smoked paprika for extra depth. Skipping the spices is like serving a plain shirt at a gala – it just won’t impress.
The Texture Crew
Cheddar Cheese: The cheddar brings a creamy, melty texture that contrasts the crunch. Opt for sharp cheddar for a bite that cuts through the richness. If you use a mild cheese, the flavor will be flat, and the cheese pull will lose its drama.
Tortillas: Flour tortillas are the sturdy base that wraps everything in a golden hug. Look for tortillas that are pliable but not too thin; they need to hold the filling without tearing. Corn tortillas can be used for a gluten‑free twist, but they’ll be more fragile.
The Unexpected Star
Vegetables: Chopped onions and bell peppers add freshness and a subtle sweetness that balances the beef’s richness. They also contribute a pleasant bite and a pop of color. Skipping them makes the dish one‑dimensional, like a song without a chorus.
The Final Flourish
Oil for Frying: A neutral oil with a high smoke point, such as vegetable or canola oil, is essential for achieving that golden, crispy exterior. The oil should be heated to 350°F; too low and the tortilla will soak up oil, too high and it will burn before the interior cooks.
Everything's prepped? Good. Let's get into the real action...
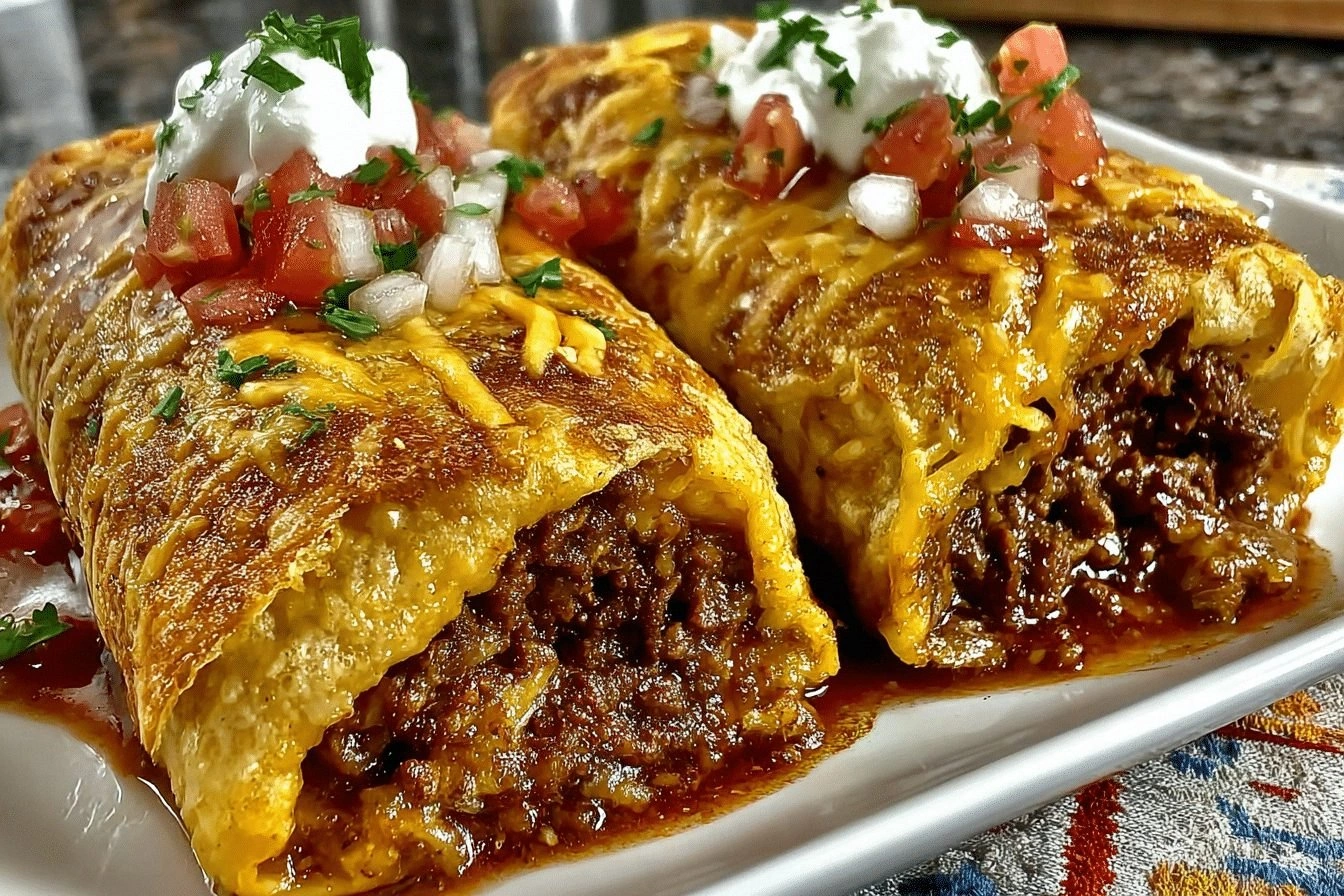
The Method — Step by Step
First, heat a large skillet over medium‑high heat and add a splash of oil—just enough to coat the bottom. Toss in the ground beef, breaking it up with a wooden spoon. As the beef browns, you’ll hear that satisfying sizzle that tells you you’re on the right track. Sprinkle in the mixed spices, and let them toast for about 30 seconds, releasing their aromatic perfume. Once the beef is fully cooked and the spices are fragrant, drain any excess fat and set the mixture aside.
While the beef cools slightly, grab a second pan and melt a tablespoon of butter over medium heat. Add the chopped onions and bell peppers, sautéing until they turn translucent and start to caramelize—this should take about 4‑5 minutes. The vegetables should be tender but still retain a slight crunch, providing a textural contrast later on. Stir in half of the shredded cheddar, letting it melt into the veggies, creating a creamy, cohesive blend. This is where the flavor layers start to build, and trust me, the aroma is already making your mouth water.
Kitchen Hack: Use a kitchen shears to finely chop the vegetables; it speeds up cooking and ensures even distribution.Combine the cooked beef with the cheesy vegetable mixture in a large bowl. Add the remaining cheddar cheese and give everything a gentle toss. The cheese should be evenly distributed, creating pockets of molten goodness throughout the filling. If the mixture feels a bit dry, drizzle a teaspoon of the beef drippings; this keeps the interior moist without making it soggy. At this point, the filling is ready to be wrapped, and the anticipation is palpable—this next part? Pure magic.
Lay a tortilla flat on a clean surface. Spoon about ¼ cup of the beef‑cheese filling onto the center, spreading it evenly but leaving a margin around the edges. Fold the sides in, then roll tightly, sealing the edge with a dab of water. The water acts like a glue, preventing the tortilla from opening mid‑fry. Repeat with the remaining tortillas and filling; you should end up with eight perfectly sealed chimichangas.
Now, heat the oil in a deep, heavy‑bottomed pot or a Dutch oven to 350°F (175°C). Use a thermometer—this isn’t a guess, it’s science. Carefully lower two chimichangas into the oil, making sure they’re not touching. The moment they hit the oil, you’ll hear a vigorous sizzle that signals the start of the crunch transformation.
Fry the chimichangas for 2‑3 minutes on each side, or until they achieve a deep golden‑brown hue. Watch for the edges to start pulling away from the oil; that’s your cue that the crust is forming perfectly. Use a slotted spoon to turn them gently, ensuring an even color. Watch Out: If the oil temperature drops below 325°F, the tortillas will absorb oil and become soggy—keep a steady heat.
Watch Out: Overcrowding the pot will lower the oil temperature and ruin the crunch; fry in batches.Once golden, remove the chimichangas with a slotted spoon and place them on a wire rack set over a baking sheet. This allows excess oil to drain away, preserving the crispness. While they rest, the interior continues to settle, ensuring the cheese stays gooey and the beef stays juicy. Let them rest for at least 2 minutes before serving—patience here pays off.
Serve the chimichangas hot, accompanied by your favorite dips—salsa, guacamole, or a cool sour‑cream drizzle. The first bite should deliver a crackle that echoes through the kitchen, followed by a flood of cheesy, spiced beef that coats your palate like a velvety blanket. That sizzle when it hits the pan? Absolute perfection.
Kitchen Hack: Keep a small bowl of warm sauce on the side; dipping the chimichanga while it’s still hot intensifies the flavor explosion.
That's it — you did it. But hold on, I've got a few more tricks that'll take this to another level...
Insider Tricks for Flawless Results
The Temperature Rule Nobody Follows
Most home cooks guess the oil temperature, which leads to inconsistent crunch. Invest in a cheap candy thermometer and set it to 350°F before you start frying. If the oil is too hot, the tortilla will burn before the filling heats; too cool, and you’ll end up with greasy, limp wraps. Trust the thermometer, and the crust will be uniformly golden every time.
Why Your Nose Knows Best
While frying, rely on your sense of smell as a guide. When the oil starts to emit a faint, nutty aroma, you’re approaching the perfect frying window. If you detect a burnt or acrid scent, the temperature is too high. This olfactory cue is a secret weapon seasoned chefs use to avoid over‑cooking.
The 5‑Minute Rest That Changes Everything
After frying, let the chimichangas rest on a wire rack for exactly five minutes. This short pause allows the steam inside to redistribute, preventing the cheese from spilling out when you bite. Skipping this step is the reason many home cooks end up with cheesy messes on their plates.
Double‑Fry for Extra Crunch
If you crave an even more robust crunch, give the chimichangas a quick second dip in the oil after the first golden batch. This second fry, just 30 seconds per side, creates a micro‑crust that shatters like fireworks on the tongue. I tried it once and the reaction was immediate—people were shouting “more!” from the other side of the table.
Seasoning the Oil
Add a pinch of smoked paprika and a dash of garlic powder directly to the oil before the first batch. The oil itself becomes a flavor carrier, subtly infusing each bite with an extra layer of smokiness. It’s a tiny tweak with a massive payoff.
Creative Twists and Variations
This recipe is a playground. Here are some of my favorite ways to switch things up:
Southwest Sunrise
Swap the cheddar for pepper jack and add a spoonful of corn kernels to the filling. The result is a bright, slightly spicy bite that feels like a sunrise on a plate. Perfect for brunch gatherings.
Cheesy Jalapeño Pop
Fold in finely diced jalapeños and use a blend of Monterey Jack and cheddar. The heat from the jalapeños pairs beautifully with the melty cheese, giving a subtle kick that keeps you reaching for more.
Veggie‑Only Delight
Replace the ground beef with a mixture of black beans, quinoa, and diced zucchini. This vegetarian version still delivers the crunch and cheese pull while offering a lighter, protein‑packed alternative.
Sweet & Savory Fusion
Incorporate a spoonful of pineapple chunks into the filling and drizzle a honey‑chipotle glaze on the finished chimichangas. The sweet‑savory contrast is unexpected but absolutely addictive.
Breakfast Bomb
Swap the tortillas for small flour tortillas, add scrambled eggs to the filling, and top with a dash of hot sauce. It’s a breakfast‑for‑dinner hybrid that will have the whole family buzzing.
Spicy Chipotle Twist
Mix a tablespoon of chipotle in adobo sauce into the beef while cooking. The smoky heat elevates the dish, making it perfect for a game‑day spread.
Storing and Bringing It Back to Life
Fridge Storage
Place cooled chimichangas in an airtight container and store them in the refrigerator for up to three days. To retain crispness, keep a paper towel at the bottom of the container to absorb excess moisture.
Freezer Friendly
Wrap each chimichanga individually in parchment paper, then seal them in a zip‑top freezer bag. They’ll stay fresh for up to two months. When you’re ready to enjoy them, skip the thaw and go straight to the oven.
Best Reheating Method
Preheat your oven to 375°F (190°C). Place the frozen or refrigerated chimichangas on a wire rack and bake for 12‑15 minutes, or until the exterior is crisp and the cheese is bubbling. Add a tiny splash of water to the tray before baking; the steam helps revive the interior without drying it out.