I still remember the first time I tried to make a low-carb version of loaded baked potato casserole and ended up with a watery, gray mess that tasted like disappointment and wet socks. My friends had dared me to create something that could rival the cheesy, bacon-laden masterpiece from our favorite steakhouse, but without the starchy comfort of potatoes. After three failed attempts and one particularly embarrassing dinner party where guests politely pushed food around their plates, I nearly gave up. But then, in a moment of culinary desperation fueled by a late-night craving and a head of cauliflower that was about to go bad, I stumbled upon a method that would change my kitchen game forever.
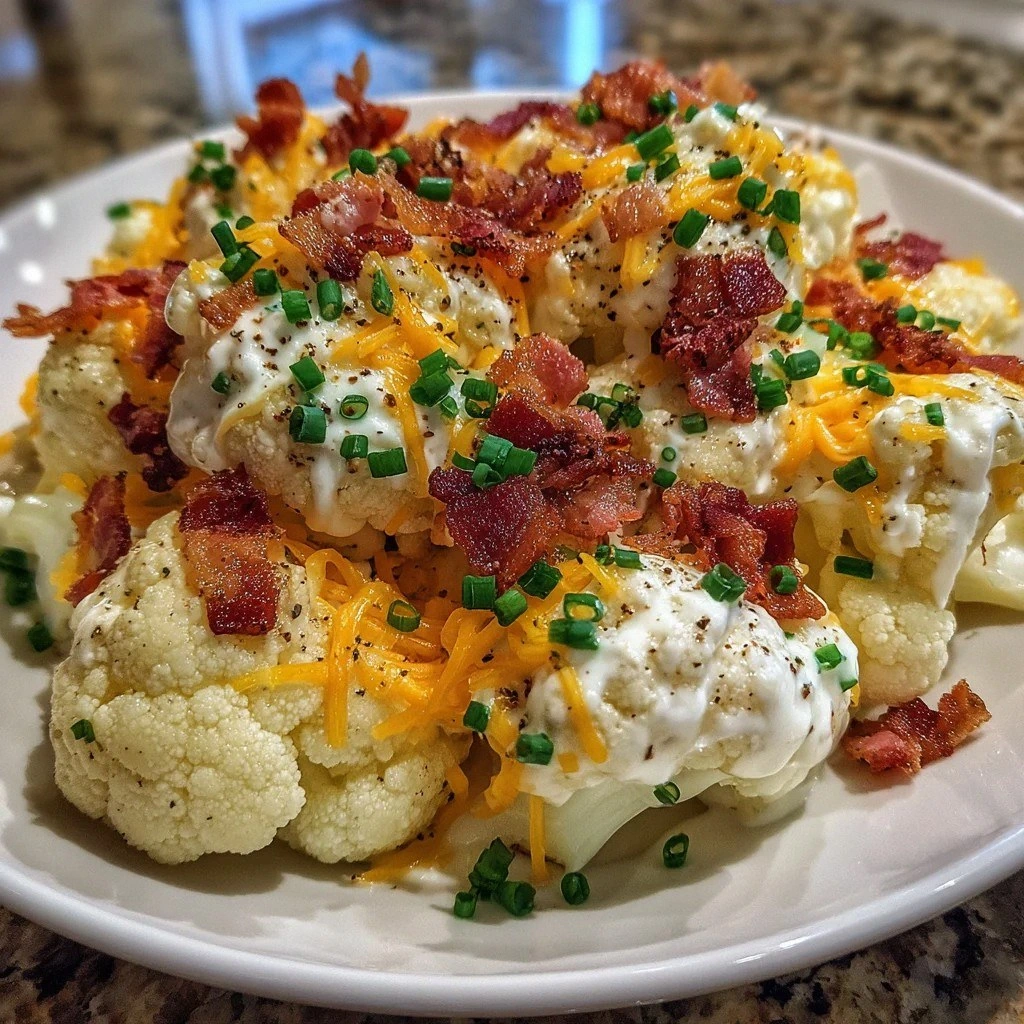
The moment I pulled that bubbling, golden-topped casserole from the oven, the entire kitchen filled with the intoxicating aroma of melted cheese, crispy bacon, and garlicky creaminess that made my neighbors knock on the wall wondering what on earth I was making at midnight. The first bite was nothing short of revelatory — the cauliflower had transformed into tender, creamy bites that soaked up all the rich flavors like little edible sponges, while the combination of cream cheese and sour cream created a sauce so luxurious it could make grown adults weep with joy. That crispy bacon on top added just enough crunch and salt to make you forget you were eating vegetables at all.
I've spent the last two years perfecting this recipe, testing it on unsuspecting dinner guests, potluck attendees, and even my vegetable-hating nephew who asked for seconds. This isn't just another cauliflower recipe trying to be something it's not — this is the loaded casserole that will make you forget potatoes ever existed. The secret lies in the technique of roasting the cauliflower first to concentrate its flavor, then bathing it in a three-cheese blend that creates those Instagram-worthy cheese pulls while maintaining the perfect balance of creamy and chunky textures.
What makes this version absolutely irresistible is how it manages to be both comfort food and relatively virtuous, landing in that sweet spot where you can serve it to health-conscious friends and devoted carb-lovers alike. Picture yourself pulling this golden beauty from the oven, the cheese bubbling like molten lava while crispy bacon bits dance across the surface, and that moment when you scoop out the first serving and it slides onto the plate in one perfect, creamy wedge. Let me walk you through every single step — by the end, you'll wonder how you ever made it any other way.
What Makes This Version Stand Out
Restaurant-Quality Texture: Most cauliflower casseroles turn out either mushy or crunchy, but this recipe hits that perfect middle ground where each floret maintains its shape while becoming irresistibly tender. The key is par-roasting the cauliflower first, which concentrates the flavor and removes excess moisture that would otherwise turn your casserole into soup.
Triple-Threat Cheese Strategy: While other recipes might use just one type of cheese, we're building layers of flavor with sharp cheddar for that nostalgic comfort food taste, Monterey Jack for its incredible melting properties, and cream cheese to bind everything together in a sauce that coats each piece like velvet.
Make-Ahead Magic: This casserole actually tastes better when assembled the night before, allowing all those flavors to meld together in the refrigerator. You can prep it on Sunday and have an instant weeknight dinner that tastes like you spent hours in the kitchen.
Customizable Brilliance: Whether you're feeding vegetarians, spice-lovers, or those watching their calories, this recipe adapts beautifully. Swap turkey bacon for regular, add jalapeños for heat, or throw in some caramelized onions for extra sweetness — the base is your canvas.
Leftover Gold Mine: Unlike many casseroles that become sad and soggy, this one reheats like a dream. The flavors actually intensify overnight, and a quick spin in the air fryer brings back that crispy bacon crunch that makes each bite addictive.
Guaranteed Crowd Pleaser: I've served this at everything from fancy dinner parties to tailgates, and not once has anyone missed the potatoes. In fact, most people can't believe it's cauliflower until you tell them — that's how good this is.
Alright, let's break down exactly what goes into this masterpiece...
Inside the Ingredient List
The Flavor Base
Cauliflower florets are obviously the star here, but not all cauliflower is created equal. You want to select a head that feels heavy for its size with tightly packed, bright white florets — avoid any with brown spots or yellowing, which indicates age and will give you that unfortunate sulfur taste that gives cauliflower its bad reputation. The key is cutting them into bite-sized pieces that are roughly the same size, about 1-inch chunks, so they cook evenly and provide the perfect vehicle for all that cheesy goodness.
Cream cheese forms the luxurious backbone of our sauce, but here's where most recipes go wrong — you need to let it come to room temperature first. Cold cream cheese will seize up and create lumpy pockets that refuse to incorporate smoothly with the sour cream. I learned this the hard way after serving a casserole with white blobs that looked like cottage cheese gone wrong. Let it sit on the counter for at least 30 minutes, or better yet, microwave it for 15 seconds to get that perfect spreading consistency.
Sour cream brings the tang that cuts through all that richness, but don't you dare reach for the low-fat version. Full-fat sour cream not only melts better, but it also creates a sauce that actually clings to the cauliflower instead of sliding off like watery disappointment. If you're in a pinch, Greek yogurt works too, but add an extra tablespoon to compensate for its thicker texture.
The Texture Crew
Sharp cheddar cheese is where we get that nostalgic loaded potato flavor, but here's the secret — buy it in block form and shred it yourself. Pre-shredded cheese is coated with cellulose that prevents it from melting smoothly, leaving you with a grainy sauce that separates like a bad relationship. I know it's an extra step, but trust me, watching that freshly shredded cheddar melt into creamy perfection is worth the 30 seconds of arm workout.
Monterey Jack might seem like an odd choice, but its mild flavor and incredible melting properties make it the perfect partner to the sharp cheddar. It creates those Instagram-worthy cheese pulls while adding a subtle creaminess that balances the stronger flavors. If you can't find Monterey Jack, Havarti or even mozzarella will work, but avoid aged cheeses like Parmesan here — they'll overpower the delicate cauliflower.
Crispy bacon is non-negotiable for that authentic loaded flavor, but let's talk technique. Starting bacon in a cold pan renders the fat slowly, giving you perfectly crispy strips without burning. And here's where I confess — I always cook double the amount because apparently half of it mysteriously disappears before it makes it to the casserole. Turkey bacon works in a pinch, but you'll want to add a teaspoon of smoked paprika to compensate for the missing smoky flavor.
The Unexpected Star
Garlic powder and onion powder might seem basic, but they provide that savory backbone that makes people ask "what's in this?" without being able to identify the individual flavors. Fresh garlic works too, but sauté it first to remove that harsh raw bite. I've found that using both fresh and powdered versions creates layers of allium flavor that make this casserole taste like it simmered for hours instead of minutes.
Kosher salt is crucial here — not table salt, which has a metallic edge that can ruin the delicate balance. Kosher salt's larger crystals dissolve more slowly, seasoning the dish throughout instead of just the surface. And please, taste as you go! Cauliflower can handle more salt than you think, especially when it's competing with all that cheese and bacon.
Black pepper should be freshly ground — I know it's an extra step, but the pre-ground stuff tastes like dusty nothingness. The volatile oils in peppercorns start dissipating as soon as they're cracked, so that tin of ground pepper that's been in your cabinet since college isn't doing you any favors. Invest in a good pepper mill and you'll wonder how you ever cooked without it.
The Final Flourish
Fresh chives are the finishing touch that makes this dish look and taste restaurant-quality. Dried chives have all the flavor of green paper, so skip them entirely. If you can't find fresh chives, green onions make a fine substitute — just use the green parts and save the whites for another recipe. And don't add them until the very end; the heat from the casserole will wilt them just enough to release their delicate onion flavor without turning them into sad, brown strings.
Everything's prepped? Good. Let's get into the real action...
The Method — Step by Step
- Preheat your oven to 425°F (220°C) — this high temperature is crucial for getting those beautiful caramelized edges on the cauliflower that will add incredible depth to your finished dish. While it's heating, toss your cauliflower florets with two tablespoons of olive oil, half a teaspoon of kosher salt, and a few grinds of black pepper. Spread them in a single layer on a dark baking sheet, making sure not to crowd them (use two sheets if necessary) because overcrowding equals steaming, and steaming equals sad, gray cauliflower.
- Roast the cauliflower for 20-25 minutes, flipping once halfway through with a thin metal spatula. You're looking for golden-brown edges and tender centers — the florets should yield to gentle pressure but still hold their shape. This is not the time to multitask with social media; cauliflower can go from perfectly roasted to burnt in the blink of an eye. When they're done, they should smell nutty and slightly sweet, like someone invented vegetable candy.
- While the cauliflower is roasting, cook your bacon until crispy. Start it in a cold pan over medium heat, turning occasionally until it's the color of mahogany and renders out all that glorious fat. Drain the strips on paper towels and resist the urge to eat them all immediately. Once cooled, crumble into bite-sized pieces — not too small, or they'll disappear into the casserole, but not so large that they overpower each bite.
- In a large bowl, combine the room-temperature cream cheese, sour cream, garlic powder, onion powder, half the cheddar, half the Monterey Jack, and half the crumbled bacon. This is where the magic happens — you're creating a cheese sauce so decadent it should come with a warning label. Mix until completely smooth, tasting and adjusting seasoning as needed. Remember, the cauliflower will dilute the flavors slightly, so don't be shy with the salt.
- Add the roasted cauliflower to the cheese mixture and fold gently with a rubber spatula until every floret is coated in that creamy goodness. This is not the time for vigorous mixing — you want to maintain some of those beautiful cauliflower pieces intact. The mixture should look like it belongs in a five-star restaurant, all glossy and tempting with flecks of bacon peeking through.
- Transfer the mixture to a buttered 9x13 baking dish, spreading it into an even layer. Sprinkle the remaining cheese over the top in an even layer — this is what will create that gorgeous golden crust that makes people fight over the corner pieces. Add the remaining bacon on top, pressing it gently into the cheese so it adheres and doesn't just fall off when you serve.
- Bake at 375°F (190°C) for 20-25 minutes until the cheese is melted and bubbly with golden-brown spots. The edges should be slightly crispy, and the center should be heated through — insert a knife in the middle and it should come out hot to the touch. If you want extra browning on top, broil for the last 2-3 minutes, but watch it like a hawk because cheese goes from perfect to burnt faster than you can say "dinner's ready."
- Remove from the oven and let it rest for 5 minutes — I know, I know, it smells incredible and you want to dive in immediately. But those few minutes allow the sauce to thicken and the cheese to set, ensuring you get picture-perfect scoops instead of a runny mess. Sprinkle with fresh chives just before serving, and prepare yourself for the chorus of "this can't be cauliflower!" that will inevitably follow.
- That's it — you did it. But hold on, I've got a few more tricks that'll take this to another level...
Insider Tricks for Flawless Results
The Temperature Rule Nobody Follows
Here's where most home cooks mess up — they don't let their dairy ingredients come to room temperature before mixing. Cold cream cheese will seize up and create those dreaded lumps that no amount of stirring will fix. I set everything out on the counter 30 minutes before I start cooking, and if I'm in a rush, I'll cube the cream cheese and microwave it in 5-second bursts until it's spreadable. Your sauce should be smoother than a pickup artist in a 90s movie, coating the back of a spoon without any grainy texture.
Why Your Nose Knows Best
Forget timers — your sense of smell is the most reliable tool in your kitchen arsenal. When the roasted cauliflower starts smelling like popcorn, it's perfectly done. When the casserole smells like the best loaded baked potato you've ever had, it's ready to come out of the oven. A friend tried to rush this recipe once by cranking the oven to 450°F, and let me tell you, burnt cauliflower smells like someone boiled gym socks in cabbage water. Trust your nose, and you'll never overcook this dish.
The 5-Minute Rest That Changes Everything
I know it's torture to wait when this bubbly, cheesy masterpiece is sitting on your counter calling your name. But here's what happens during those crucial 5 minutes: the sauce thickens and clings to the cauliflower instead of pooling at the bottom of the dish, the cheese sets so you get clean scoops instead of a molten mess, and the flavors meld together into something greater than the sum of their parts. Use this time to set the table, open another bottle of wine, or just bask in the glow of your impending culinary triumph.
The Cheese Blend Secret
While sharp cheddar provides that nostalgic flavor we all crave, adding a younger, milder cheese like Monterey Jack creates the perfect melt. Too much sharp cheese and your sauce becomes grainy and separates. Too much mild cheese and you lose that punchy flavor that makes this dish memorable. The 60/40 ratio of sharp cheddar to Monterey Jack hits the sweet spot every time, creating those Instagram-worthy cheese pulls while maintaining a smooth, creamy texture.
Creative Twists and Variations
This recipe is a playground. Here are some of my favorite ways to switch things up:
The Mediterranean Makeover
Swap the bacon for crispy prosciutto, add sun-dried tomatoes and Kalamata olives, and use feta instead of cheddar. The briny, salty elements play beautifully against the creamy cauliflower, creating a dish that tastes like summer in Santorini. Add some fresh oregano and a squeeze of lemon juice just before serving for brightness that cuts through all that richness.
The Buffalo Chicken Remix
Fold in shredded rotisserie chicken and swap half the sour cream for buffalo sauce. Use blue cheese crumbles instead of cheddar for that authentic wing joint flavor. Top with chopped celery for crunch and serve with carrot sticks on the side. It's like your favorite bar food got a sophisticated makeover but kept its wild side intact.
The Vegetarian Umami Bomb
Ditch the bacon entirely and add sautéed mushrooms, caramelized onions, and a tablespoon of white miso paste to the cheese mixture. The miso adds incredible depth and umami that makes you not even miss the bacon. Top with crispy fried shallots for texture and fresh thyme for an earthy note that takes this from comfort food to sophisticated side dish worthy of your fanciest dinner party.
The Tex-Mex Transformation
Add diced green chiles, swap the Monterey Jack for pepper jack, and fold in some corn kernels for sweetness. Use chorizo instead of bacon for a spicy kick, and top with fresh cilantro and a dollop of chipotle sour cream. Serve with tortilla chips for scooping up all that cheesy goodness, and watch it disappear faster than chips and salsa at a Super Bowl party.
The Breakfast of Champions
Make individual portions in muffin tins, crack an egg into each one during the last 10 minutes of baking, and serve with hot sauce on the side. The egg whites set into the cheesy cauliflower while the yolks stay runny, creating individual breakfast casseroles that are perfect for meal prep. They reheat beautifully and will make you look forward to Monday morning like never before.
The Holiday Showstopper
Add roasted chestnuts and sage for a Thanksgiving-worthy side that will make your turkey jealous. Use Gruyère instead of cheddar for a more sophisticated flavor profile, and top with crispy fried sage leaves for a restaurant-quality presentation. The chestnuts add sweetness and texture that elevates this humble casserole to holiday dinner centerpiece status.
Storing and Bringing It Back to Life
Fridge Storage
Let the casserole cool completely before covering tightly with plastic wrap or transferring to an airtight container. It will keep in the refrigerator for up to 4 days, though I dare you to make it last that long. The flavors actually intensify overnight, making leftovers something to celebrate rather than endure. Store any leftover bacon separately to maintain its crispiness — nobody wants soggy bacon, and that's a hill I'm willing to die on.
Freezer Friendly
This casserole freezes beautifully for up to 3 months, making it perfect for meal prep or gifting to new parents who don't have time to cook. Freeze it in individual portions for easy grab-and-go lunches, or freeze the whole casserole before baking. Wrap it tightly in plastic wrap, then aluminum foil to prevent freezer burn. When you're ready to eat, thaw overnight in the refrigerator and bake as directed, adding an extra 10-15 minutes to account for the cold temperature.
Best Reheating Method
The microwave works in a pinch, but you'll lose that gorgeous crispy top. For best results, reheat in a 350°F oven for 10-15 minutes until heated through. Add a splash of cream or milk if it seems dry, and top with fresh cheese for that just-baked experience. For the bacon lovers among us, add some freshly cooked crispy bacon on top after reheating — it's like giving your leftovers a delicious makeover that makes them even better than the first time around.