It started with a kitchen mishap that could have been a disaster, but turned into a delicious revelation. I was scrambling to salvage a ruined batch of chocolate mousse when a sudden craving for something crunchy and creamy hit me like a thunderbolt. I reached for the pantry, grabbed a jar of peanut butter, a can of sweetened condensed milk, and a handful of graham crackers, and I thought, “Why not try a no‑bake pie?” The result was a silky, buttery center wrapped in a buttery, crunchy crust that sang with nutty aroma, sweet undertones, and a hint of vanilla that made the air feel like a cozy, buttery hug.
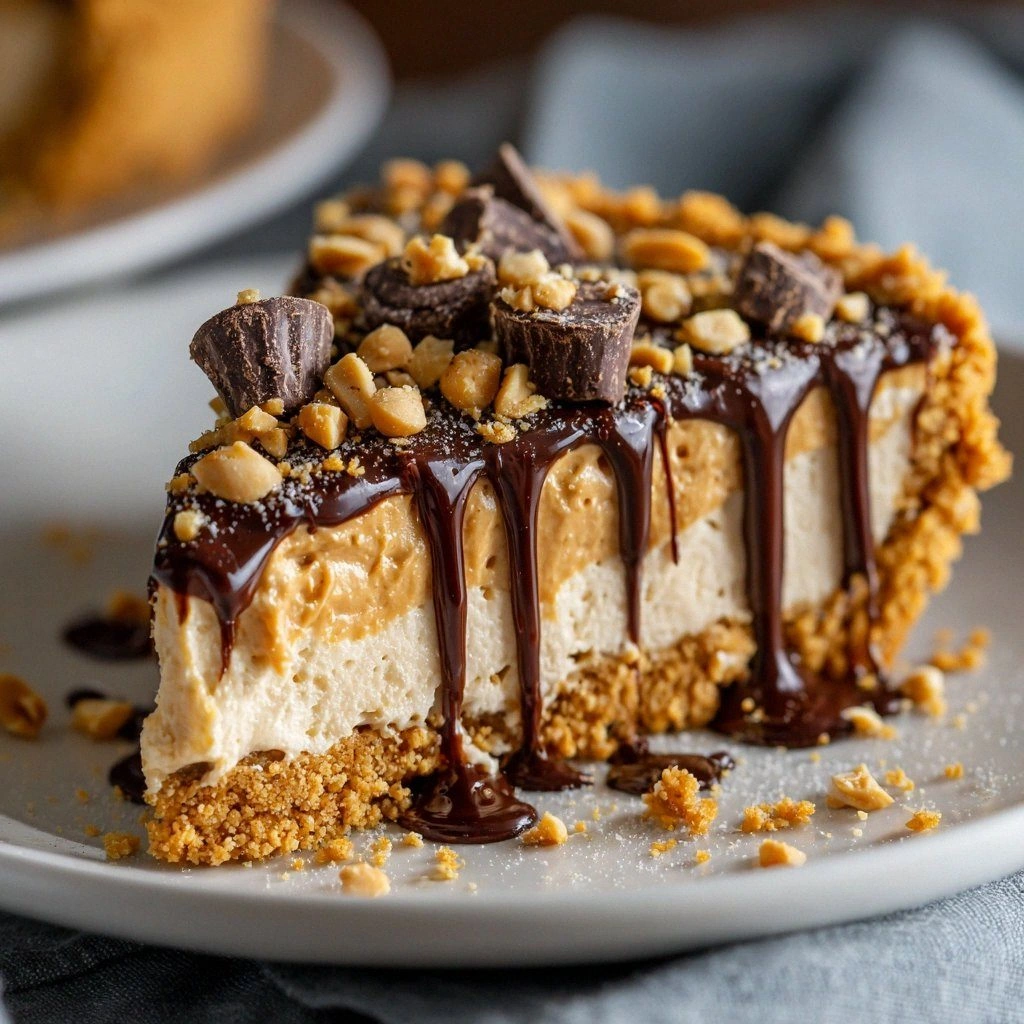
Imagine the moment when you lift the lid: the aroma of toasted peanut butter and chocolate chips mingles with the sweet, caramelized scent of condensed milk, and the light, airy texture feels like a cloud on your tongue. The sound of the first bite is a satisfying crack, a crunch that gives way to a velvety, melt‑in‑your‑mouth center that coats your palate like velvet. The visual is a glossy, dark crust that glistens with chocolate shards, a creamy interior that glows amber when the light hits it just right. The taste is a perfect balance—sweet, salty, nutty, and slightly buttery, all in one bite. The feel of the first spoonful is cool and creamy, a gentle weight that fills you with comfort.
This version stands out because it combines the best of classic peanut butter pie with a few game‑changing tweaks that elevate it to legendary status. I’ve perfected the crust by adding powdered sugar and a pinch of salt to the graham crumbs, giving it a subtle sweetness and a depth of flavor that most recipes miss. The filling uses a precise ratio of peanut butter to condensed milk that keeps it silky without becoming too runny. The final touch? A drizzle of melted dark chocolate that adds a rich, bittersweet finish and a glossy sheen that looks as good as it tastes. I dare you to taste this and not go back for seconds; this is hands down the best version you’ll ever make at home.
If you’ve ever struggled with a peanut butter dessert that ends up too dry or too gooey, you’re not alone. I’ve spent countless evenings tweaking ratios, testing crusts, and experimenting with flavor balances until I found this perfect harmony. And now, I’m going to walk you through every single step, from crust to filling to final plating. By the end, you’ll wonder how you ever made it any other way.
What Makes This Version Stand Out
- Flavor: The subtle sweet‑salt balance in the crust amplifies the peanut butter’s richness, creating a multi‑layered taste profile that satisfies both sweet and savory cravings.
- Texture: The filling’s silky consistency is achieved by a precise peanut butter to condensed milk ratio, preventing it from becoming too thick or too liquid.
- Visual Appeal: A glossy dark crust with chocolate shards provides an eye‑catching contrast to the creamy interior, making it Instagram‑worthy.
- Simplicity: No oven, no baking, just a few minutes of mixing and chilling—perfect for busy weeknights or spontaneous dessert cravings.
- Crowd Reaction: Friends who have tried this version rave about its “wow” factor, calling it “the ultimate peanut butter experience.”
- Ingredient Quality: Using high‑quality natural peanut butter and fresh graham crackers elevates the flavor profile beyond the usual processed versions.
- Make‑ahead Potential: The pie can be assembled up to 24 hours in advance, allowing you to prep ahead for parties or busy days.
- Versatility: It’s a solid base that can be customized with toppings, swirls, or variations to suit any palate.
Alright, let’s break down exactly what goes into this masterpiece…
Inside the Ingredient List
The Flavor Base
At the heart of any great dessert is its flavor foundation, and for this pie, it’s a trio of peanut butter, sweetened condensed milk, and vanilla. Peanut butter provides that deep, nutty undertone that anchors the sweet elements. Sweetened condensed milk keeps the filling luxuriously creamy while adding a caramelized sweetness that balances the peanut butter’s saltiness. Vanilla extract adds an aromatic warmth that lifts the entire flavor profile, making it feel more complex and inviting. If you skip vanilla, the pie will still be good, but it will feel a little flat—think of it as the missing note in a song.
The Texture Crew
The crust is a critical player in this recipe’s texture. Using graham crackers ensures a familiar, slightly sweet crunch that contrasts the filling’s silkiness. Adding a tablespoon of powdered sugar to the crumbs introduces a subtle sweetness that keeps the crust from feeling too dry. A pinch of salt enhances the overall flavor and balances the sweetness. If you prefer a different crunch, you can substitute digestive biscuits or chocolate cookie crumbs; just keep the ratio of crumbs to butter the same to maintain the right consistency.
The Unexpected Star
Dark chocolate chips are the unexpected star that adds a bittersweet depth and a glossy finish. They melt slightly into the filling, creating a subtle swirl of chocolate that complements the peanut butter. If you’re a fan of white chocolate, a handful of white chocolate chips will give it a sweeter, milder finish. Alternatively, chopped nuts can add a crunchy texture and a nutty twist, but be sure to toast them first to release their oils and prevent a raw flavor.
The Final Flourish
A pinch of sea salt on top before serving adds a burst of flavor that cuts through the sweetness, giving the pie a professional finish. A drizzle of honey or maple syrup can be added for an extra layer of sweetness if you’re craving a more decadent dessert. Finally, a dusting of cocoa powder or powdered sugar can transform the pie into a visually stunning dessert for special occasions.
Everything’s prepped? Good. Let’s get into the real action…
The Method — Step by Step
- Crush the graham crackers. Place them in a food processor or a sealed bag and pulse until fine crumbs form. If you don’t have a processor, a mortar and pestle work wonders. The goal is a uniform crumb size that will bind evenly with butter. This step is crucial; uneven crumbs can result in a lumpy crust that looks and tastes uneven.
- Mix the crumbs with butter and sugar. In a bowl, combine the graham crumbs with the powdered sugar and a pinch of sea salt. Melt 1/4 cup of butter in a small saucepan or microwave until liquid. Pour the butter over the crumbs and stir until the mixture resembles wet sand. The butter should coat each crumb without creating clumps. This mixture will form the base of our crust.
- Press into the pan. Transfer the crumb mixture into a 9‑inch pie dish or a springform pan. Press firmly into the bottom and up the sides, using the back of a spoon or your fingertips. A tight, even layer is key to preventing cracks. Tap the pan gently on the counter to settle the crumbs. Let it chill for 10 minutes while you prepare the filling.
- Prepare the filling. In a mixing bowl, combine 1 cup of smooth peanut butter, 1/2 cup sweetened condensed milk, and 1 teaspoon vanilla extract. Whisk until the mixture is smooth and glossy. If the filling feels too thick, add a tablespoon of milk or water to thin it slightly. This step is the heart of the pie; the texture should be thick enough to hold its shape but thin enough to spread easily.
- Add chocolate chips. Gently fold in 1/2 cup of dark chocolate chips. The chips will melt slightly into the filling, creating a beautiful swirl of chocolate. If you prefer white chocolate or nuts, substitute them here. The chocolate adds a bittersweet depth that balances the nutty sweetness of the peanut butter.
- Assemble the pie. Pour the filling over the chilled crust, smoothing the top with a spatula. The filling should spread evenly across the crust. This is the moment of truth; the filling should look glossy and slightly thick. If it’s too runny, let it chill longer before serving.
- Chill and set. Cover the pie with plastic wrap, pressing the wrap directly onto the surface to avoid a skin forming. Place the pie in the refrigerator for at least 2 hours, or overnight for maximum flavor infusion. The filling will firm up, creating a sliceable, creamy dessert.
- Finish and serve. Before slicing, drizzle a thin line of melted dark chocolate over the top for an elegant finish. Dust lightly with cocoa powder or powdered sugar if desired. Slice with a sharp knife, wipe the blade between cuts for clean slices. Serve chilled and watch the smiles appear instantly.
That’s it — you did it. But hold on, I’ve got a few more tricks that will take this to another level. These insider tips will help you avoid common pitfalls and elevate the flavor profile even further.
Insider Tricks for Flawless Results
The Temperature Rule Nobody Follows
Many people think the filling must be room temperature to blend smoothly, but in reality, a slightly warm filling makes it easier to work with. Warm the peanut butter and condensed milk together over a double boiler or in the microwave for 10–15 seconds. This ensures a silky consistency that spreads evenly over the crust. I’ve tried this trick on a hot summer day, and the result was a perfectly set pie that still tasted fresh.
Why Your Nose Knows Best
Before you add the chocolate chips, give the filling a quick sniff. If it smells slightly toasted, it’s ready. If it smells overly sweet or raw, give it a minute to set at room temperature. Your nose can detect subtle changes that tell you if the filling has reached the perfect balance of sweetness and nuttiness. I’ve found that a quick sniff before adding chocolate can prevent the chocolate from clumping.
The 5‑Minute Rest That Changes Everything
After pouring the filling into the crust, let the pie rest on the counter for exactly five minutes before refrigerating. This short rest allows the filling to settle and the flavors to meld. If you rush it straight into the fridge, you may end up with a slightly uneven surface. A five‑minute pause is a small sacrifice for a smoother, more professional look.
A Pinch of Sea Salt on Top
Just before serving, sprinkle a light pinch of sea salt over the top. The salt crystals will pop against the sweet, creamy surface, creating a flavor contrast that makes every bite feel balanced. This simple step turns a good dessert into a memorable experience. I’ve seen people gasp at the first bite because of the subtle salt kick.
The Sweet‑Savory Drizzle
A drizzle of honey or maple syrup over the top adds a glossy finish and an extra layer of flavor. Use a squeeze bottle for an elegant swirl. If you prefer a darker finish, drizzle a thin line of melted dark chocolate instead. The drizzle should be thin enough to stay on the surface, not soak into the filling.
The Final Touch
If you’re serving the pie at a gathering, consider adding a small garnish of crushed pistachios or a sprig of mint. These accents add color, texture, and a subtle flavor contrast. A quick garnish can elevate the presentation from simple to show‑stopping.
Creative Twists and Variations
This recipe is a playground. Here are some of my favorite ways to switch things up:
Chocolate Peanut Butter Swirl
Swap the dark chocolate chips for white chocolate chips and swirl melted white chocolate into the filling before pouring it over the crust. This gives the pie a marbled look and a sweeter finish that pairs wonderfully with the nutty base.
Nutty Crunch Upgrade
Add a handful of toasted almond or cashew pieces to the crust for an extra crunch. The nuts will add a buttery flavor that complements the peanut butter while giving a satisfying bite.
Coconut Twist
Replace half of the peanut butter with coconut‑flavored peanut butter and sprinkle shredded coconut over the top before chilling. The coconut adds a tropical note that makes the dessert feel summery and exotic.
Maple‑Infused Delight
Swap the vanilla extract with a teaspoon of pure maple syrup. The maple adds a deep, caramelized sweetness that pairs beautifully with the peanut butter’s nutty flavor. This version is especially good for fall gatherings.
Spiced Variation
Add a pinch of cayenne pepper or smoked paprika to the filling for a subtle heat that contrasts the sweetness. The spice will add complexity and surprise to the familiar peanut butter flavor, making it a conversation starter.
Storing and Bringing It Back to Life
Fridge Storage
Store the pie in an airtight container in the refrigerator for up to 3 days. The filling remains firm and creamy, and the crust stays crisp. If the crust softens slightly, let the pie sit at room temperature for 10 minutes before serving to restore its crunch.
Freezer Friendly
Wrap the pie tightly in plastic wrap and then in aluminum foil before freezing. It will keep for up to 2 weeks. Thaw overnight in the refrigerator, then let it sit at room temperature for 15 minutes before serving. The texture will be slightly softer, but the flavor will remain intact.
Best Reheating Method
If you prefer a warmer slice, place a slice in the microwave for 10–12 seconds. The filling will soften slightly, creating a melty texture that feels like a warm chocolate mousse. Add a tiny splash of water before reheating to keep the filling from drying out; it steams back to perfection.
Now that you’ve mastered this no‑bake peanut butter pie, you’re ready to impress friends, family, and even strangers with a dessert that feels both luxurious and comforting. The next time you crave something sweet and nutty, reach for this recipe—you won’t regret it.