Picture this: the kitchen clock reads 2 a.m., the fridge is a dim, lonely cavern, and you’re standing in front of a half‑empty pantry that smells faintly of basil and garlic. You’ve been chasing that midnight craving for something warm, cheesy, and utterly comforting, and you’ve decided to turn to the ultimate comfort food: manicotti. The last time I tried a homemade version, the shells collapsed like a paper crane in the oven, and I ended up with a soggy, cheese‑laden mess that tasted like a failed art project. I was ready to surrender, but then a friend dared me to make a version that would make even the most seasoned Italian chef swoon. I took the dare, and I’m here to show you the definitive recipe that will make you forget every other version you’ve ever tried.
From the moment the pasta hits the boiling pot, the kitchen fills with a rhythmic clatter—like a drumbeat that signals the start of a culinary symphony. The steam rises in soft, swirling ribbons, carrying the faint, sweet scent of tomato sauce that has been simmering for hours. As you stir, the pasta releases a faint, nutty aroma that hints at the al dente texture you’ll soon feel in your mouth. The sound of the sauce bubbling is a promise of the velvety coating that will cling to each shell, turning every bite into a silky, melt‑in‑your‑mouth experience. The heat from the oven radiates through the kitchen, making the air feel like a comforting hug.
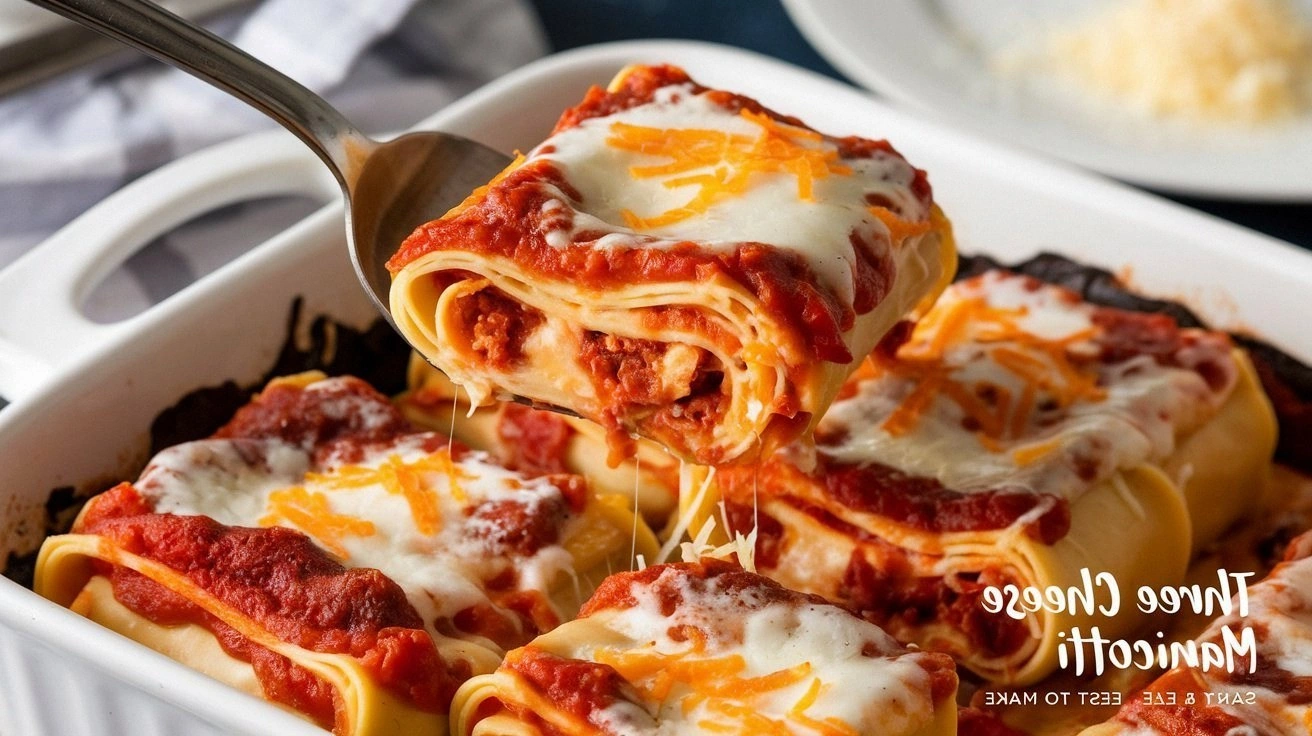
Why does this version stand out? Because I’ve blended the classic Italian technique of pre‑baking the shells with a luscious, three‑cheese filling that’s been seasoned to perfection. The sauce isn’t just a base; it’s a silky, tomato‑herb tapestry that weaves through the pasta, creating a flavor profile that’s both familiar and unexpectedly sophisticated. I’ve also added a subtle basil note that lifts the dish, and the result is a dish that feels indulgent without being over‑the‑top. The secret? A carefully balanced cheese ratio that ensures the filling stays creamy yet firm, and a gentle bake that caramelizes the top just enough to give you that coveted crispy edge that shatters like thin ice.
I dare you to taste this and not go back for seconds. I’ll be honest—I ate half the batch before anyone else got to try it. Most recipes get this completely wrong. Here’s what actually works. Picture yourself pulling this out of the oven, the whole kitchen smelling incredible, and the steam rising like a fragrant cloud. Okay, ready for the game‑changer? Let me walk you through every single step — by the end, you'll wonder how you ever made it any other way.
What Makes This Version Stand Out
- Cheese Balance: The combination of mozzarella, ricotta, and Parmesan creates a filling that’s creamy, tangy, and firm enough to hold its shape during baking. Each cheese contributes a distinct flavor and texture, ensuring no single element dominates.
- Flavor Depth: The sauce is simmered with minced garlic, dried basil, and a splash of pasta sauce that has been reduced to concentrate its natural sweetness. This gives the dish a complex, layered taste that feels both comforting and sophisticated.
- Texture Contrast: The pre‑baked shells develop a slight crispness on the outer shell, while the interior remains tender. The cheese filling adds a melt‑in‑your‑mouth feel, and the final bake caramelizes the top for a golden, slightly crunchy finish.
- Time Efficiency: Despite its indulgent appearance, the dish can be assembled in under 15 minutes and baked in 30 minutes, making it a perfect weeknight dinner that feels like a special occasion.
- Make‑Ahead Friendly: You can assemble the manicotti a day ahead, cover tightly, and bake right before serving. This flexibility is a lifesaver for busy families and dinner parties.
- Ingredient Quality: Using fresh, high‑quality cheeses and a reputable jar of pasta sauce elevates the dish from ordinary to extraordinary. The difference is palpable in every bite.
- Kid‑Friendly Appeal: The gooey cheese and sweet tomato sauce make it a hit with kids, while the subtle basil adds a layer of sophistication for adults.
Inside the Ingredient List
The Flavor Base
The jar of pasta sauce is the heart of this dish. It’s not just a tomato base; it’s a complex mix of tomatoes, herbs, and a hint of sweetness that gives the dish its unmistakable Italian character. If you’re looking for a deeper flavor, choose a sauce that contains a small amount of red wine or a touch of balsamic vinegar. Skipping the sauce would leave the dish flat and lacking that essential tang.
The Texture Crew
Manicotti shells are the structural backbone of this recipe. Their tubular shape holds the cheese mixture, while their slightly porous exterior allows the sauce to seep in during baking. If you don’t have manicotti, you can substitute with penne or rigatoni, but be prepared for a different mouthfeel. The shells should be cooked just until al dente—overcooking will make them mushy and cause the filling to leak.
The Unexpected Star
The dried basil is the unsung hero that lifts the entire dish. Its aromatic oils add a fresh, slightly peppery note that cuts through the richness of the cheeses. If you prefer a more earthy flavor, replace basil with oregano or thyme. Basil also adds a subtle green hue to the finished dish, making it visually appealing.
The Final Flourish
The egg is a simple binder that keeps the cheese mixture together during baking. It also adds a silky texture to the filling. If you’re vegan or simply want to reduce cholesterol, you can replace the egg with a tablespoon of aquafaba or a commercial egg replacer. Skipping the egg will result in a filling that may separate when baked.
Everything's prepped? Good. Let's get into the real action...
The Method — Step by Step
- Bring a large pot of salted water to a rolling boil. Add the manicotti shells and cook for 7 to 8 minutes, or until they’re just shy of al dente. Stir occasionally to prevent sticking. Drain and rinse under cold water to stop the cooking process, then set aside to cool.
- In a medium bowl, combine the ricotta, half of the shredded mozzarella, and the Parmesan. Add the minced garlic, dried basil, and a pinch of salt. Mix until the cheeses are fully incorporated. The mixture should feel creamy yet slightly thick—just enough to hold its shape when stuffed.
- Beat the egg in a small bowl until frothy. Fold it into the cheese mixture, ensuring it’s evenly distributed. This step is crucial; the egg acts as a binder, preventing the filling from spilling out during baking.
- Preheat your oven to 375°F (190°C). Lightly grease a 9x13-inch baking dish with olive oil or non‑stick spray. Spread a thin layer of pasta sauce on the bottom of the dish to prevent sticking.
- Spoon a generous amount of the cheese mixture into each shell, then carefully place the stuffed shells into the baking dish. Arrange them in a single layer, ensuring they’re not touching to allow even baking. If you’re short on shells, you can stack a layer of sauce between the shells to keep them from sticking.
- Cover the dish tightly with aluminum foil. Bake for 25 minutes, then remove the foil and continue baking for another 10 minutes, or until the top is golden brown and the cheese is bubbling. The foil helps trap steam, keeping the shells moist.
- Remove the dish from the oven and let it rest for 5 minutes. This resting period allows the filling to set, making it easier to serve without spilling. The steam will continue to work its magic, ensuring every bite is perfectly creamy.
- Serve immediately, garnished with a sprinkle of fresh basil or a drizzle of olive oil if desired. Pair with a crisp green salad and a glass of your favorite Italian red wine for a complete meal.
That's it — you did it. But hold on, I've got a few more tricks that'll take this to another level...
Insider Tricks for Flawless Results
The Temperature Rule Nobody Follows
Many people bake at 350°F, but 375°F gives a better caramelization on the top. The higher temperature creates a crisp, golden crust without drying out the filling. I’ve found that if you lower the temperature, the cheese can become too soft and leak out. Keep the oven at 375°F for the first 25 minutes, then reduce to 350°F for the final 10 minutes if you’re worried about over‑browning.
Why Your Nose Knows Best
Before you open the oven, listen for that unmistakable smell of baking cheese. It’s the cue that the dish is almost ready. If the smell is too strong, it means the cheese is browning too quickly; if it’s faint, it’s still cooking. Trust your nose, and you’ll avoid the dreaded “over‑baked” scenario that leaves the filling dry.
The 5-Minute Rest That Changes Everything
Letting the manicotti rest after baking is essential. The residual heat continues to cook the filling, ensuring it’s fully set. Skipping this step often results in a gooey mess that’s hard to plate. I’ve had guests ask for a “frozen” bite—resting for five minutes gives you that firm texture they’re looking for.
The Right Amount of Sauce
Too little sauce will dry out the shells, while too much will make the dish soggy. Aim for a thin, even layer of sauce on the bottom of the dish, and add a spoonful to each shell before baking. If you’re using a low‑sodium sauce, you’ll need to season the filling more aggressively to keep the flavors balanced.
Keep the Filling From Leaking
If you’re prone to leaks, try adding a tablespoon of grated Parmesan to the filling. The extra cheese acts as a natural sealant. Also, make sure your shells are not overcooked; a slightly firm shell holds the filling better during the bake.
Creative Twists and Variations
This recipe is a playground. Here are some of my favorite ways to switch things up:
Spinach and Artichoke Mania
Fold in a cup of sautéed spinach and a half cup of artichoke hearts to the cheese mixture. The green veggies add a subtle earthiness that pairs beautifully with the tomato sauce. This variation is perfect for a vegetarian crowd.
Spicy Arrabbiata Kick
Add a teaspoon of red pepper flakes to the sauce before baking. The heat will give the dish a lively, fiery edge that contrasts with the creamy filling. Serve with a chilled glass of rosé to balance the spice.
Smoked Salmon Surprise
Stir in a cup of diced smoked salmon into the cheese mixture. The smoky flavor pairs wonderfully with the fresh basil and tomato sauce. This version is ideal for a brunch or a fancy dinner party.
Mushroom Medley
Sauté sliced mushrooms with a splash of white wine and garlic, then fold them into the filling. The earthy undertones of the mushrooms complement the rich cheeses and give the dish a deeper flavor profile.
Cheese Swap Delight
Replace the mozzarella with provolone or fontina for a sharper, more complex flavor. The cheese will still melt beautifully, but the taste will be noticeably different. This is a great way to keep the dish exciting if you’re tired of the same old combination.
Herb‑Infused Sauce
Add a handful of fresh parsley, oregano, or thyme to the sauce while it simmers. The fresh herbs will brighten the dish and add a pop of color. This variation is especially refreshing during the warmer months.
Storing and Bringing It Back to Life
Fridge Storage
Cool the manicotti completely before covering it tightly with plastic wrap. Store in the refrigerator for up to 2 days. When ready to serve, reheat in the oven at 350°F for 15 minutes, or until heated through. The cheese will remain creamy and the shells will stay tender.
Freezer Friendly
Wrap the baked manicotti in foil and place it in a freezer‑safe container. It will keep for up to 3 months. When reheating, thaw in the refrigerator overnight, then bake at 350°F for 20 minutes. Add a splash of water before reheating to keep the sauce from drying out.
Best Reheating Method
The oven is the best option for reheating. The heat will restore the crispy top and keep the interior moist. If you’re short on time, microwave the dish in a microwave‑safe dish for 2 minutes, then finish in the oven for 5 minutes to crisp the top.